TABLE OF CONTENTS
- Adding a media holder
- Options to add your media files
- How to edit the added video file
- How to edit the added image file
Renderforest templates come with designated placeholders for various types of media, such as video, image, and logo holders. These placeholders let you integrate your own images, videos, and logos into your project while keeping a professional, polished result. This article walks you through adding your media files to a Renderforest project.
Adding a Media Holder
Before using your own media, you'll need to add a placeholder scene to your project.
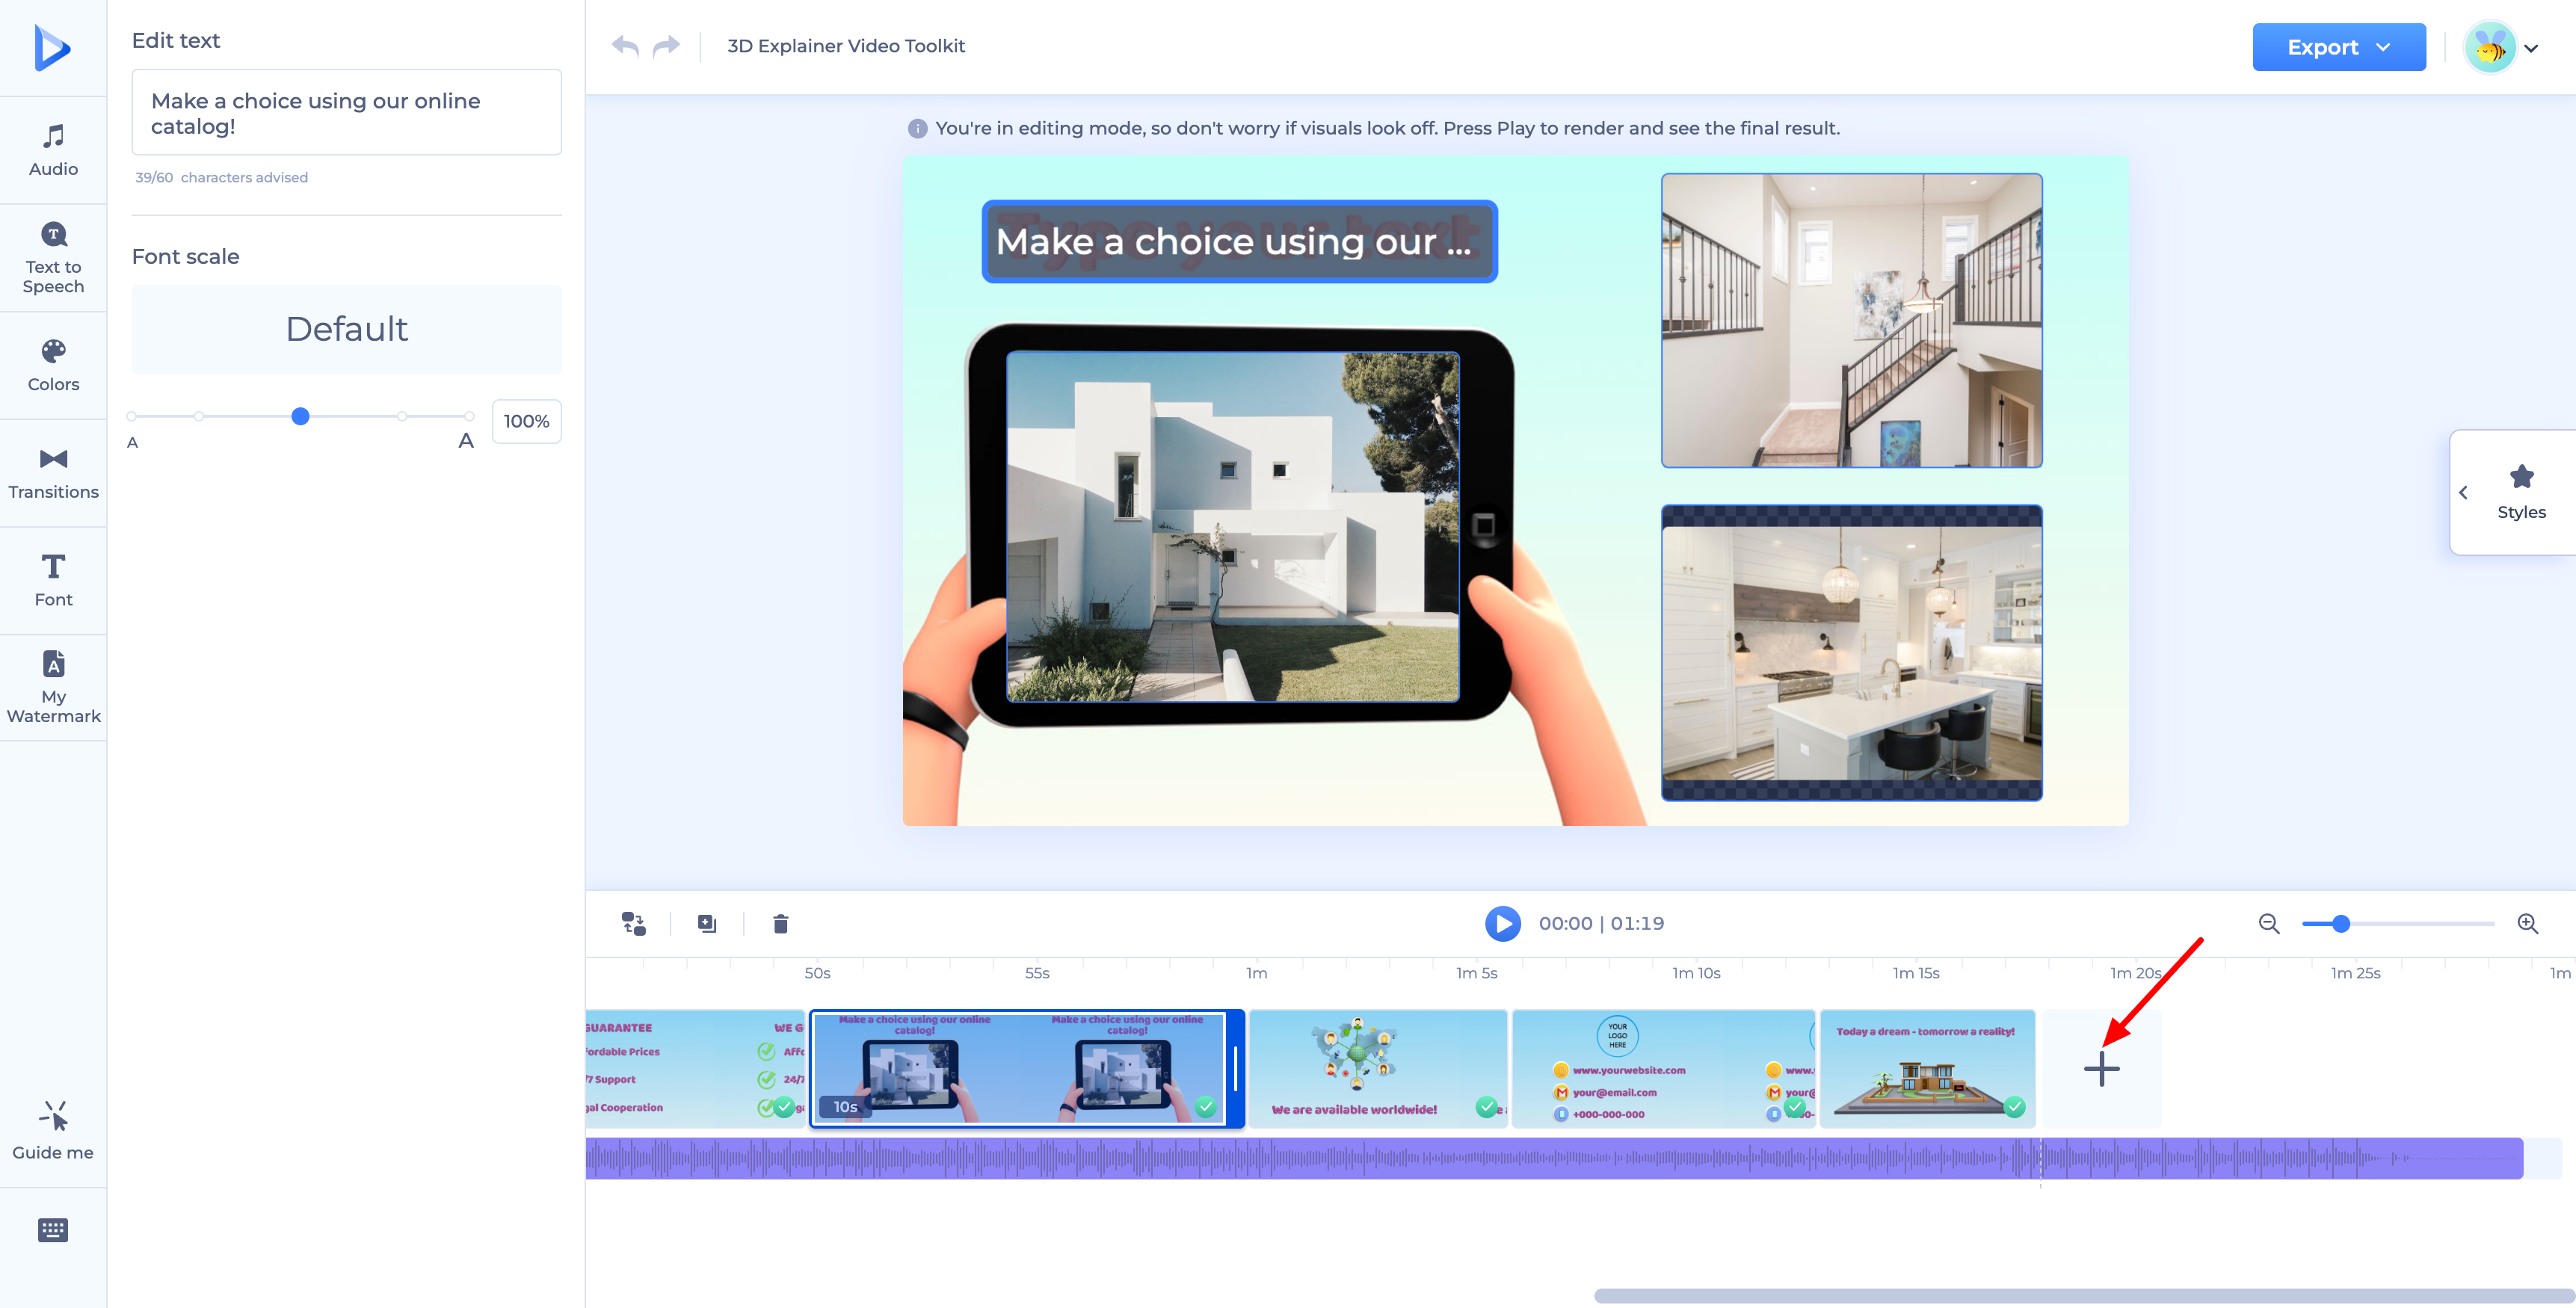
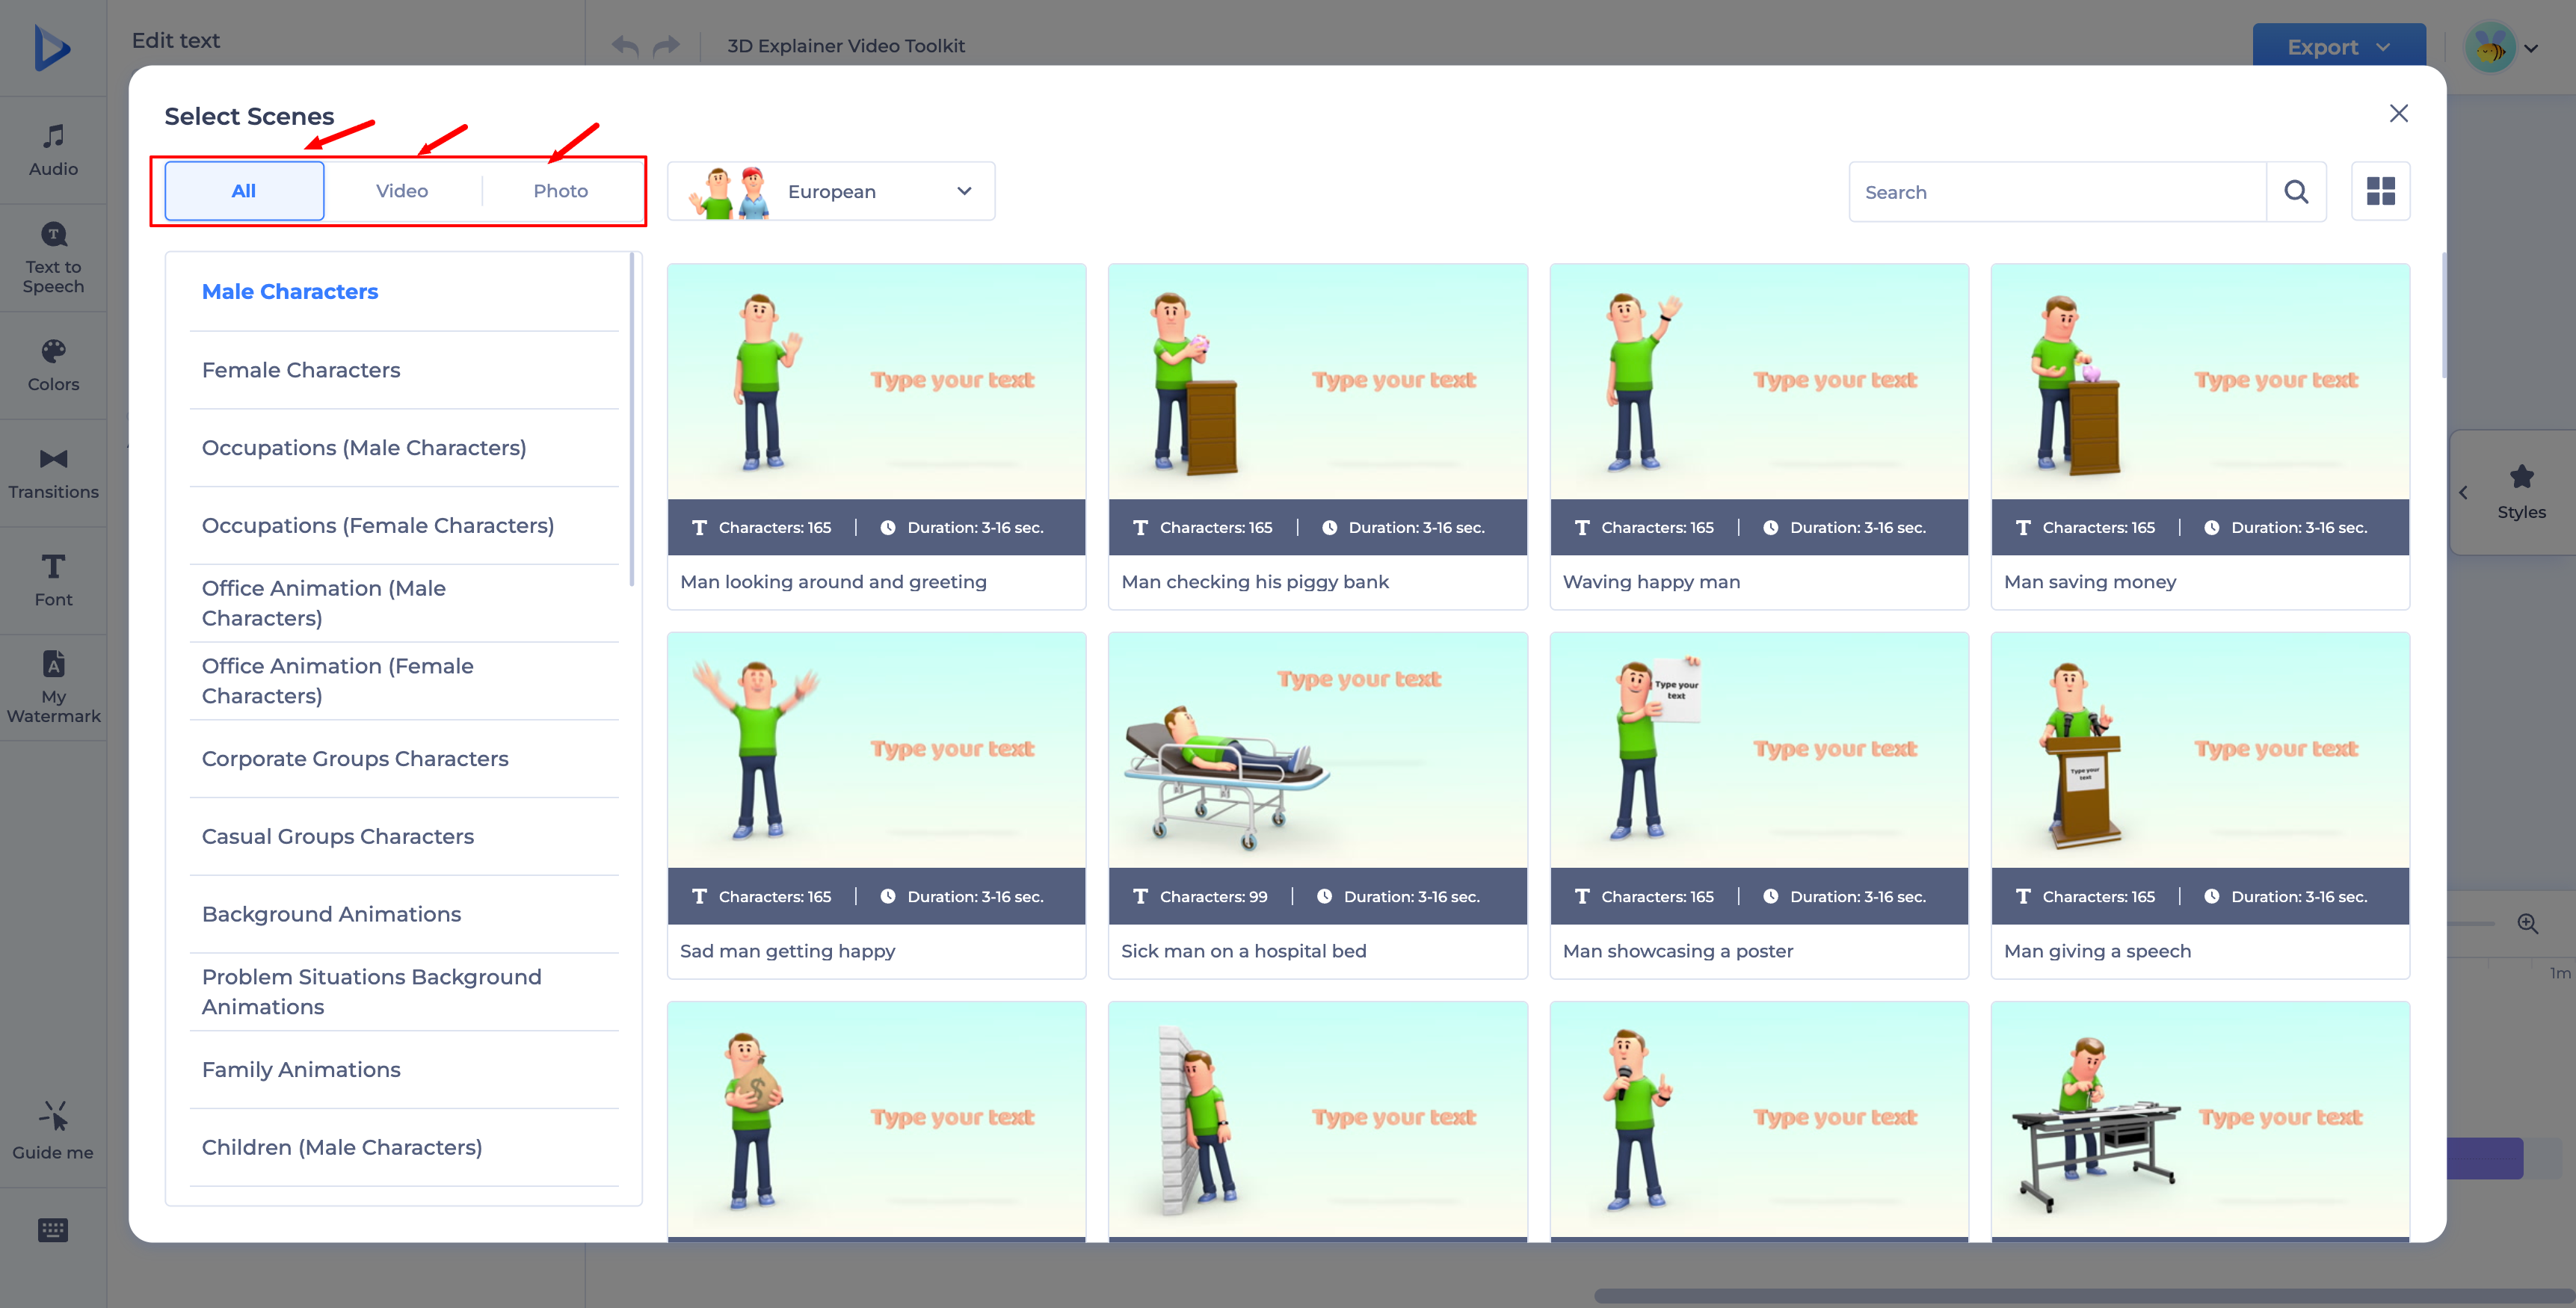
Start by clicking the "+" button on your project timeline. This opens the "Select Scenes" window, where you can filter by "All," "Video," or "Photo," search by keyword, and — for character-based scenes — choose a character style from the dropdown (e.g., "European"). Categories are listed on the left (such as Male/Female Characters, Occupations, Background Animations, Image Holders, and Video Holders, depending on the tab).
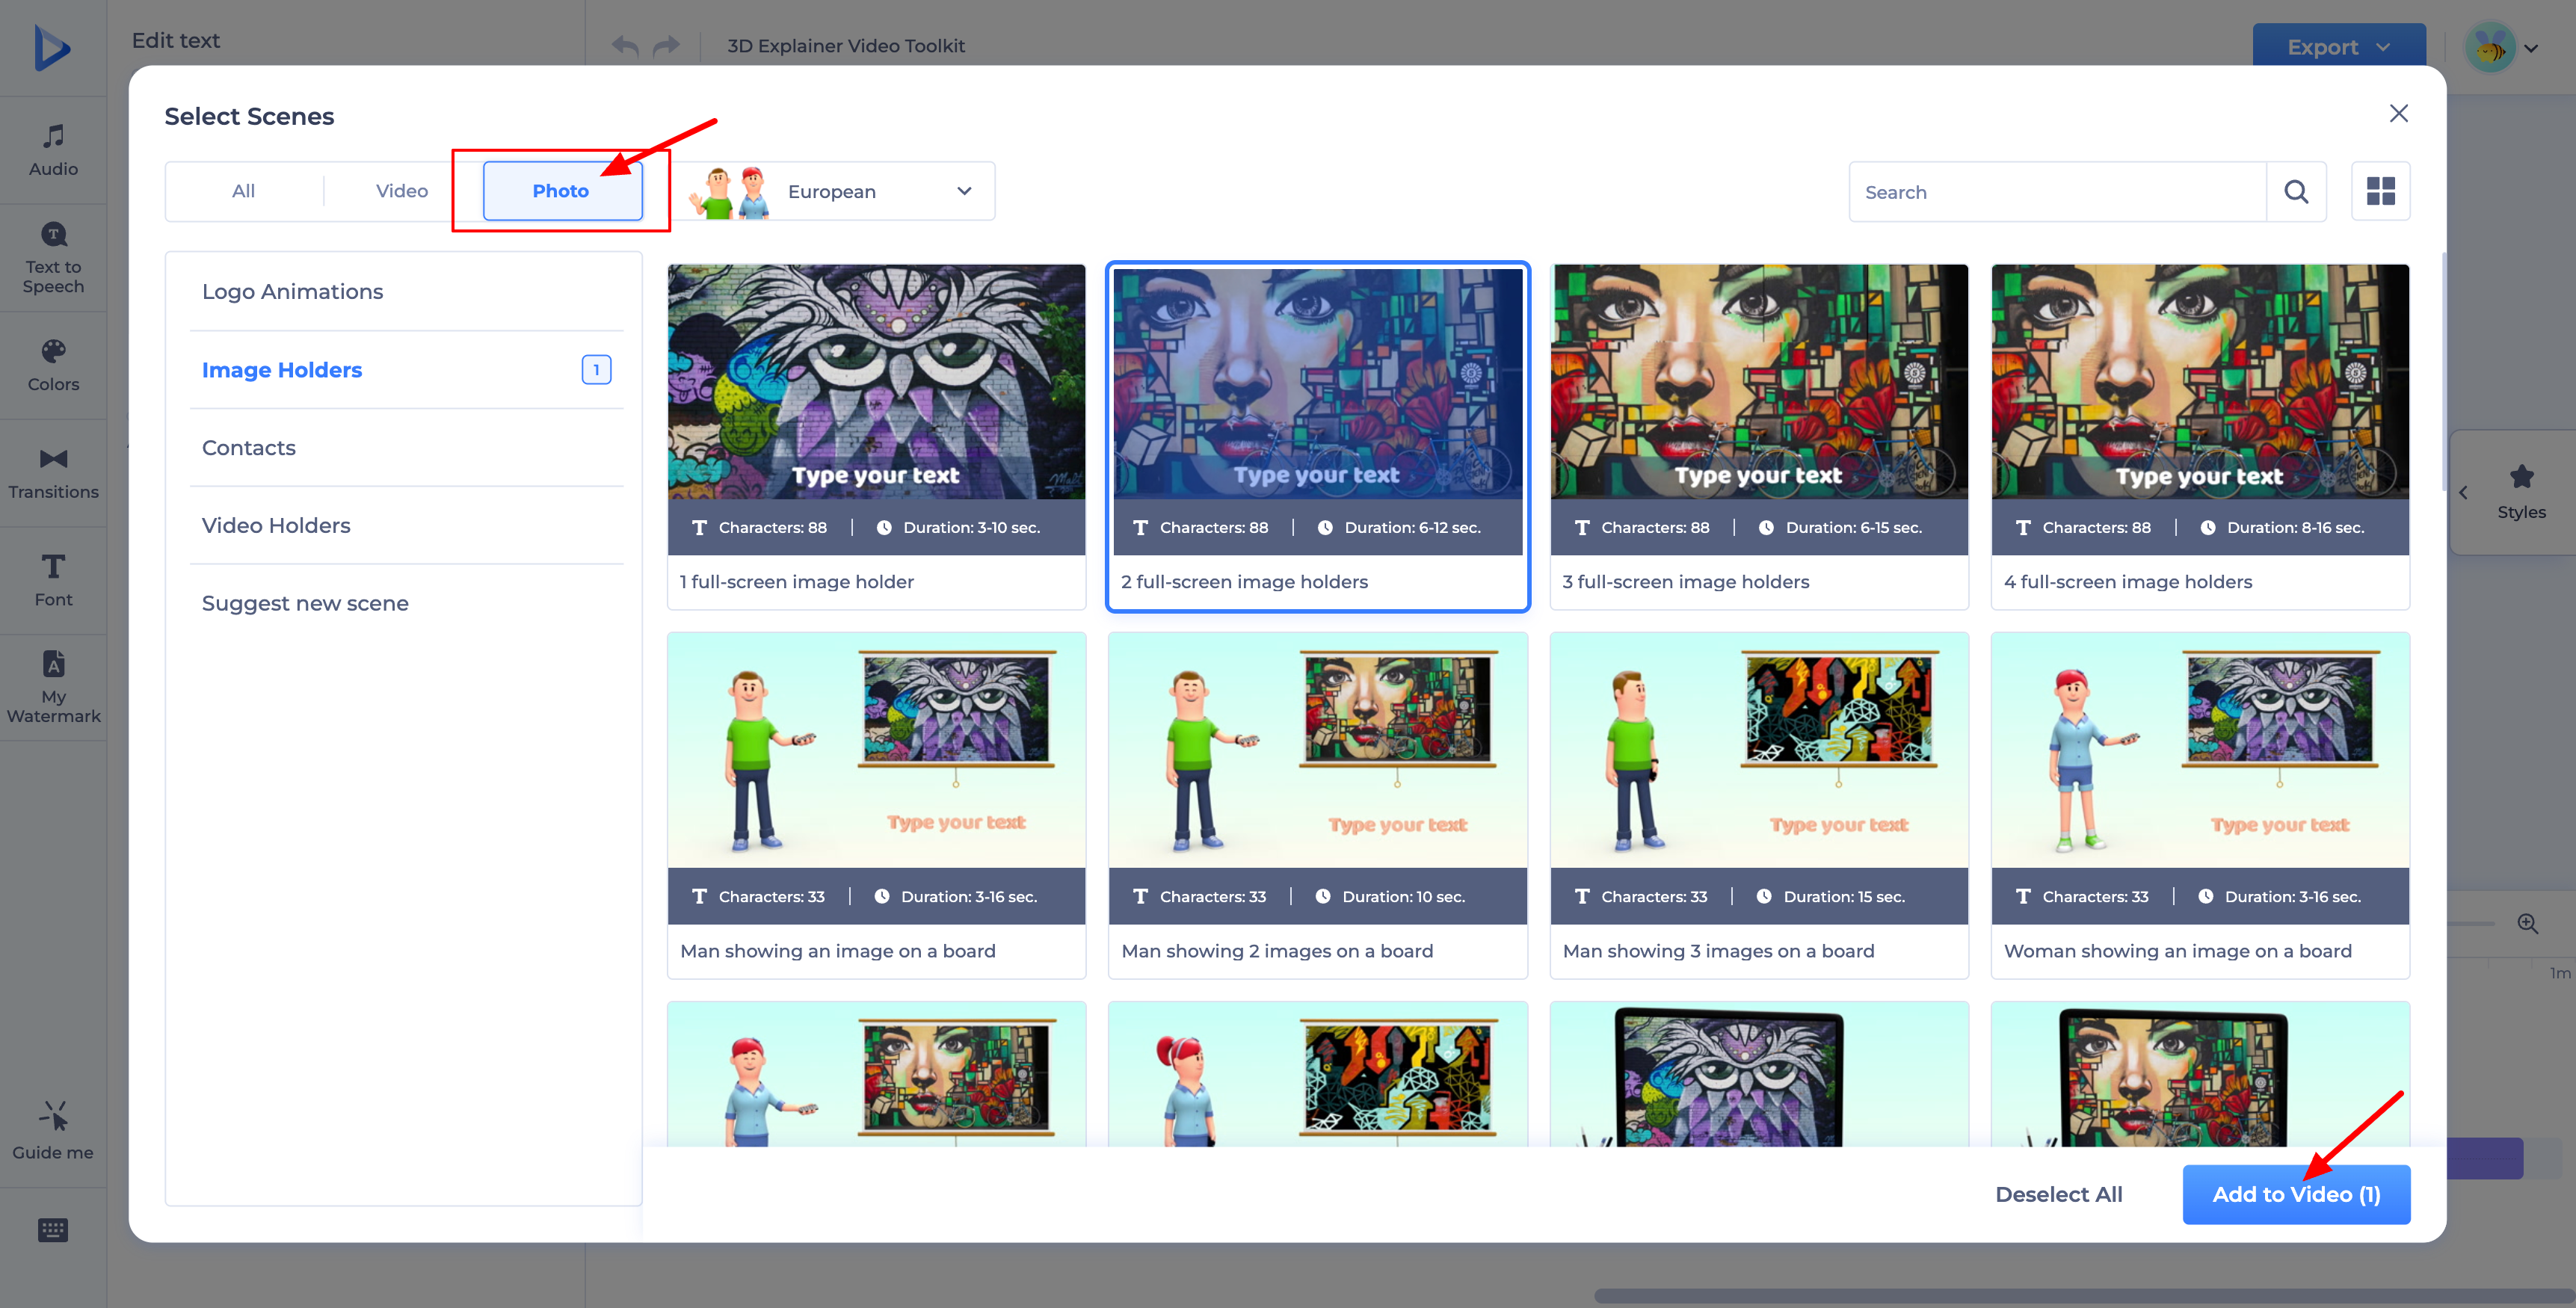
Select one or more holder scenes, then click "Add to Video" to include them in your project for further editing. You can select multiple scenes at once — the button updates to show your current count (e.g., "Add to Video (2)") — or click "Deselect All" to start over.
Options to Add Your Media Files
To add your own media files to a project, click on the media holder to open the "Add media" panel (it also shows the recommended file size, e.g. 1920x1080). Your options are:
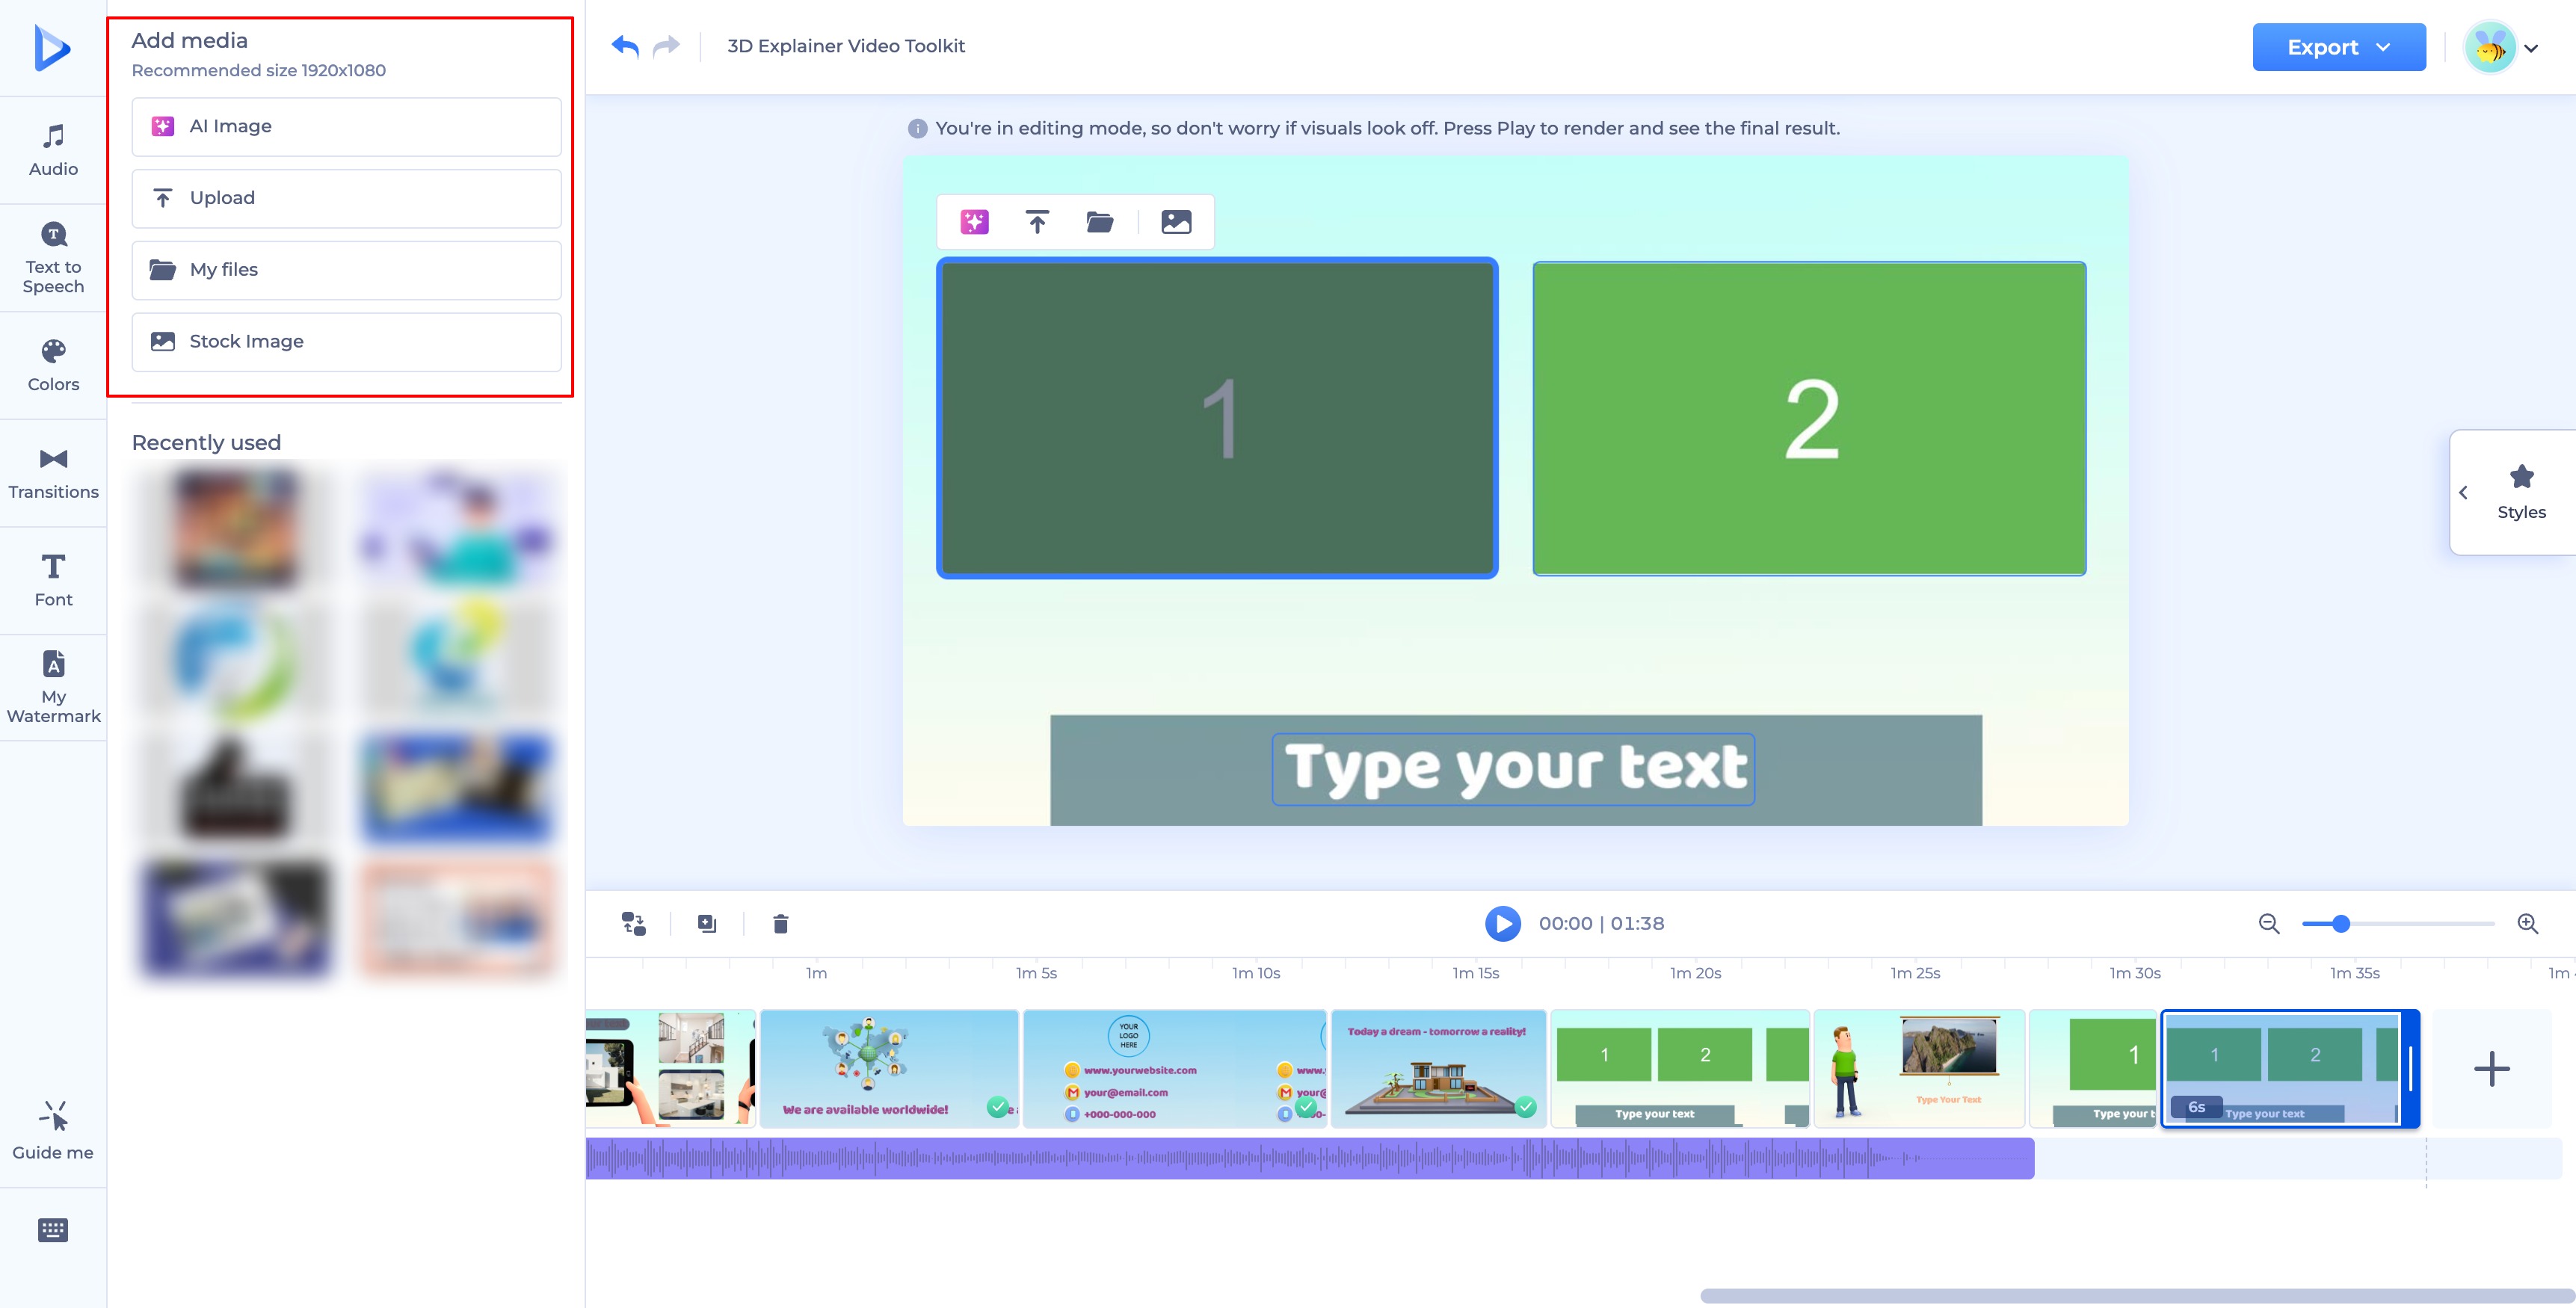
- AI Image (image holders only): generate an image directly within the placeholder using AI. This opens a dedicated panel with:
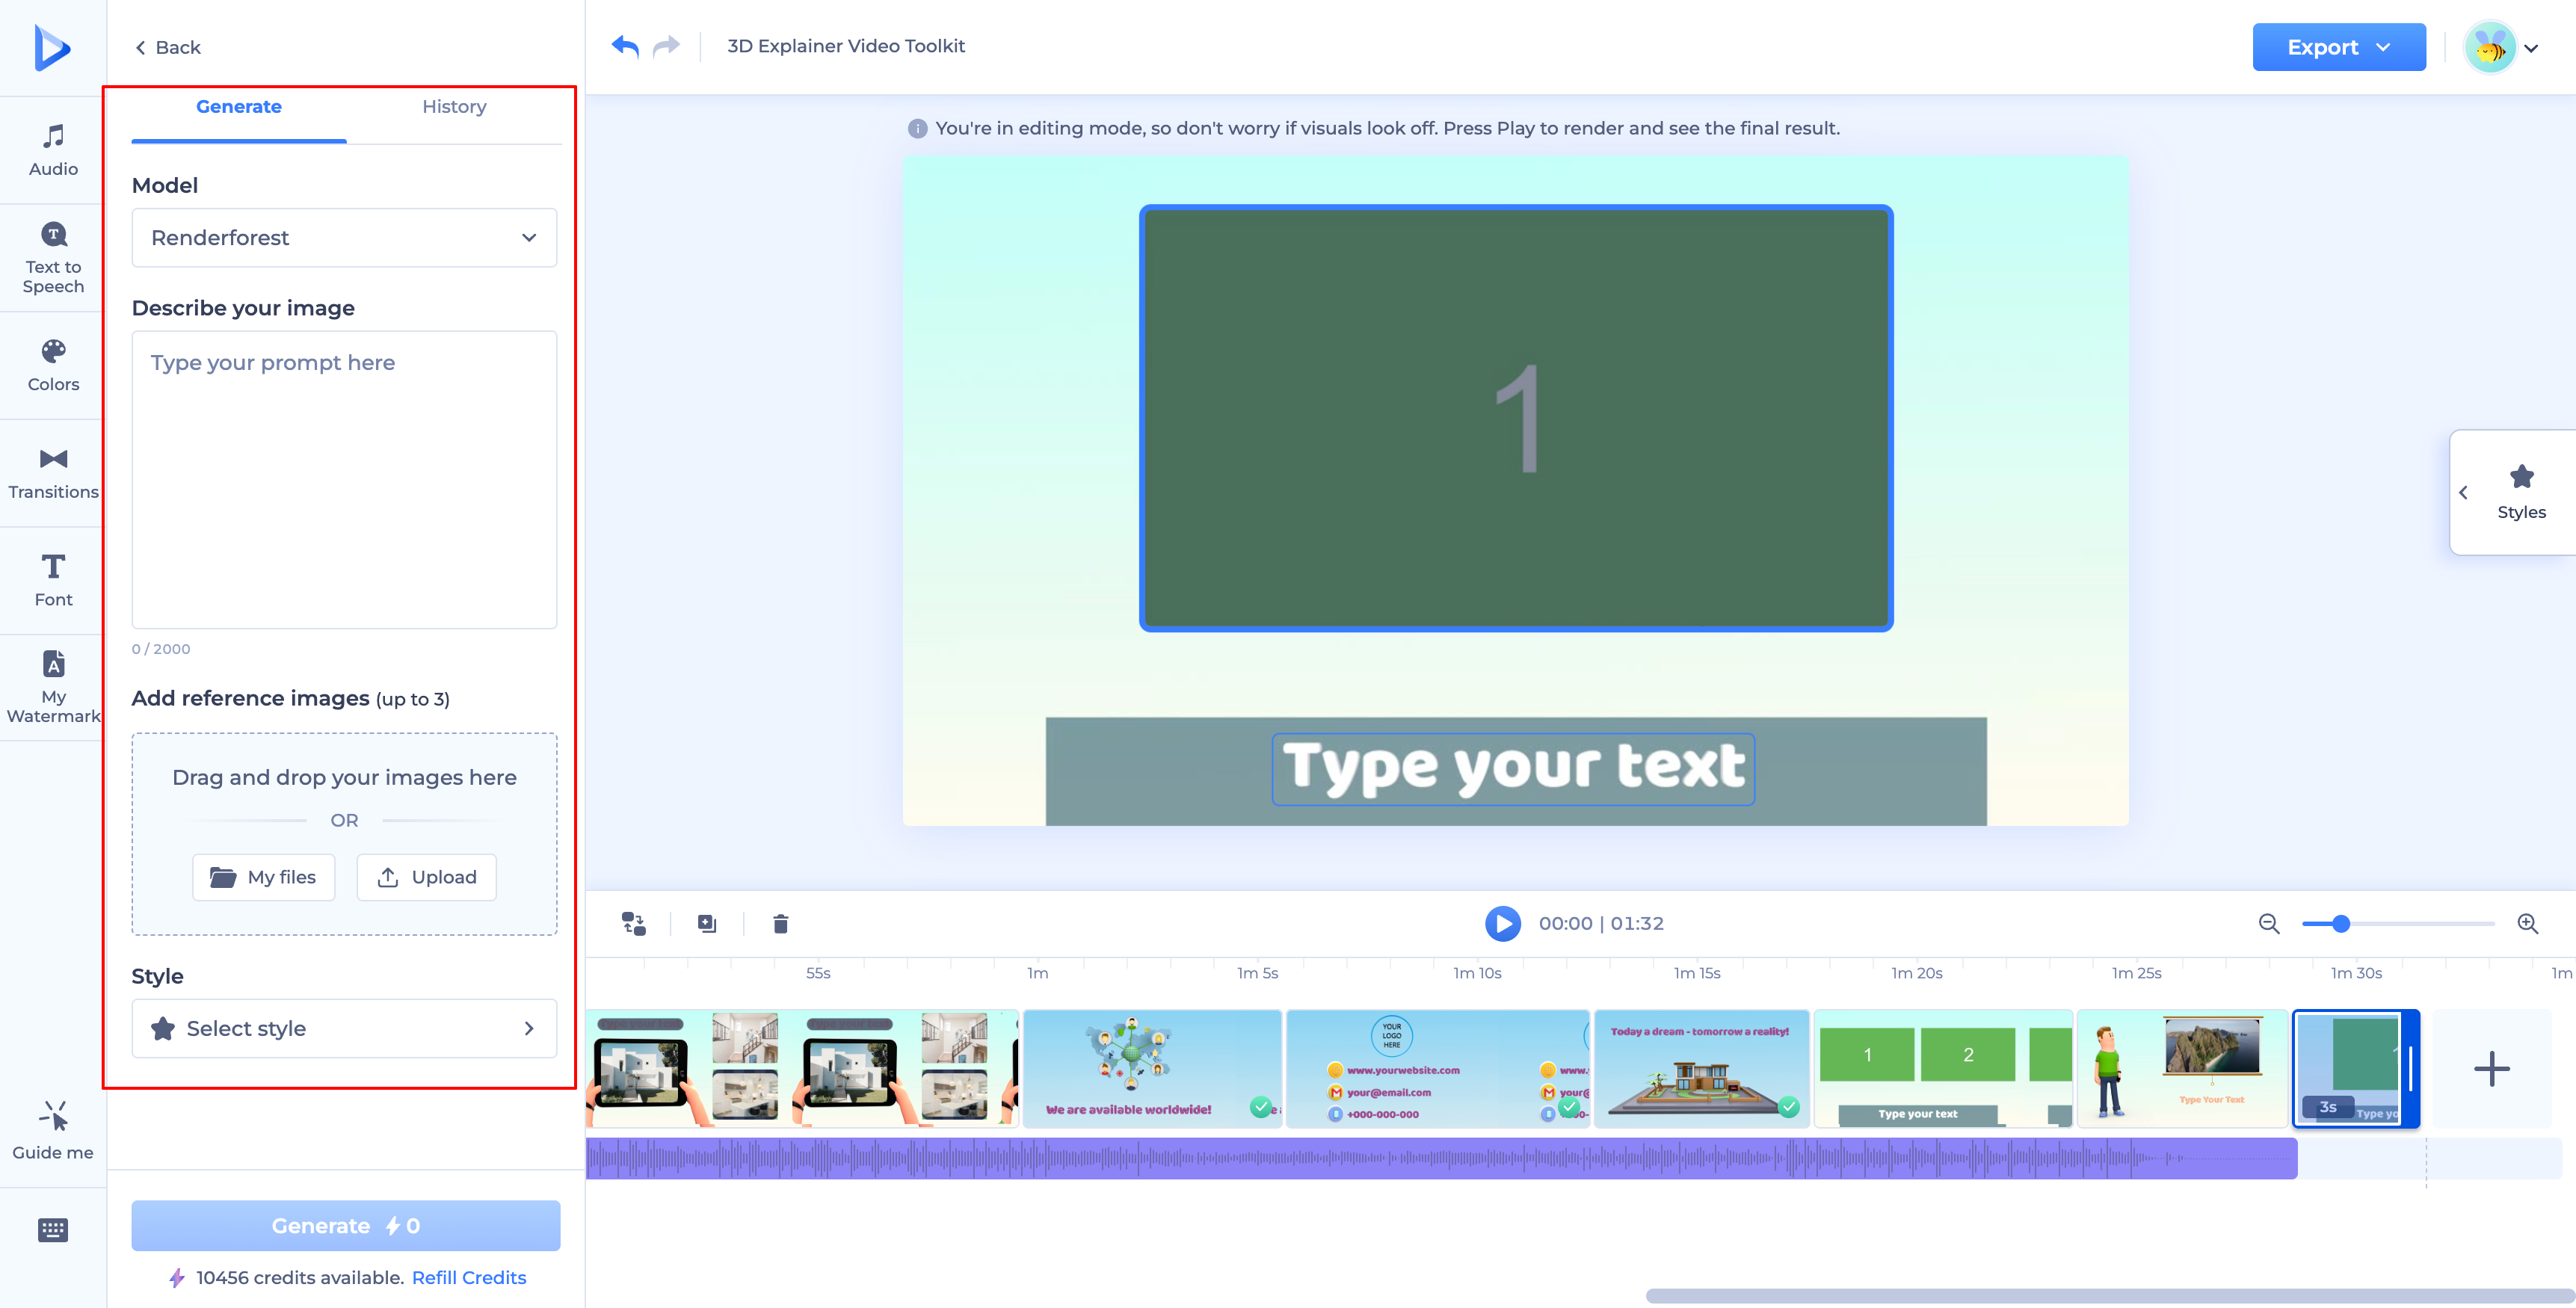
- Model: choose the AI model to generate with (defaults to "Renderforest").
- Describe your image: enter a text prompt (up to 2,000 characters).
- Add reference images: optionally add up to 3 reference images via drag-and-drop, "My files," or "Upload," to guide the result.
- Style: pick a style for your generated image.
- A History tab keeps track of your previous generations.
- Click "Generate" to create your image — each generation uses credits, and the panel shows your available credit balance along with a "Refill Credits" option if you run low.
- Upload: add a file from your device. For a rundown of supported file types, see Navigating Compatible Media File Formats in Renderforest.
- My Files: reuse a file you've previously uploaded, or a project you've created — no need to upload it again.
- Stock Image / Stock Footage: browse or search Renderforest's stock library (labeled "Stock Image" for image holders, "Stock Footage" for video holders). Learn more in Stock Footage.
Below these options, a "Recently used" section shows the media files you've added most recently, so you can quickly reuse them without searching.
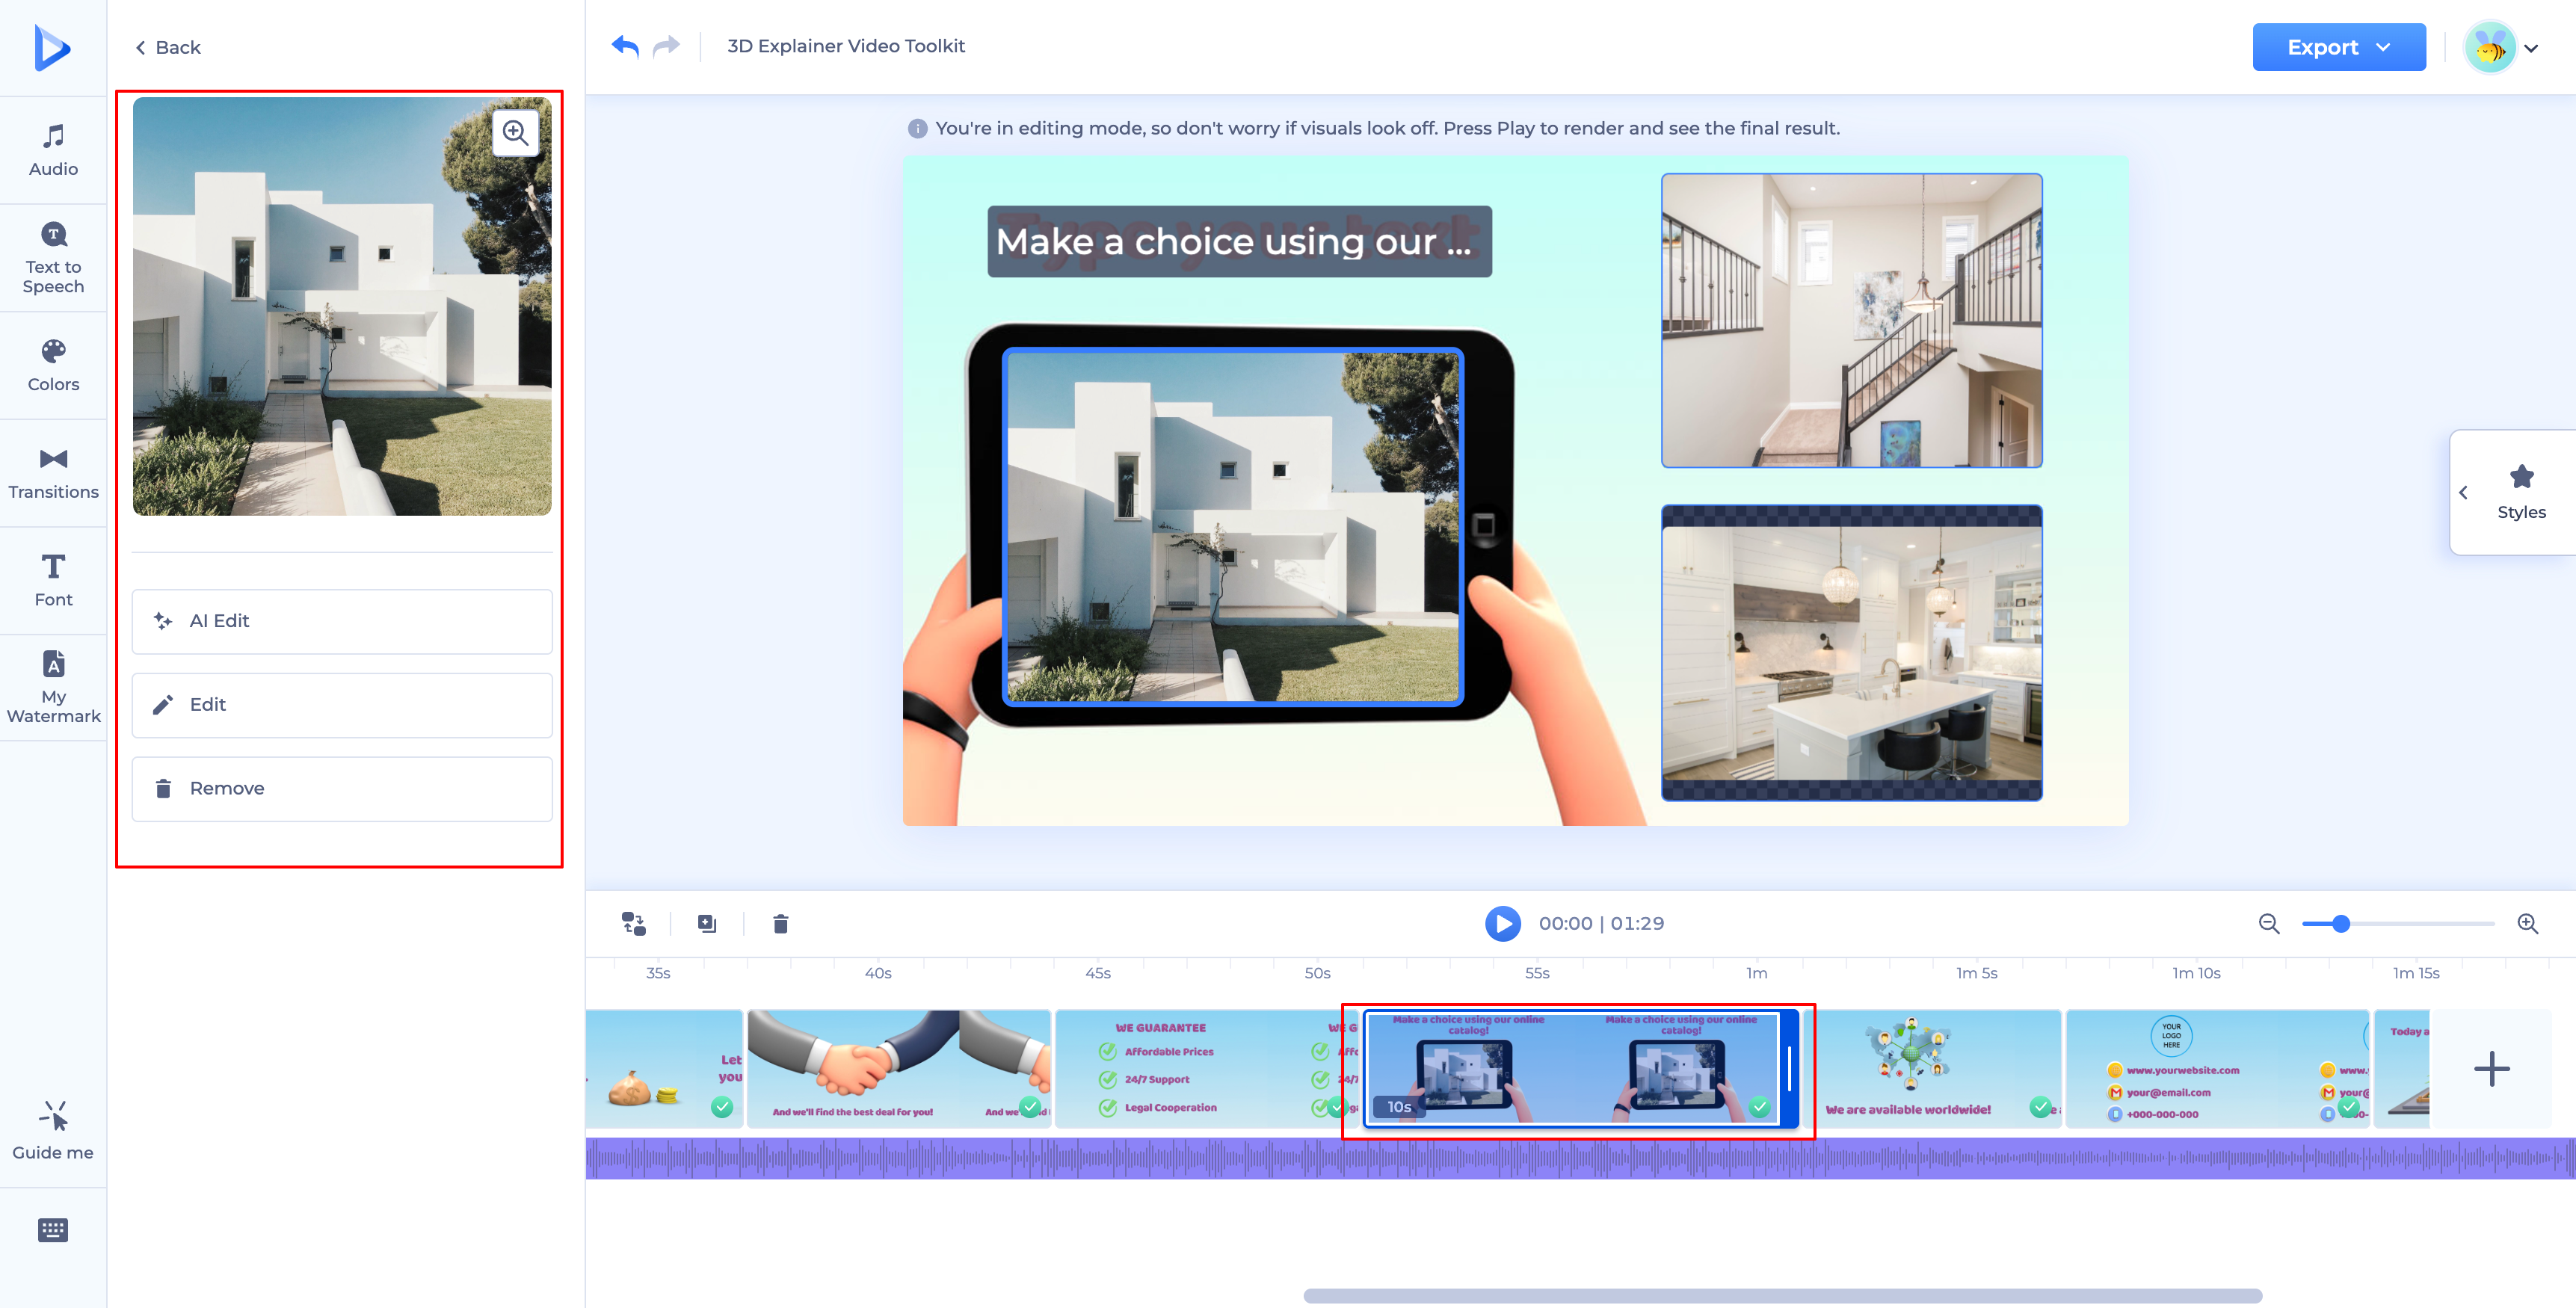
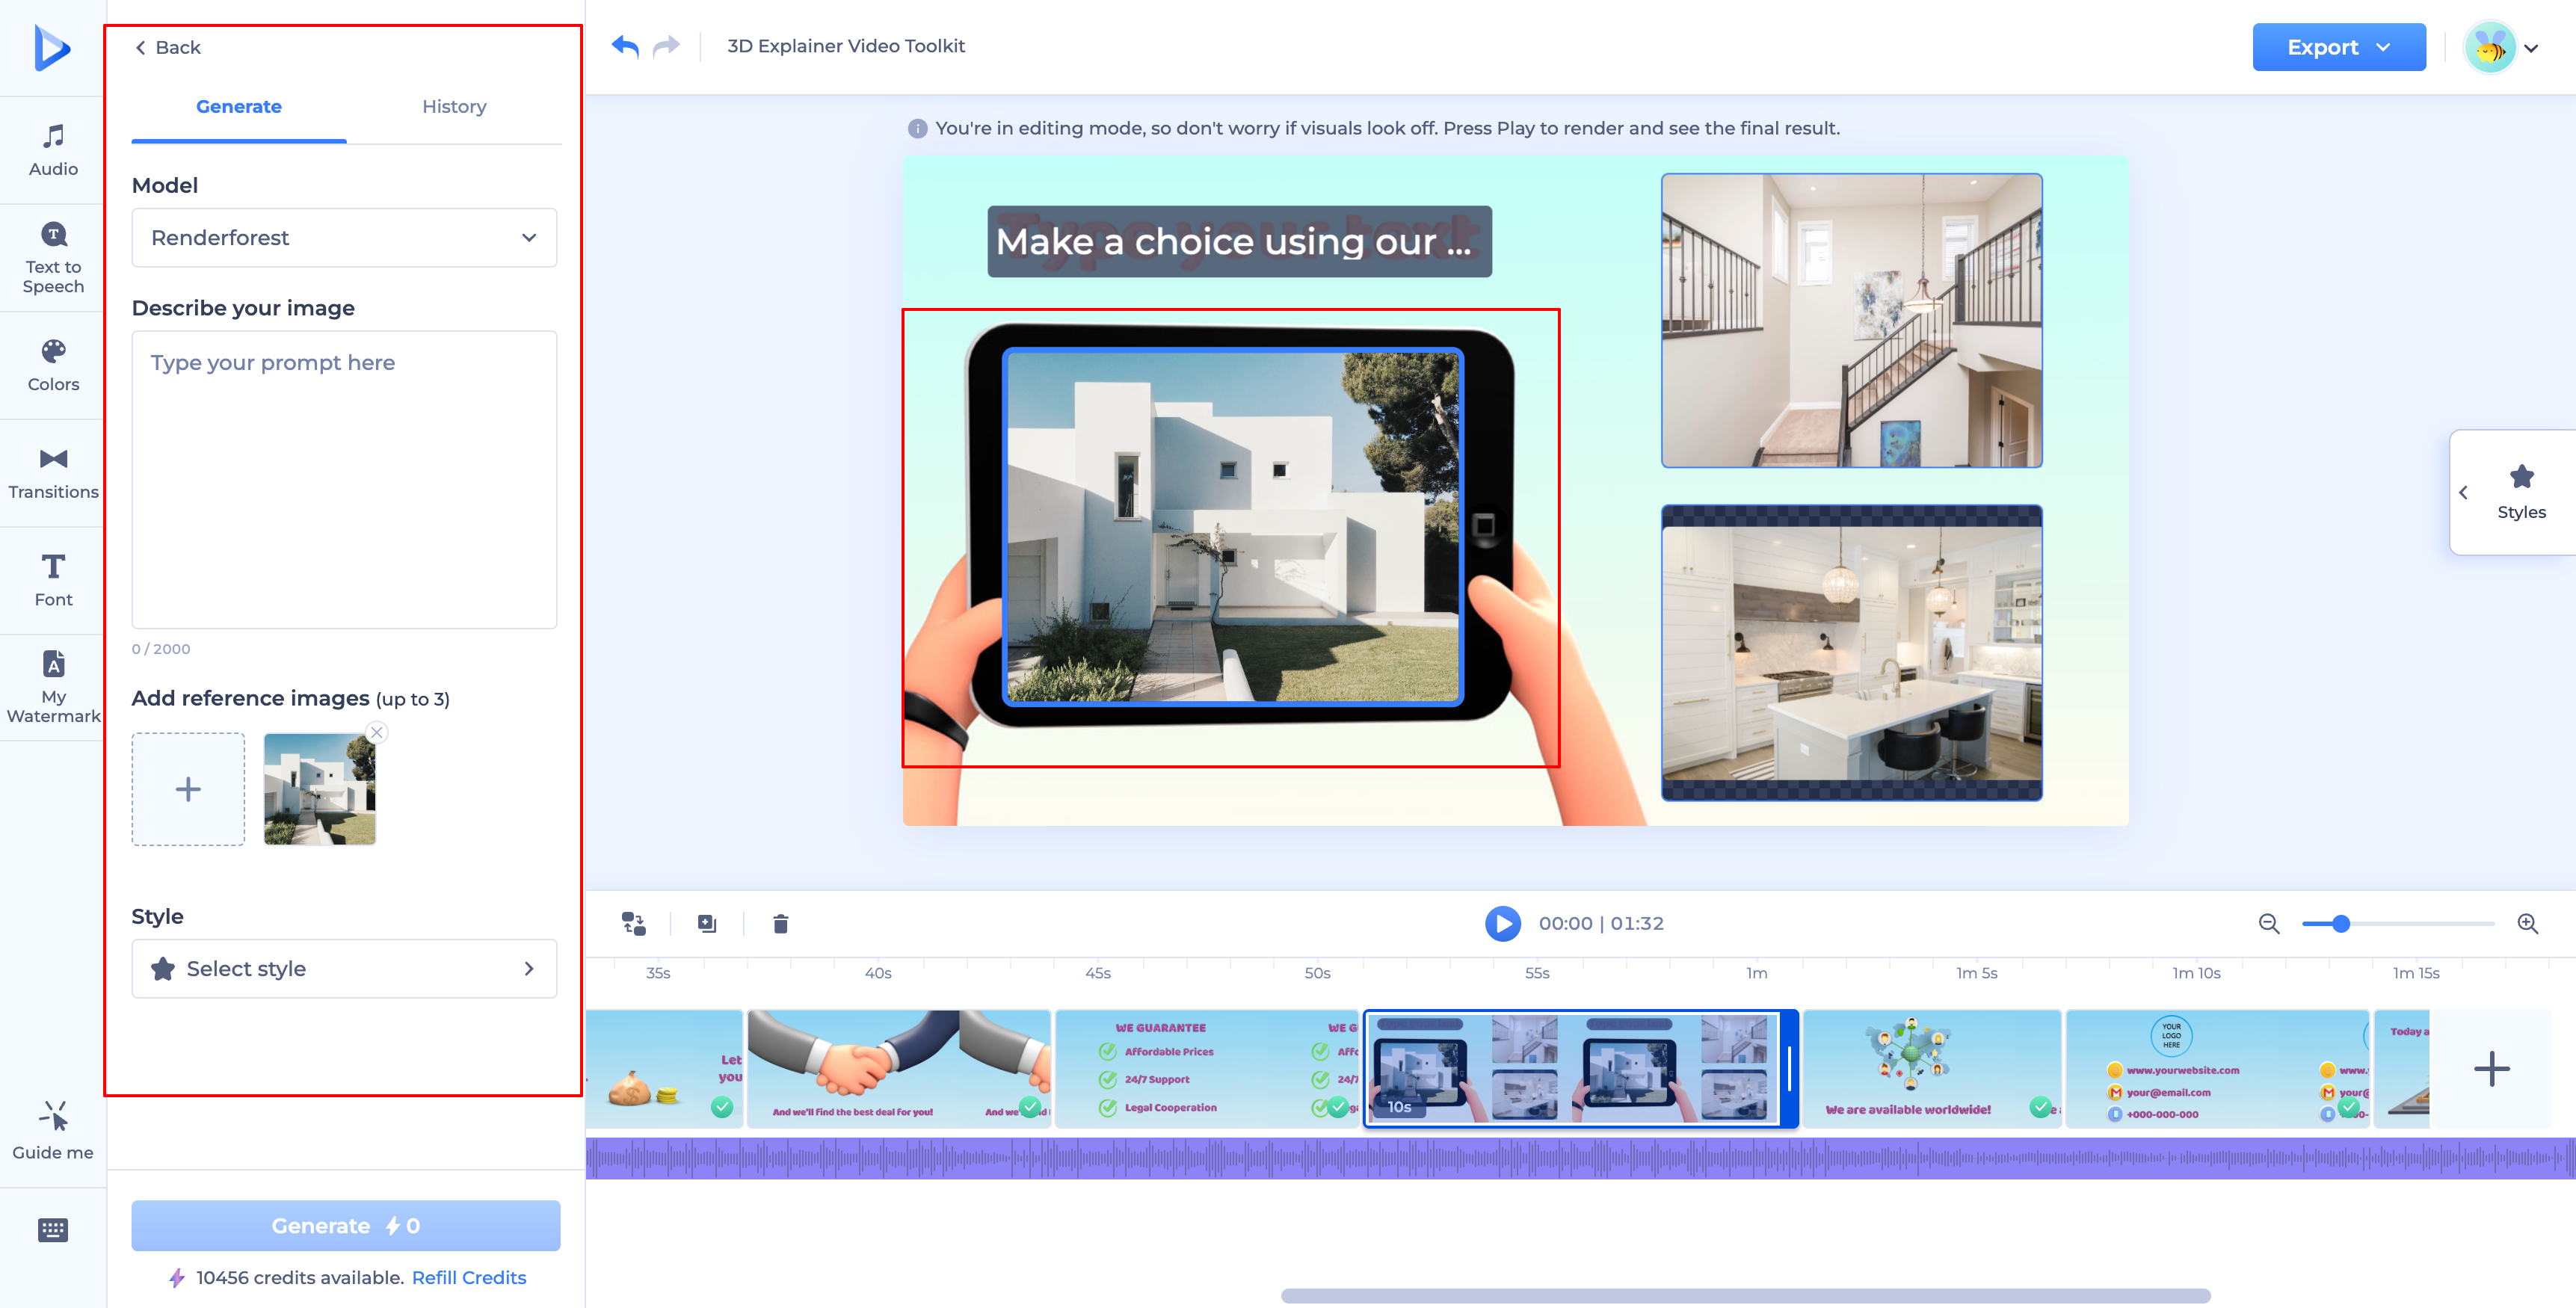
Once a file is added, hovering over it brings up a quick-action panel with three options: "AI Edit," "Edit," and "Remove." AI Edit opens the same AI Image panel described above, with your current image automatically added as a reference — handy for generating a variation of what's already in the placeholder.
How to Edit an Added Image File
Selecting "Edit" on an image opens the image editor, where you can:
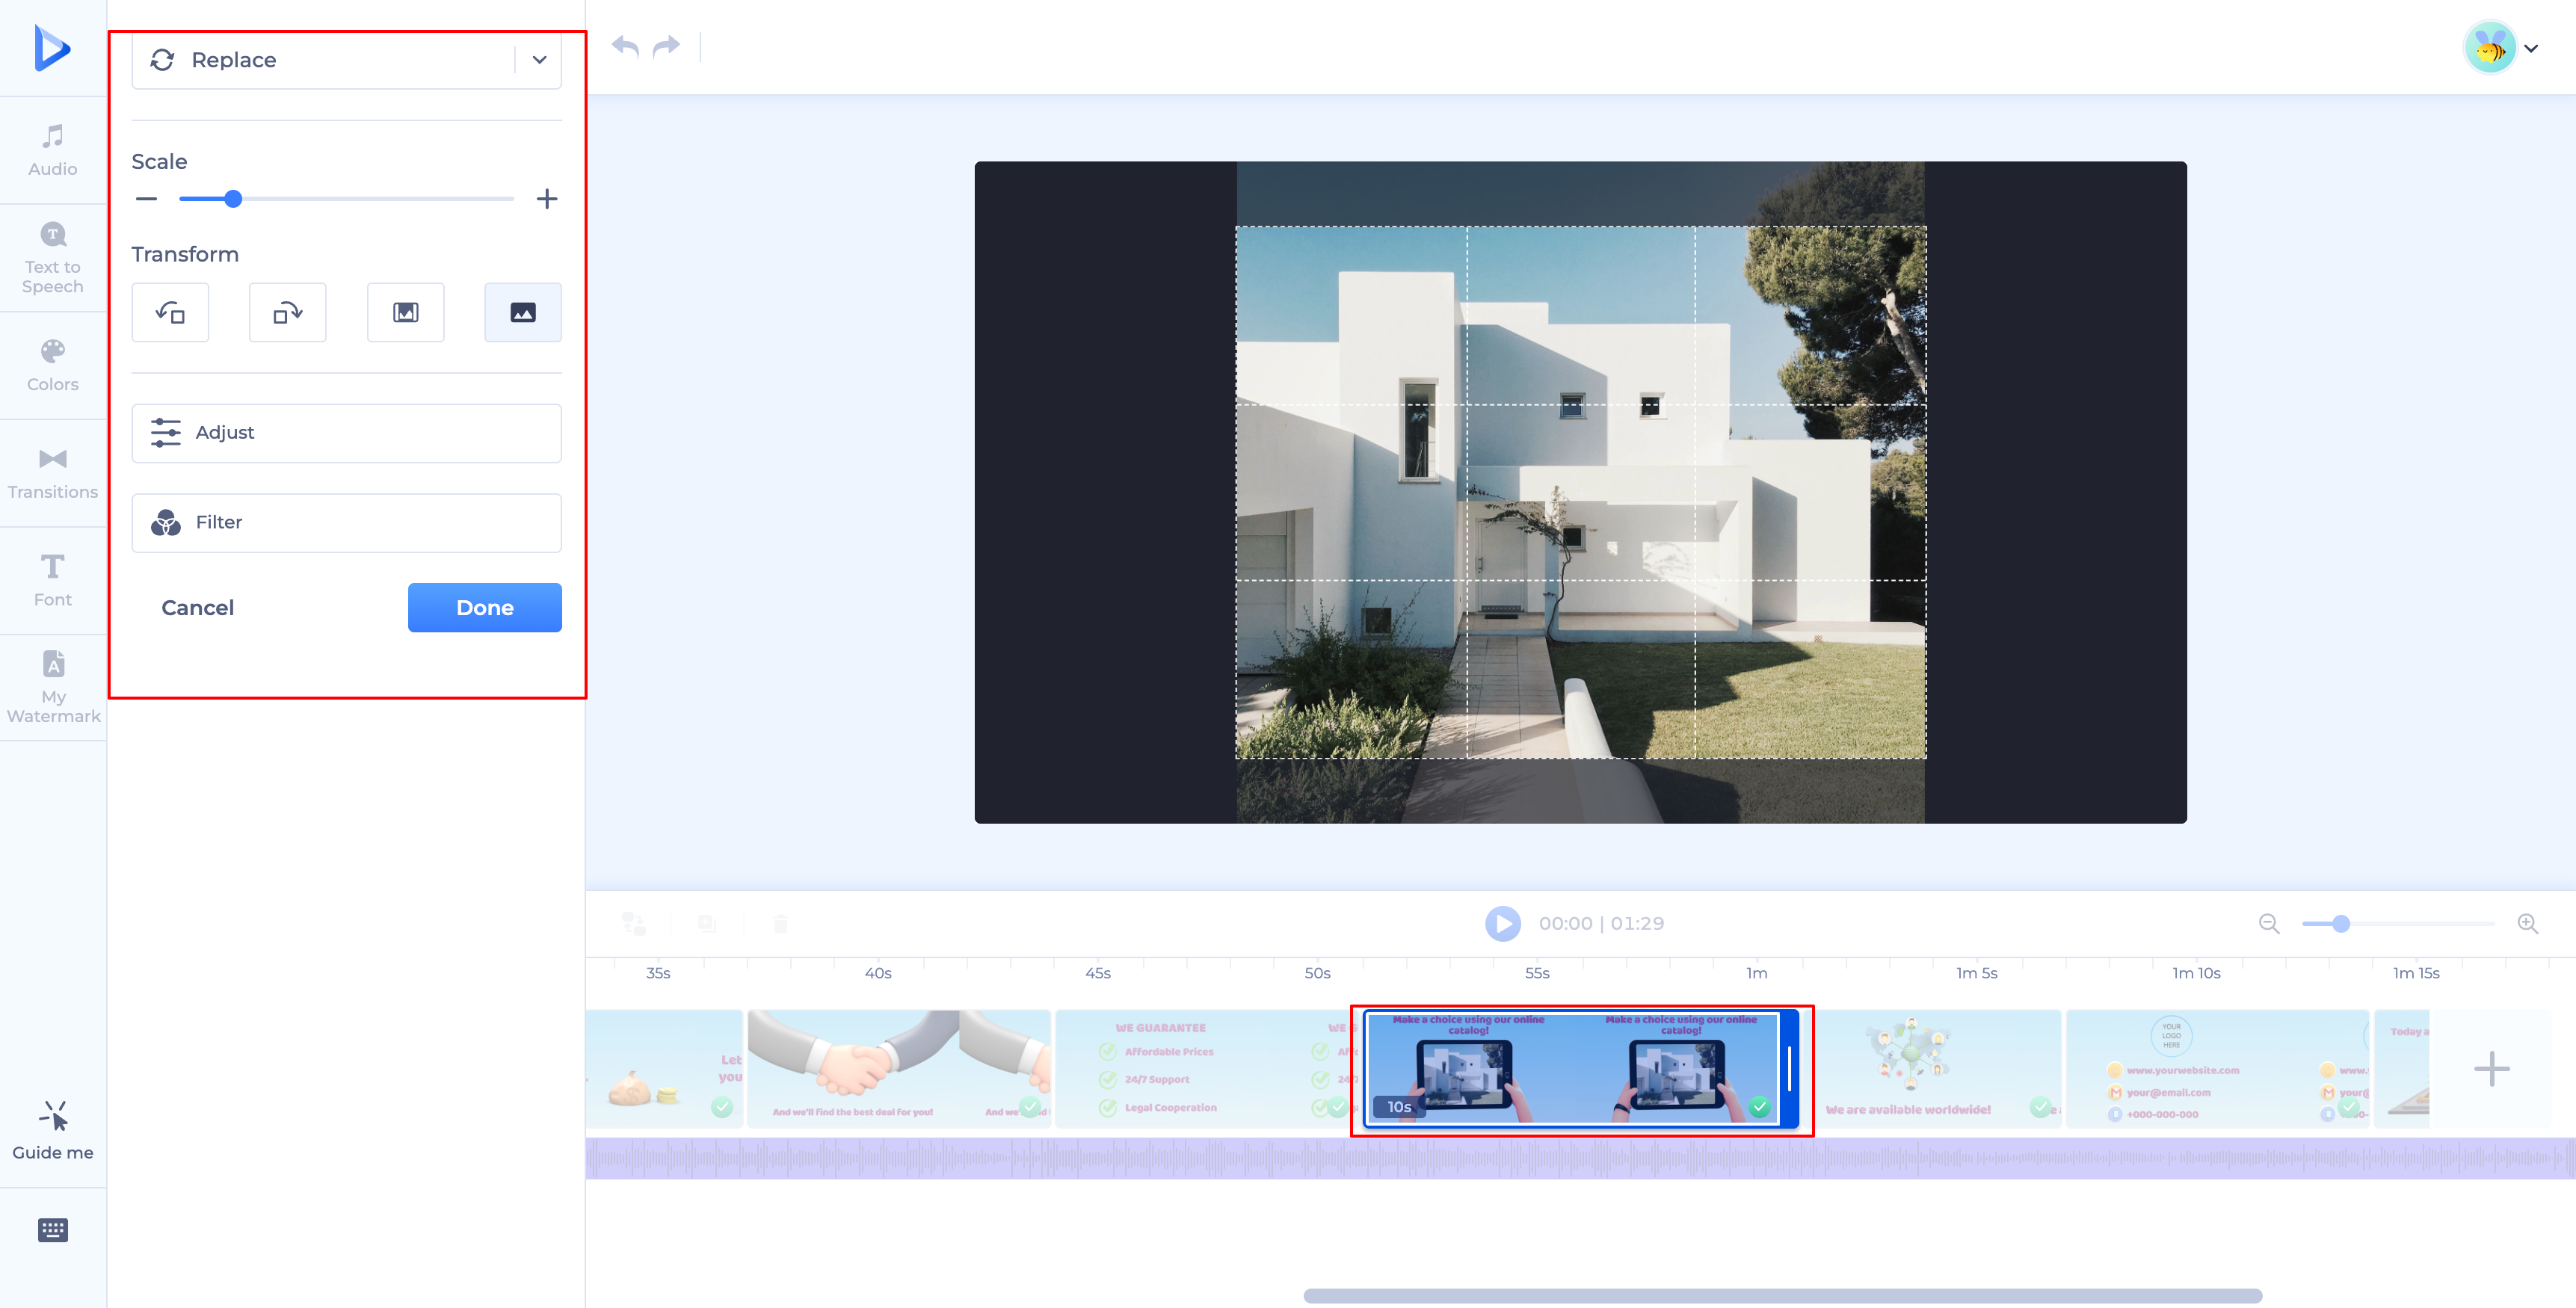
- Replace: swap the image for a different one.
- Scale: resize your image to fit your project using the slider.
- Transform: rotate the image, or choose to fill/fit it into the media placeholder.
- Adjust: fine-tune brightness, contrast, and saturation.
- Filter: enhance your image with a range of filter options.
Click "Done" to finish editing and move on with your project, or "Cancel" to discard your changes.
Using your own media files in your Renderforest projects is a simple, effective way to create unique, personalized content — with plenty of ways to upload and access your files, you can quickly bring your creative vision to life.
How to Edit an Added Video File
Selecting "Edit" on a video opens the video editor, where you can:
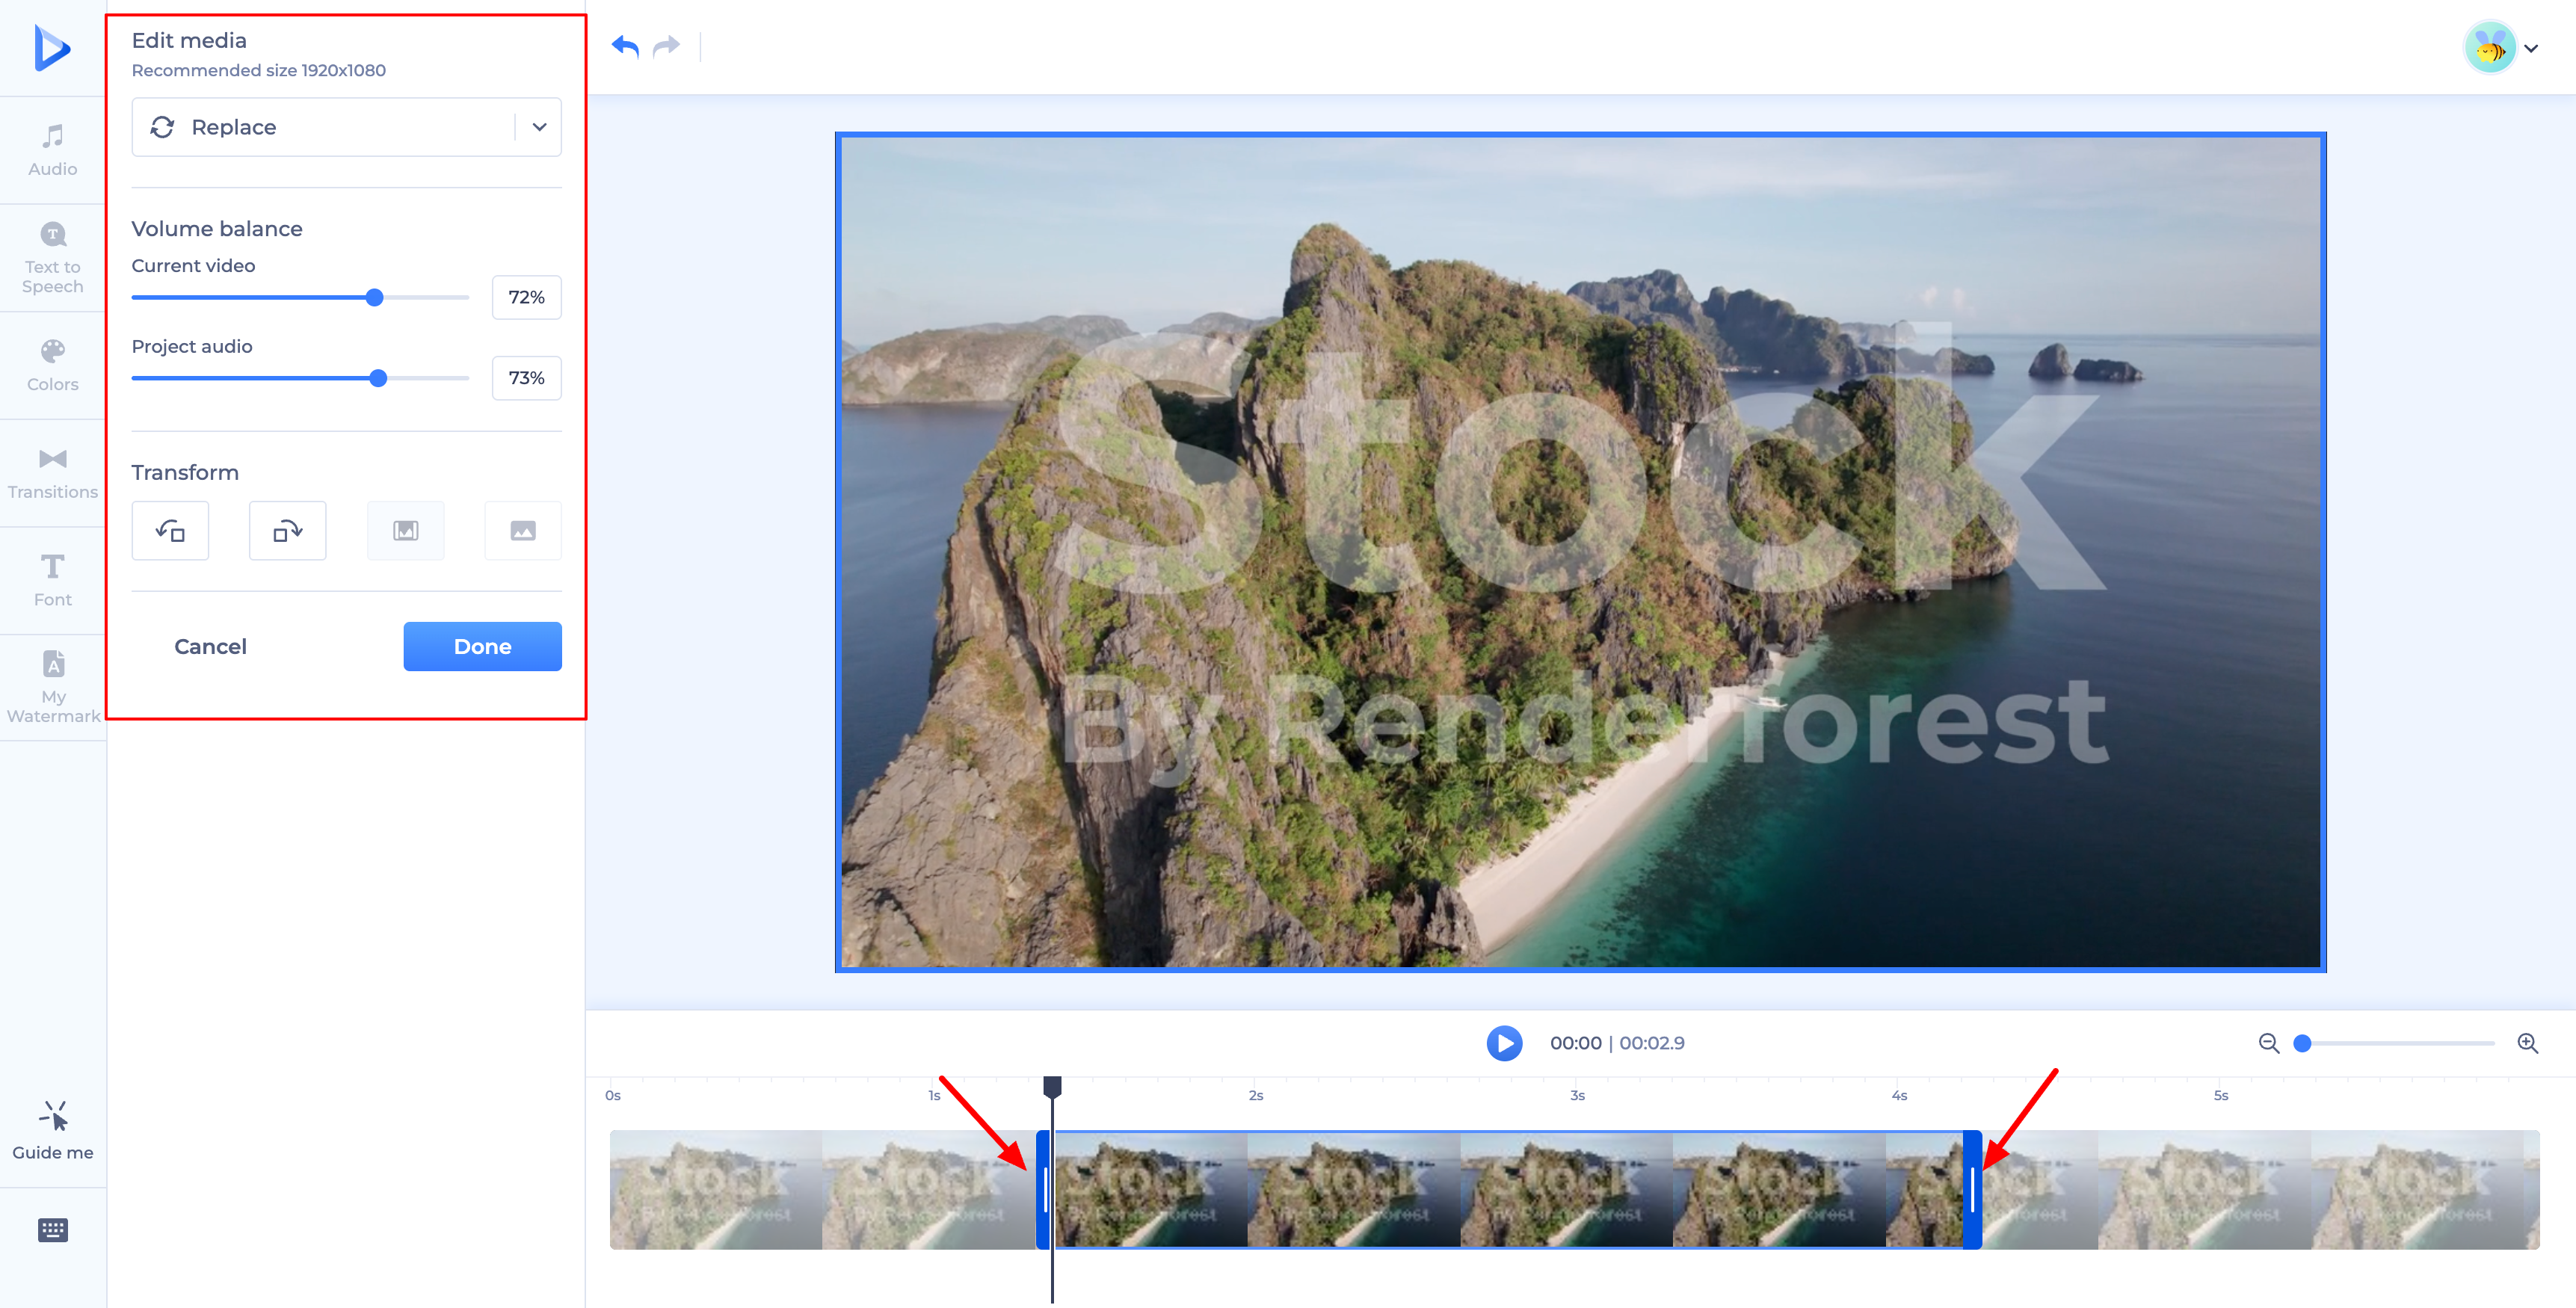
- Trim the video: use the handles on the clip directly in the timeline to fit it to your desired length.
- Balance the volume: adjust "Current video" against "Project audio" to control how loud the clip's own sound is relative to your project's other audio.
- Transform: rotate the video, or choose to fill/fit it into the media placeholder.
- Replace: swap the video for a different one without starting over.
Click "Done" to finish editing and move on with your project, or "Cancel" to discard your changes.
Was this article helpful?
That’s Great!
Thank you for your feedback
Sorry! We couldn't be helpful
Thank you for your feedback
Feedback sent
We appreciate your effort and will try to fix the article