TABLE OF CONTENTS
Creating visually captivating videos involves more than just cutting and arranging clips — it's about adding the right touches that bring your vision to life. Colors, transitions, styles, fonts, and watermarks all play a crucial role in defining the look and feel of your video content. This article walks through these editing controls so you can put them to full use in your projects.
Once you've finished editing the text, photos, or videos in your scenes, you'll move on to the styling stage. Depending on the template, you'll find different options for transitions, animation styles, fonts, colors, and more.
Colors
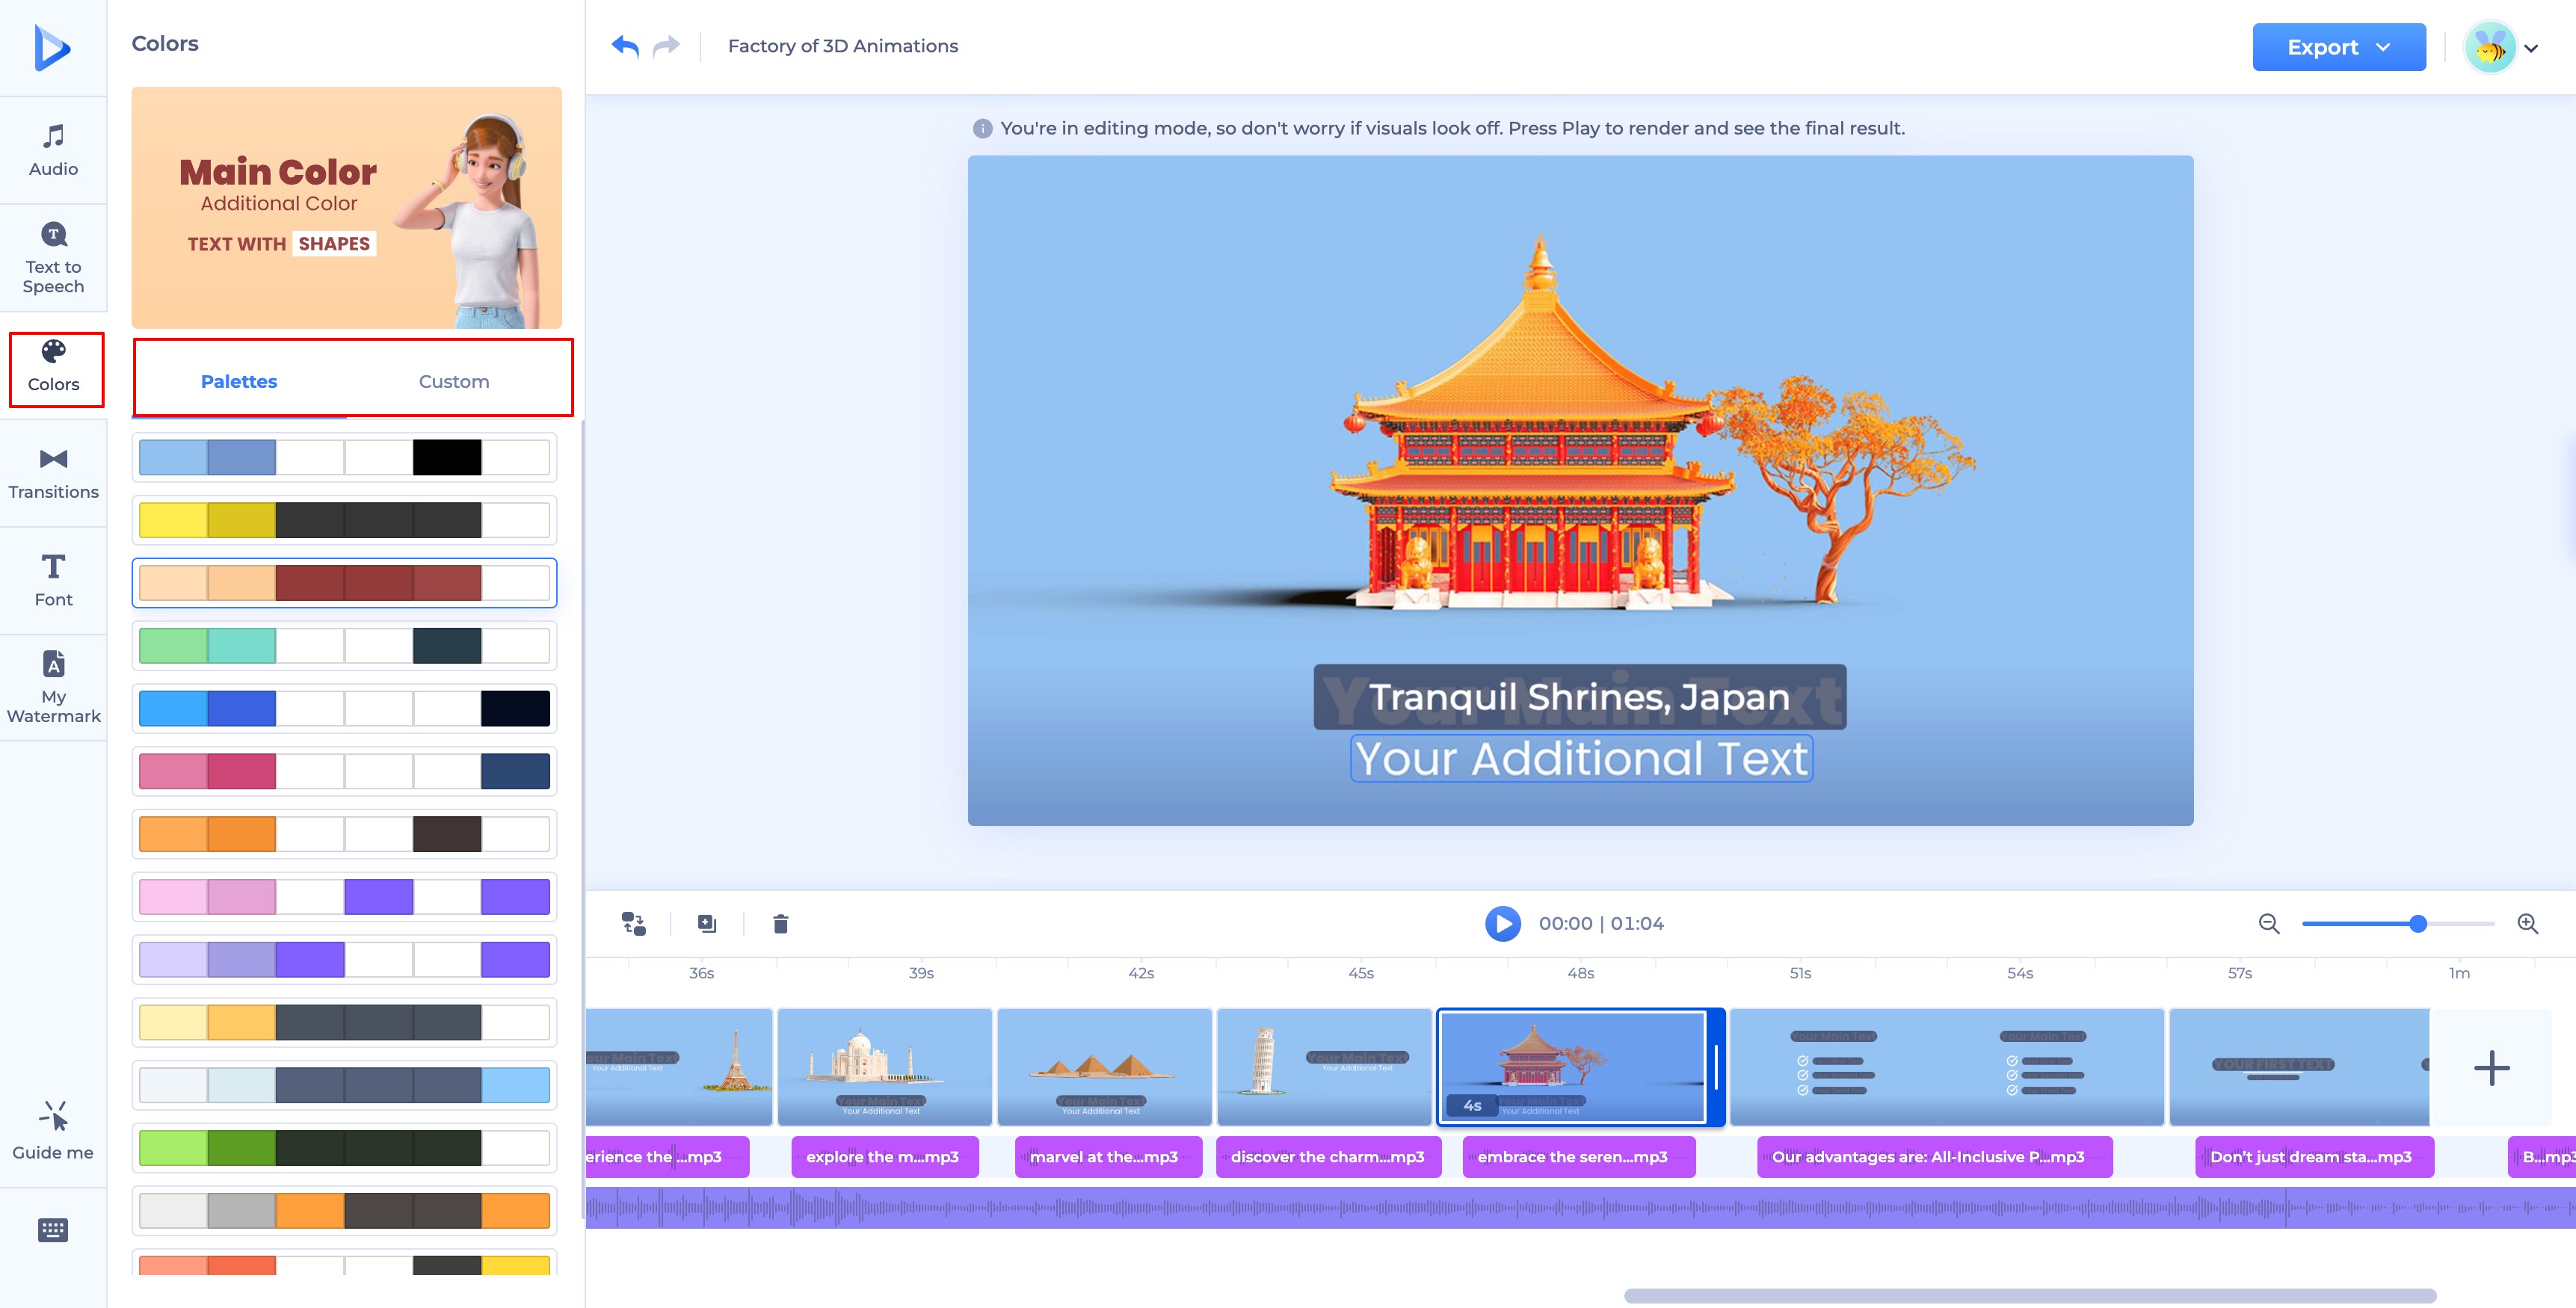
Availability depends on your template, but where supported, the Colors section lets you customize your project's colors to match your branding or personal preferences. Switch between "Palettes" — ready-made color combinations suggested by our designers — and "Custom," where you can build your own palette using the color picker or by entering a hex code. This makes it easy to work specific colors into your project.
Transitions
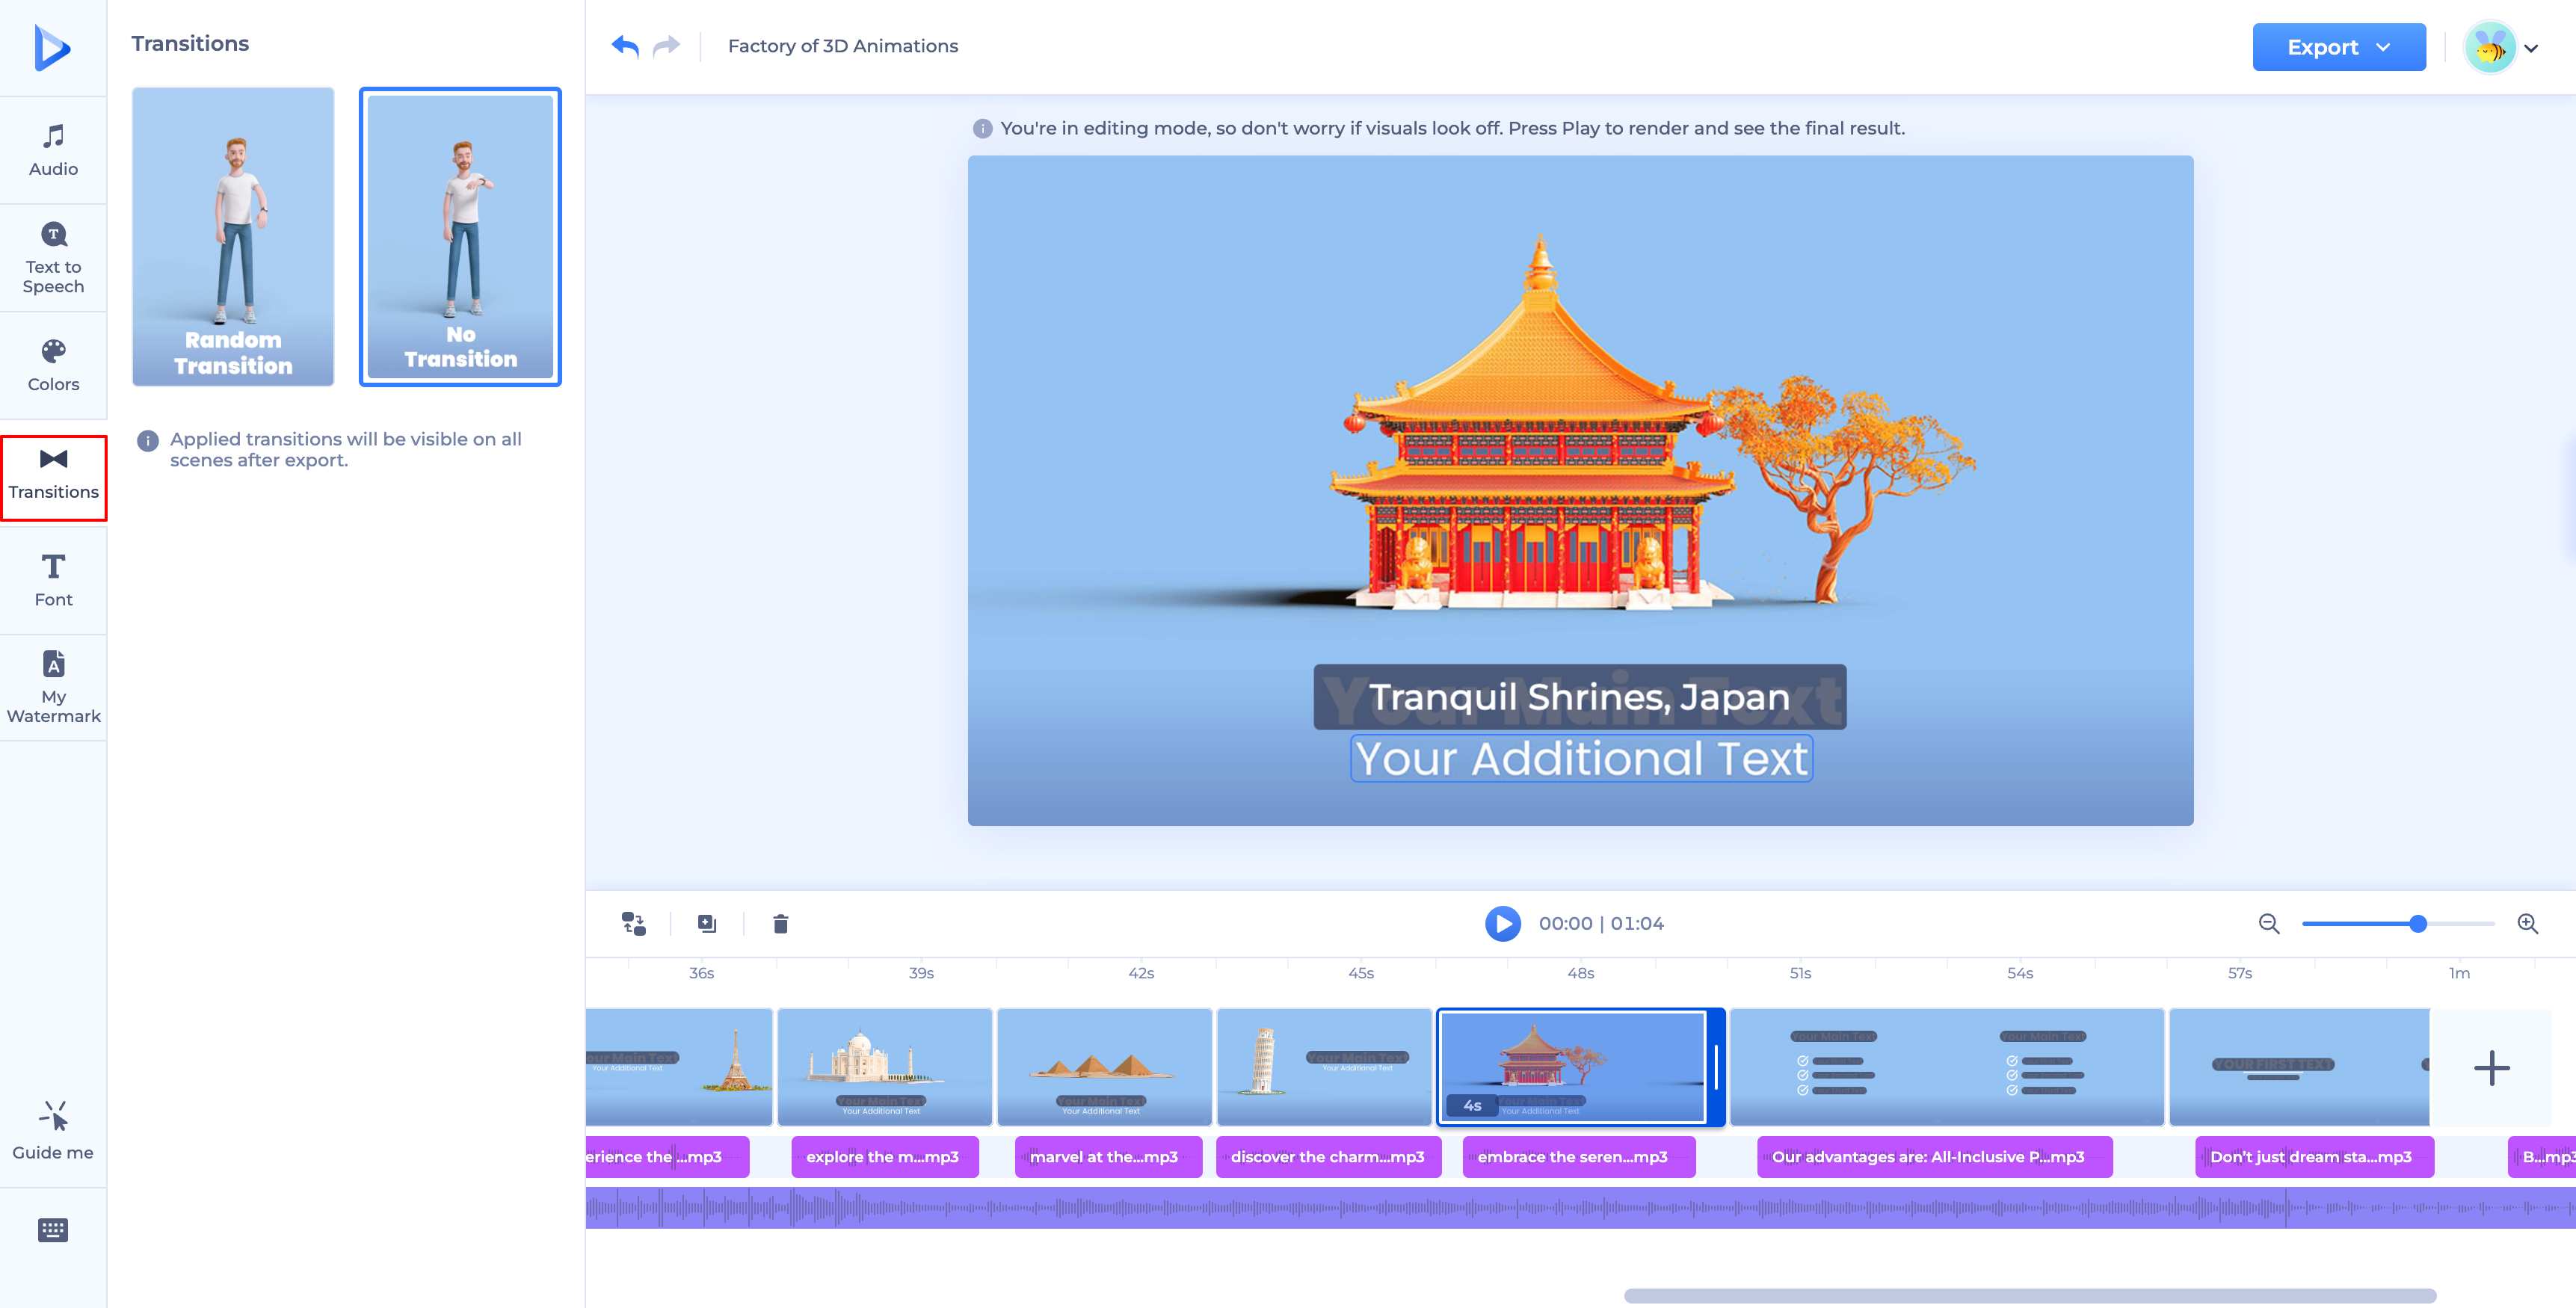
Availability depends on your template, but where supported, the Transitions section lets you choose between "Random Transition" or "No Transition" for your project. Applied transitions become visible across all scenes once you preview or export your video.
Style

For templates that support it (such as character-based scenes), a "Styles" panel appears alongside your video preview, letting you choose an overall visual style — for example, a "3D Look" — from a set of style cards. Select the style you want to apply it to your project.

Fonts
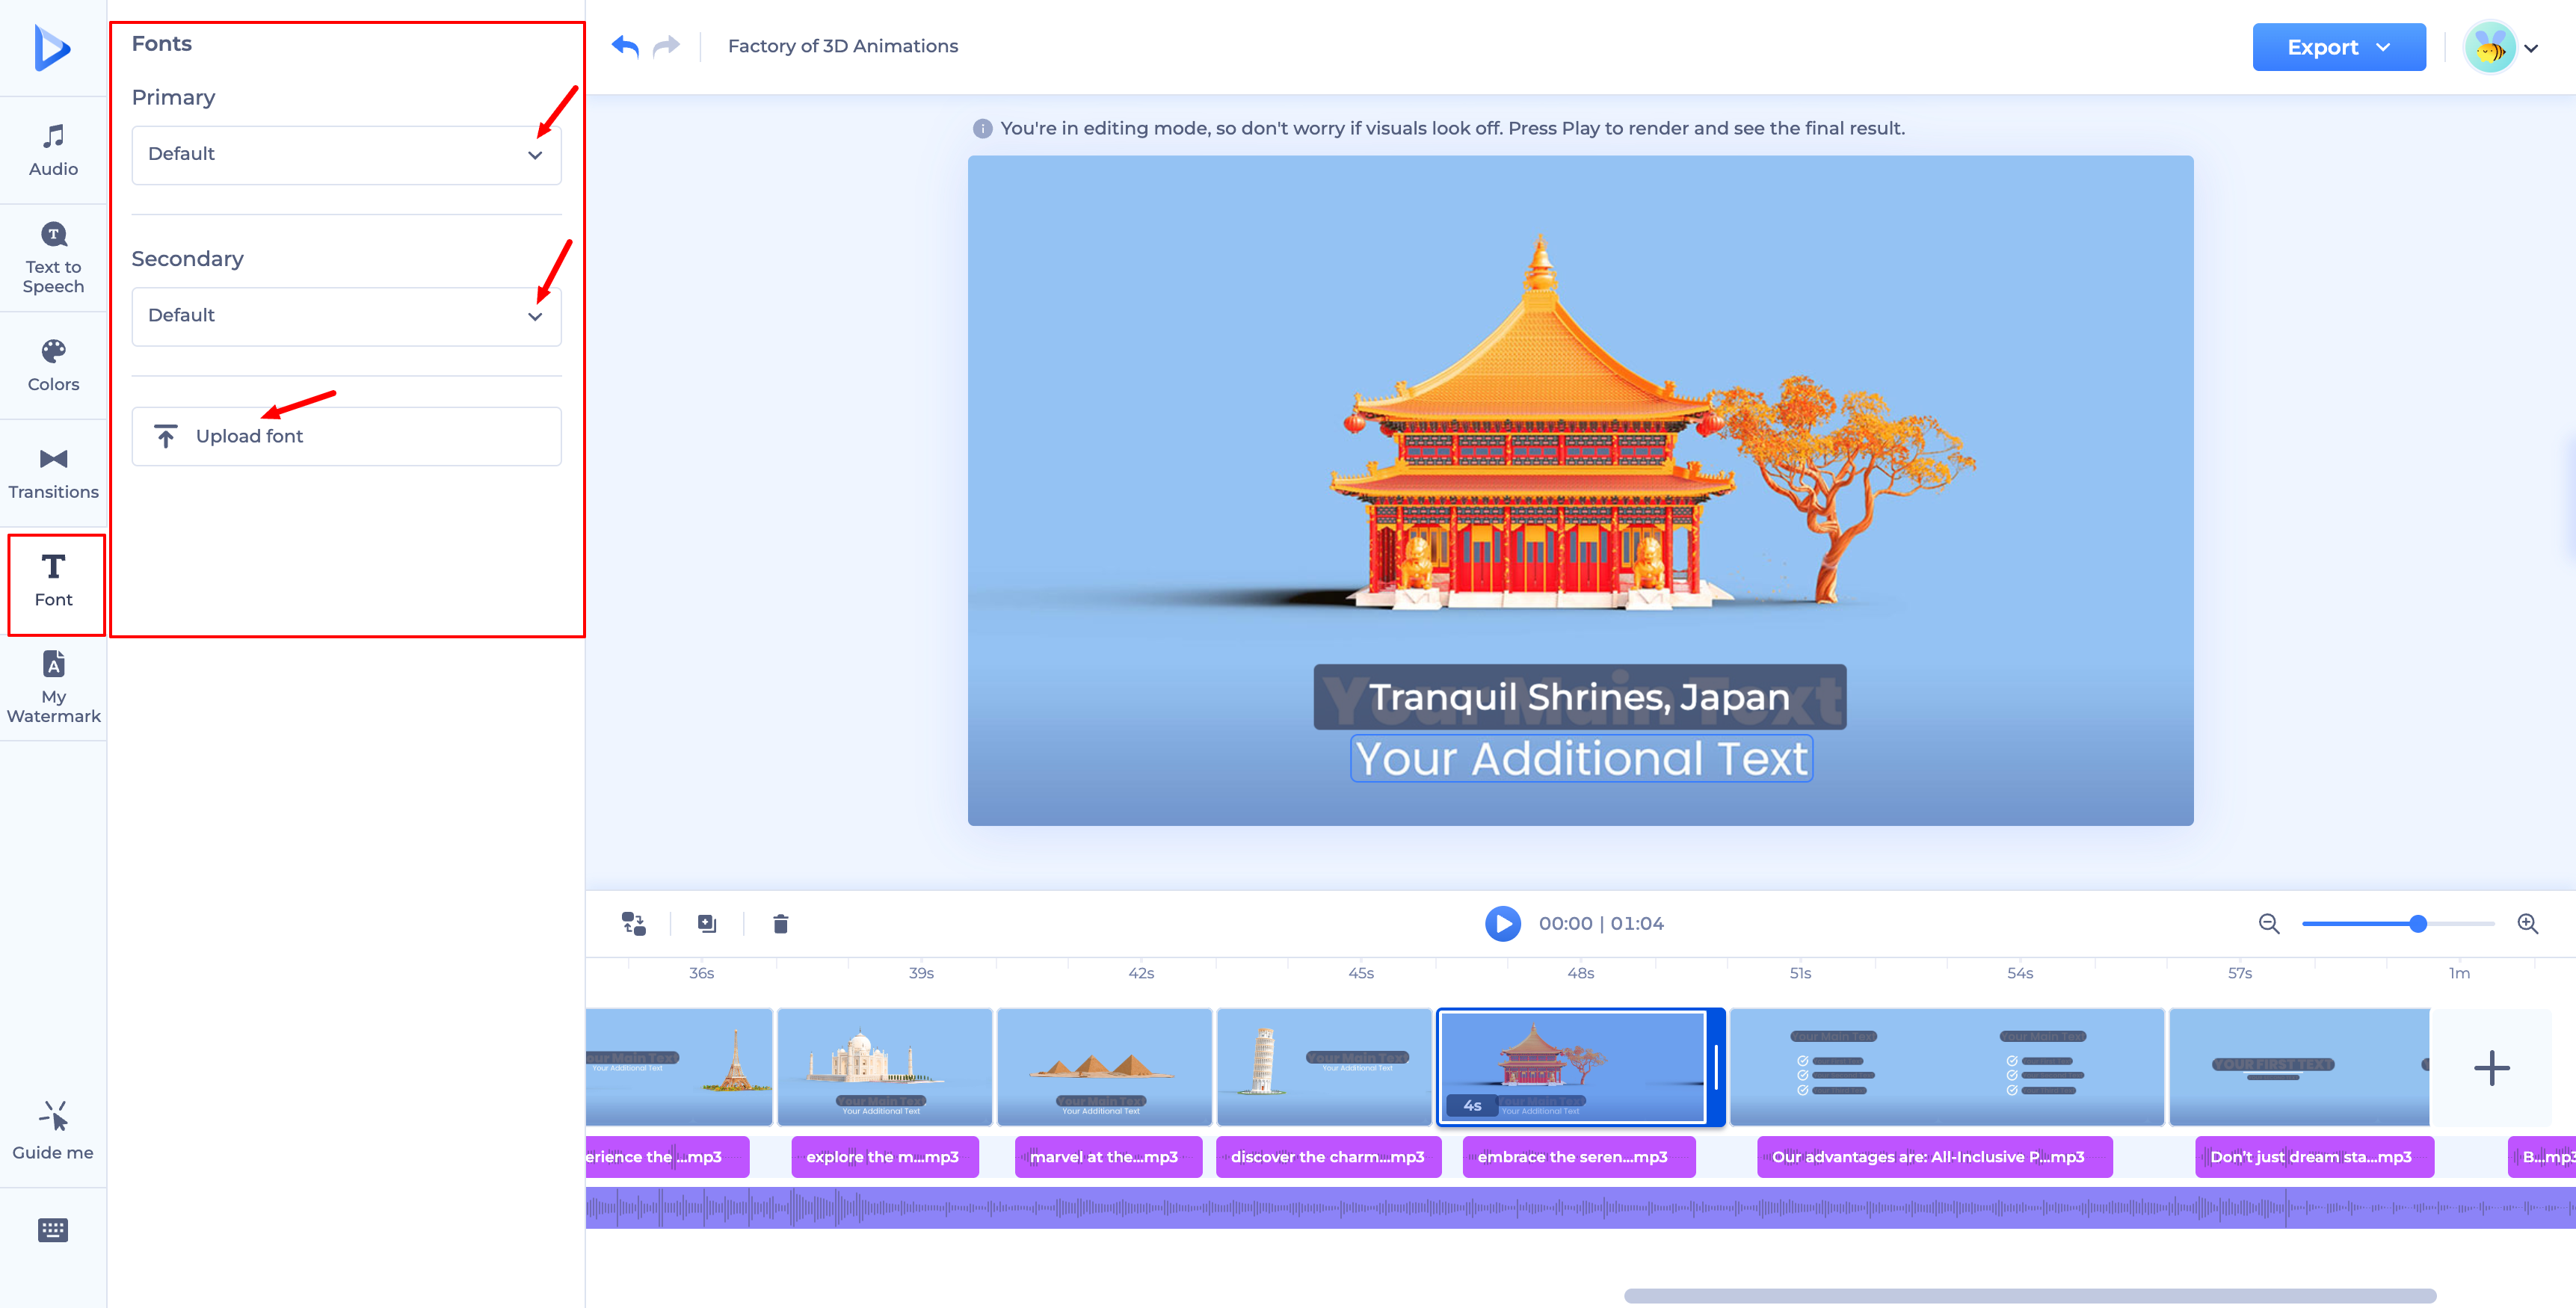
In the Font section, choose the font for your primary and secondary text using the "Primary" and "Secondary" dropdowns. You can pick from our suggested library, or upload your own font in .TTF or .OTF format via "Upload Font."
Watermarks
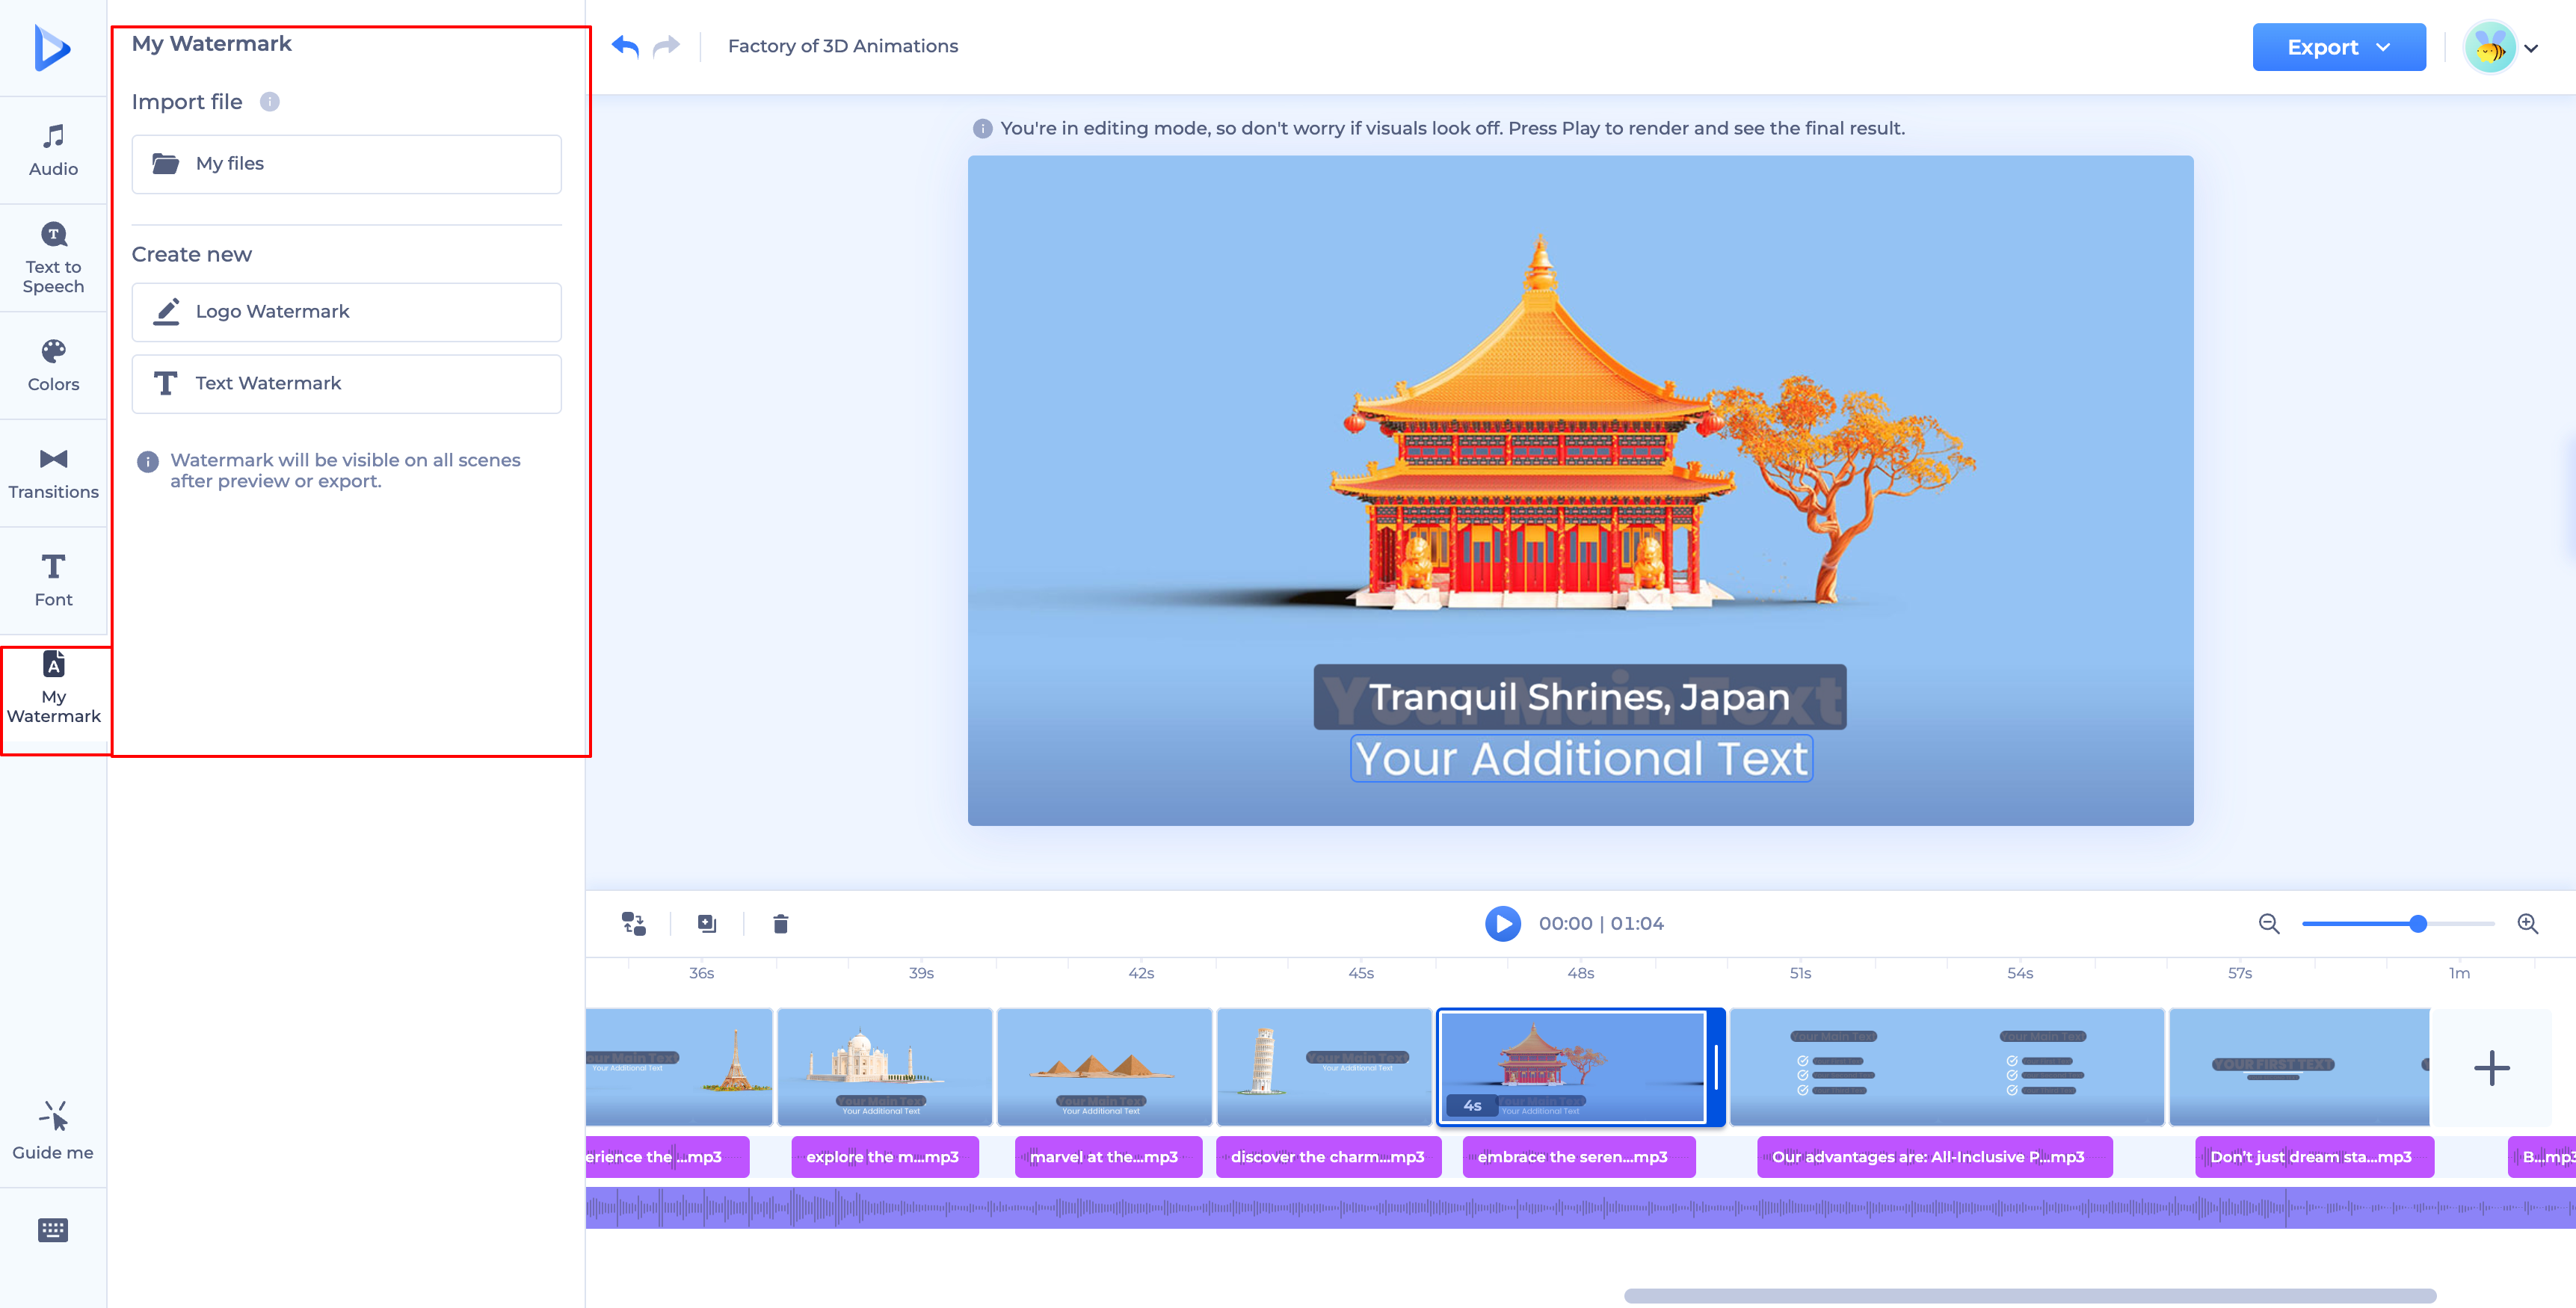
Watermarks help protect your intellectual property and reinforce your brand identity. As a Business Plan user, you can add a custom watermark to your video projects — adding an extra layer of security while keeping your brand visible throughout the viewing experience. Your watermark becomes visible on all scenes once you preview or export.
In the "My Watermark" section, you can import a watermark from "My files," or create a new one directly in the editor — either a "Logo Watermark" or a "Text Watermark."
Logo Watermark
Upload your logo, then adjust:
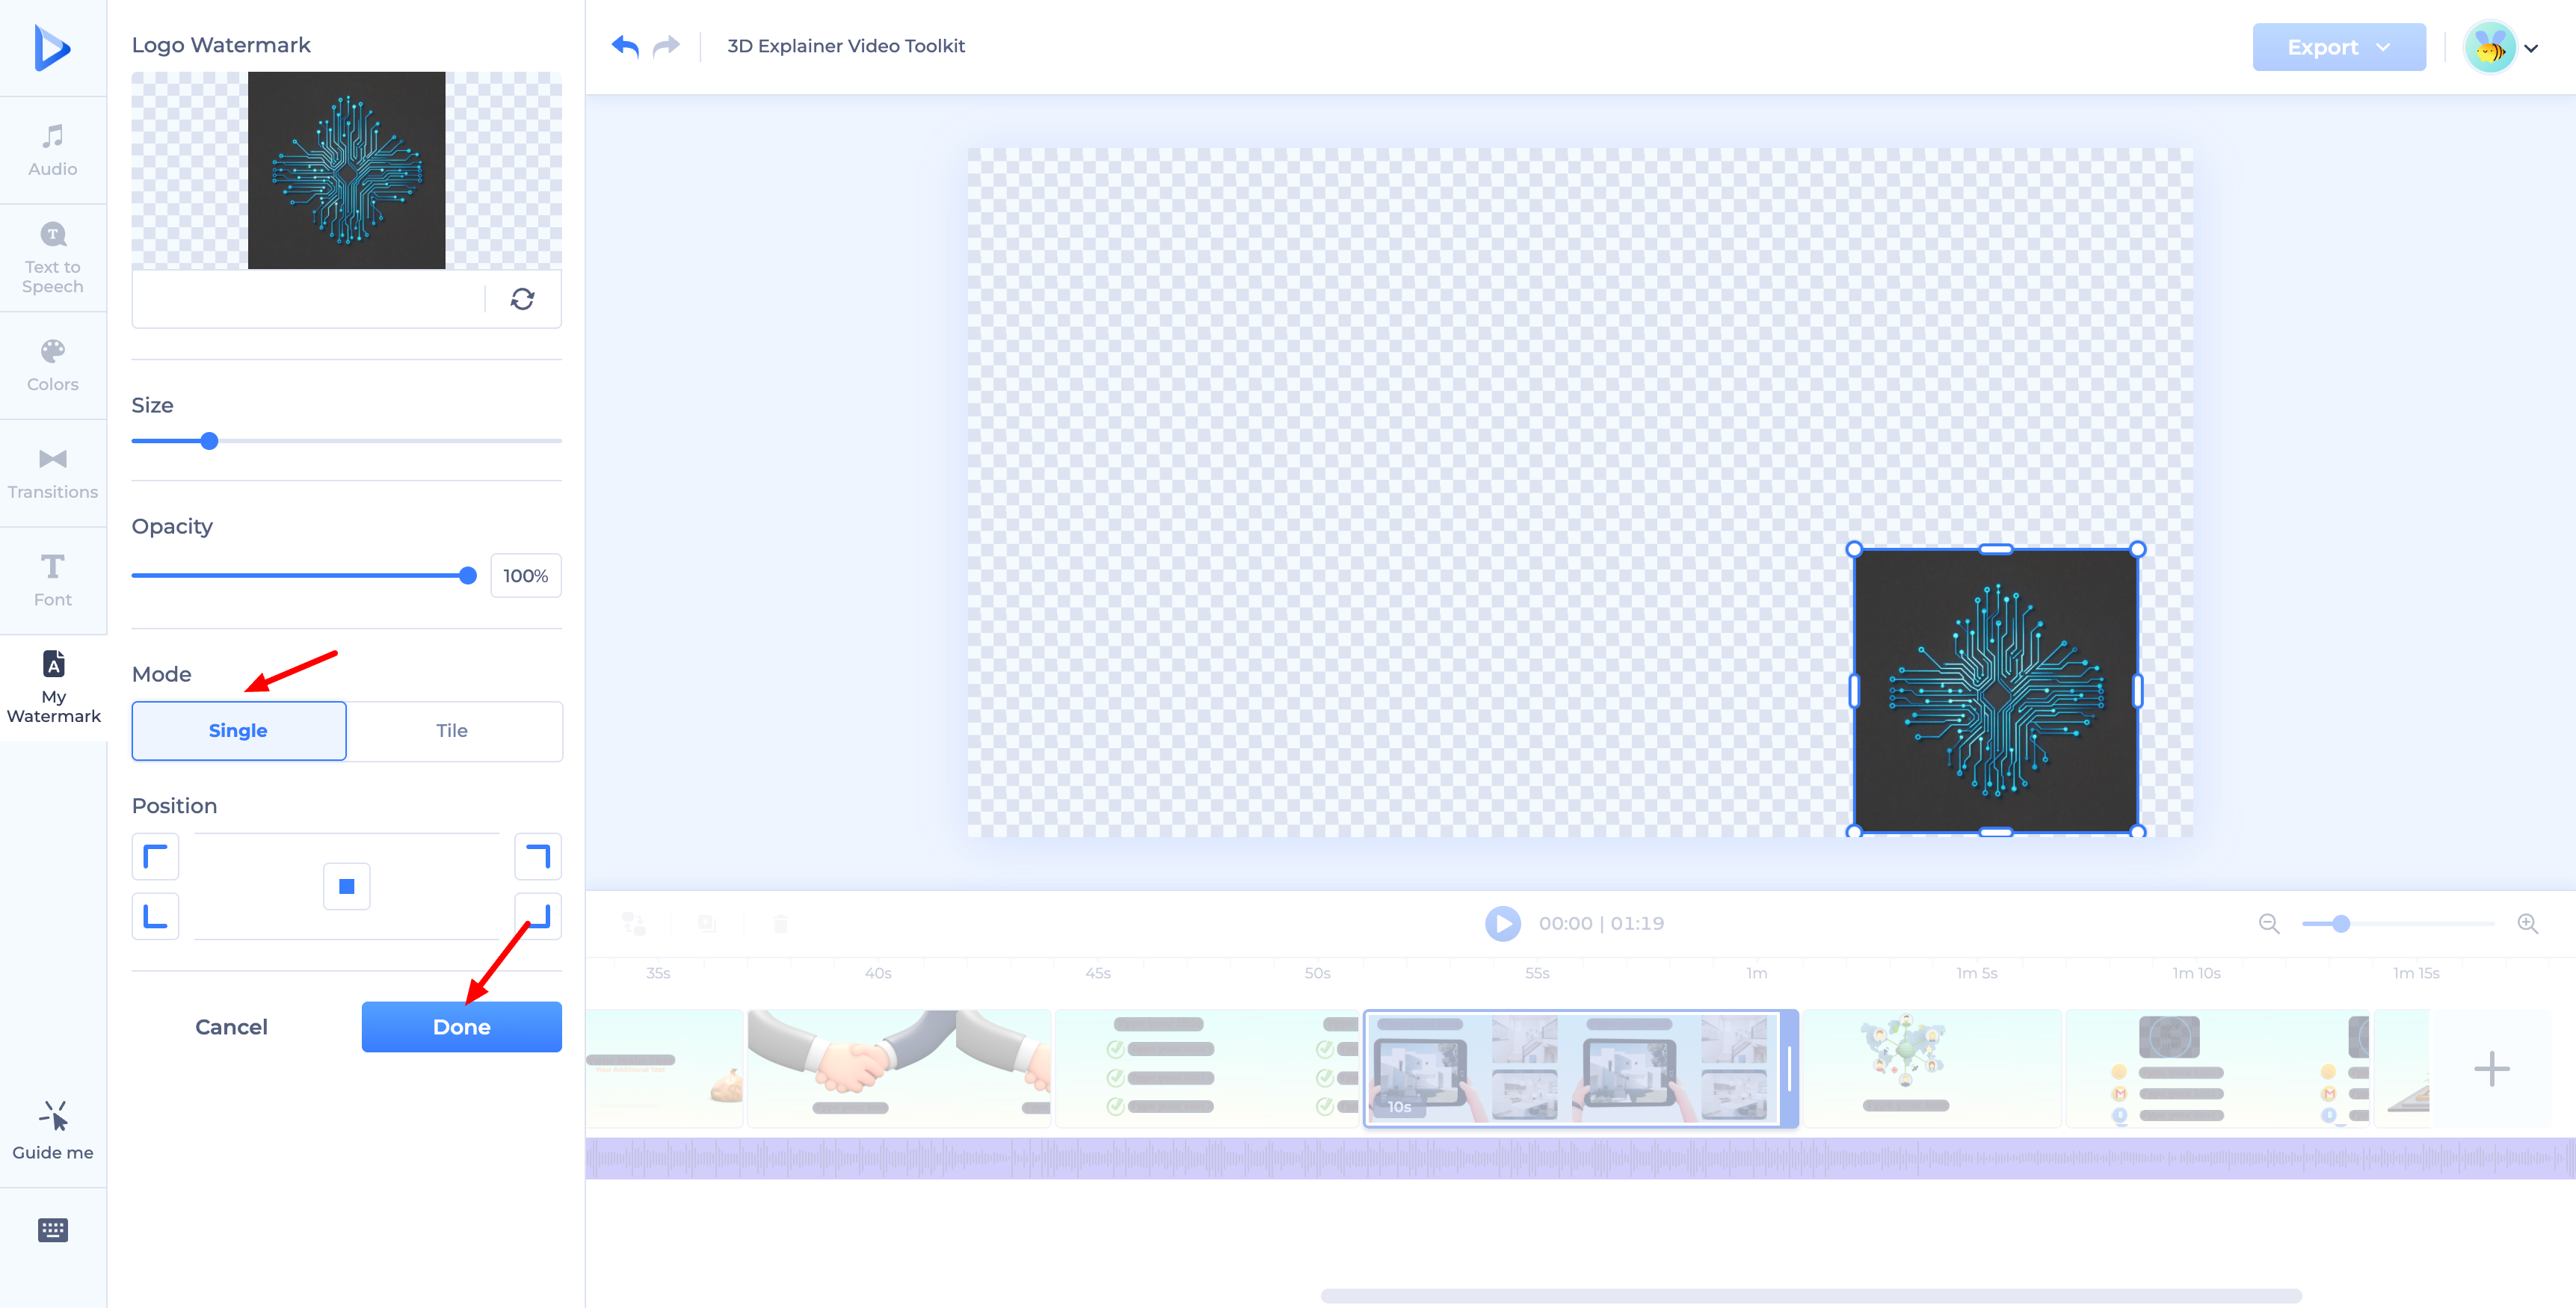
- Size and Opacity, using their respective sliders.
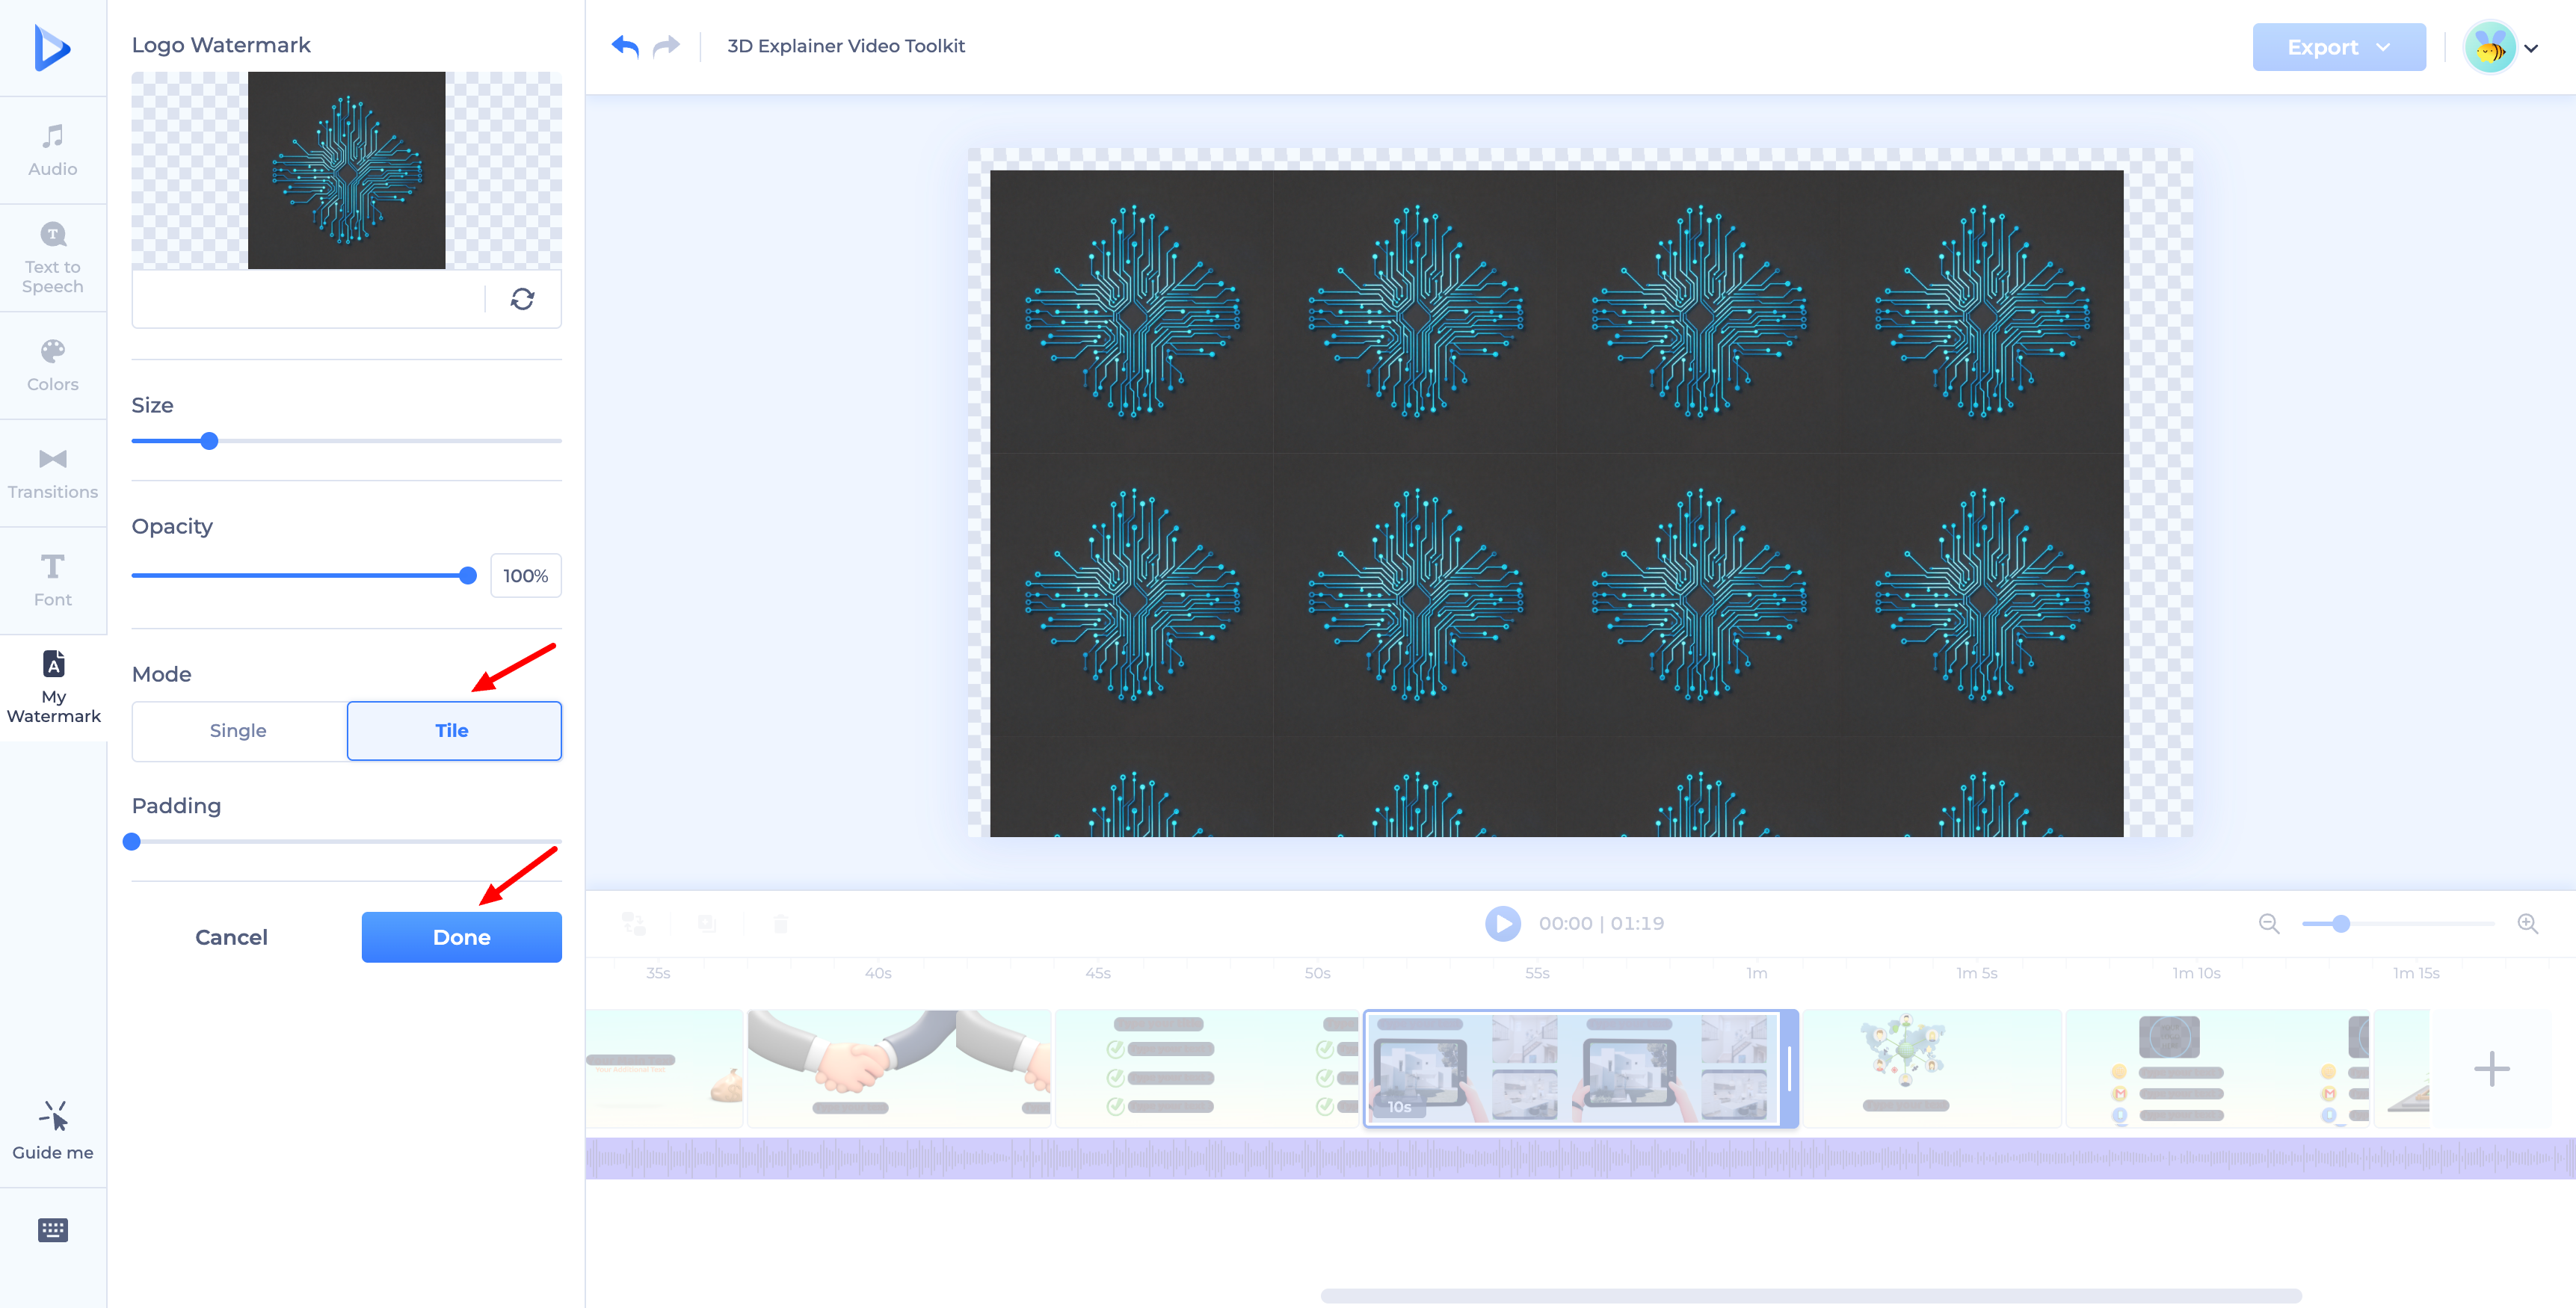
- Mode: choose "Single" for one watermark, or "Tile" to repeat it across the whole screen (with an adjustable "Padding" between tiles).
- Position: for a single watermark, place it in one of the four corners, or drag it manually in the preview to fine-tune its placement.
Text Watermark
Type in your text (up to 42 characters advised), then customize:
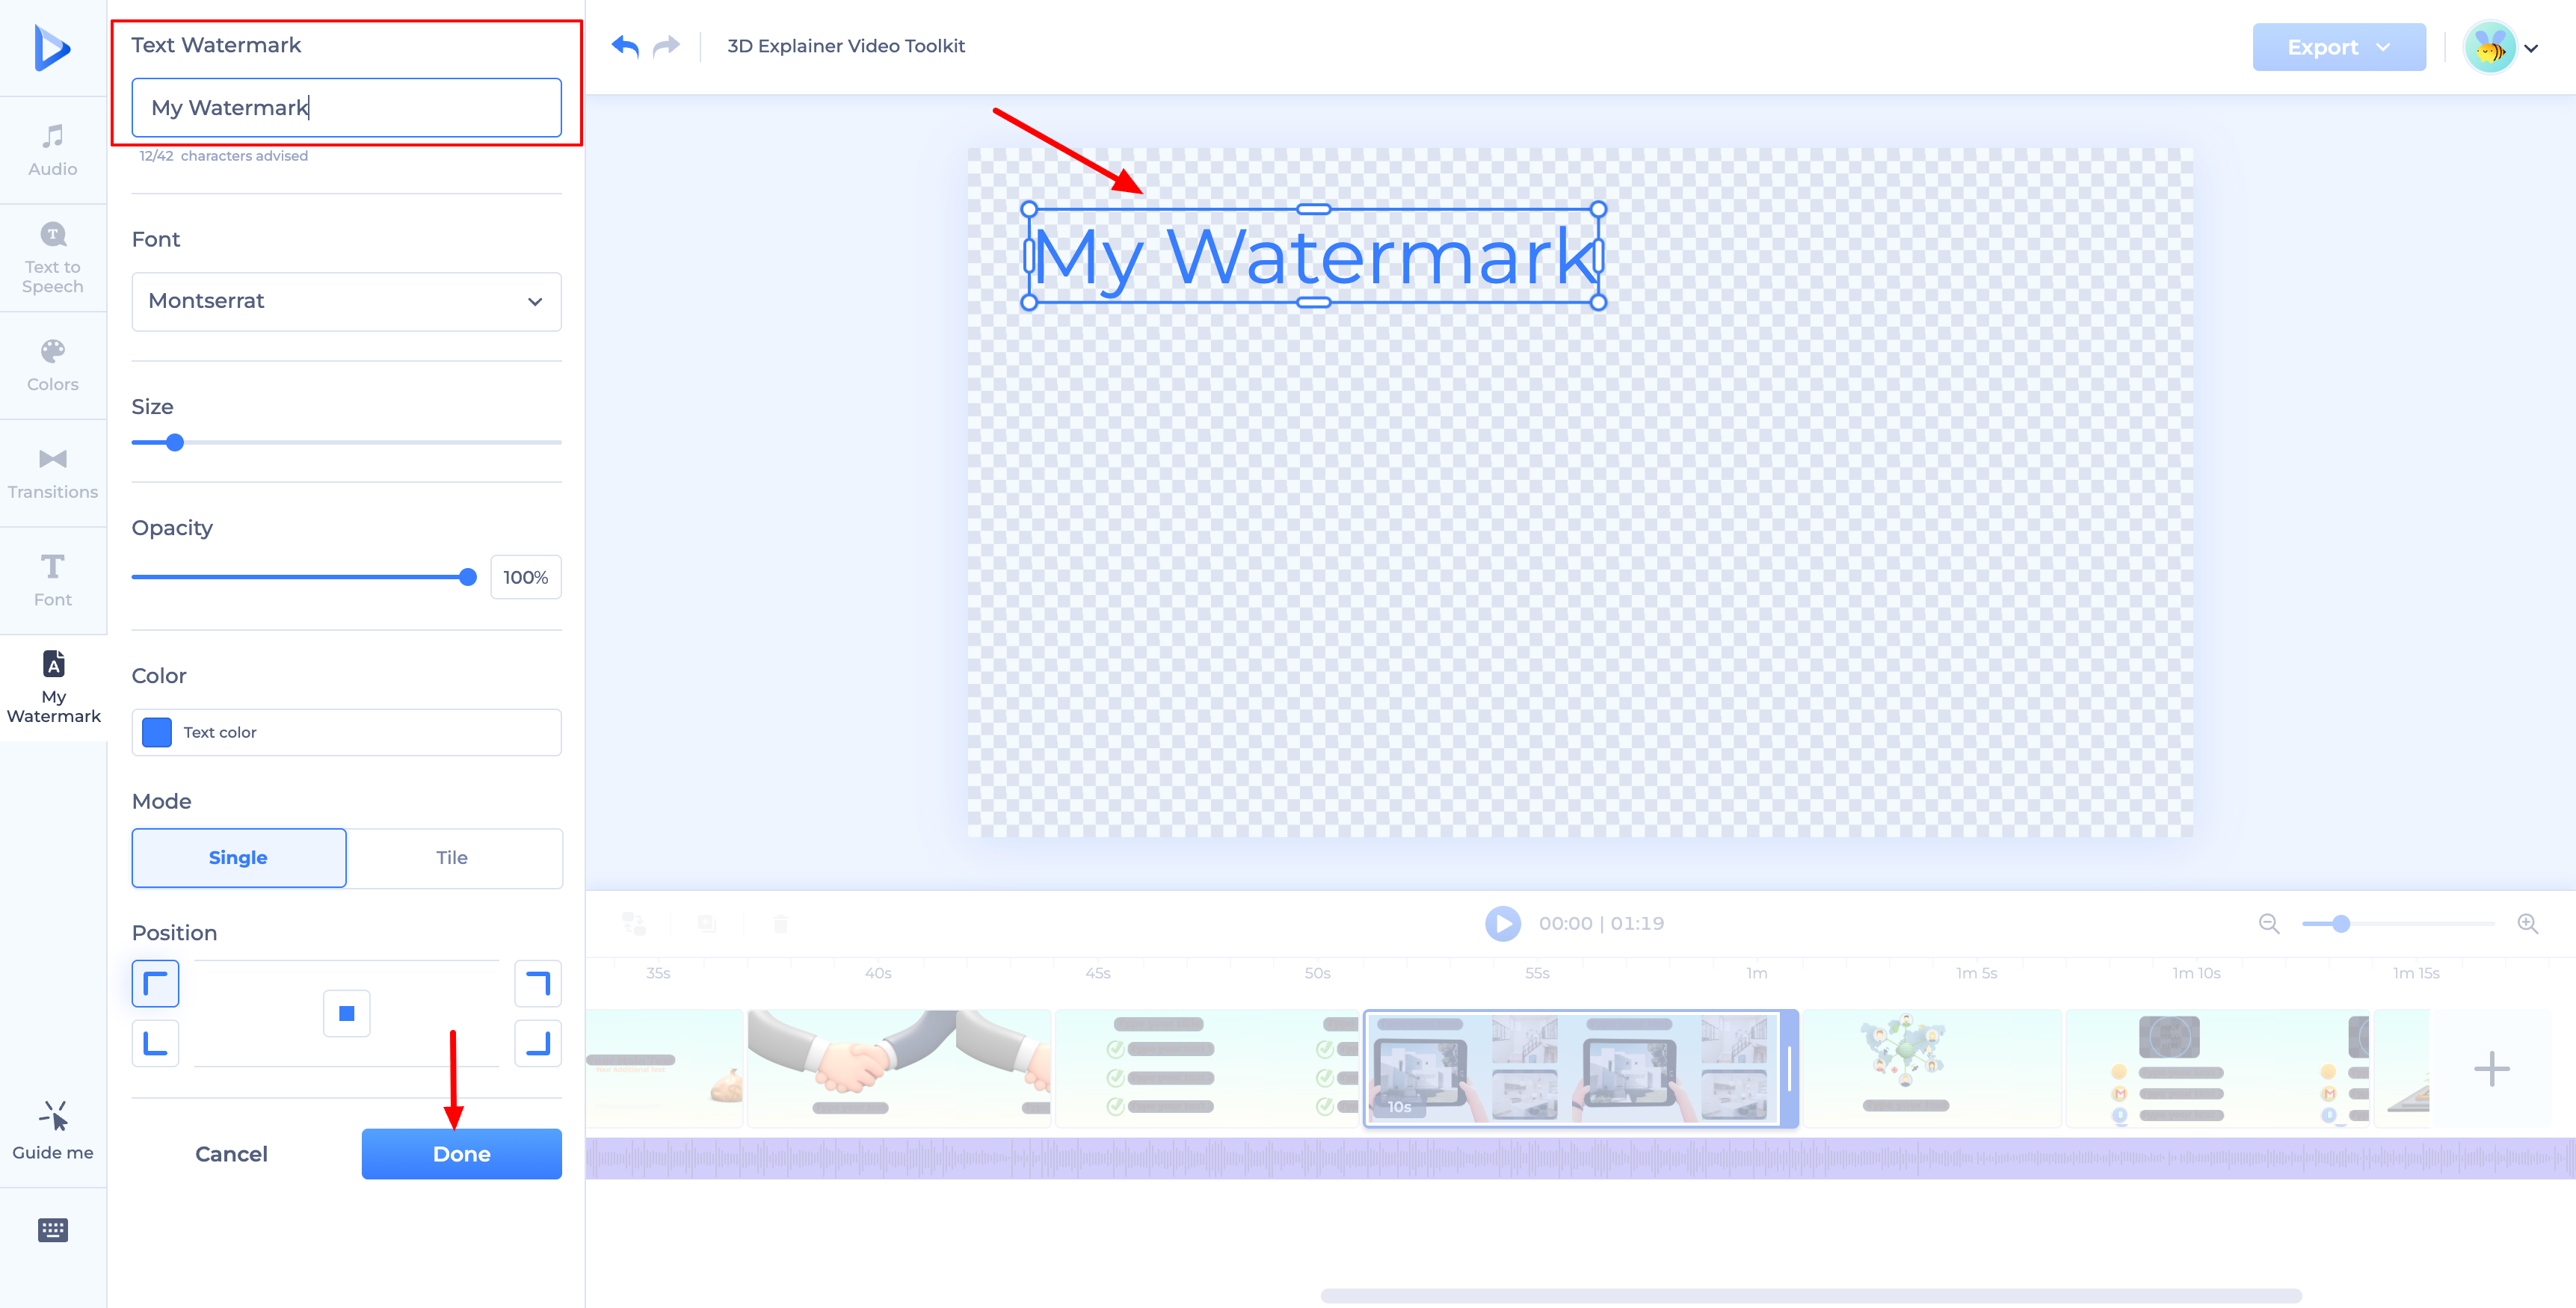
- Font, using the dropdown.
- Size and Opacity, using their respective sliders.
- Color: pick a text color, including precise hex matching for your brand.
- Mode and Position: the same Single/Tile and placement options as a logo watermark.
Once you're happy with your settings, click "Done" — your custom watermark is added to your project.

Was this article helpful?
That’s Great!
Thank you for your feedback
Sorry! We couldn't be helpful
Thank you for your feedback
Feedback sent
We appreciate your effort and will try to fix the article