TABLE OF CONTENTS
- Short AI Video
- Long AI Video
- Editing and Exporting
Renderforest offers a range of ways to create AI-powered videos — from Short AI Video and Long AI Video to AI Effects, Intro Videos, AI Music Video, and more, all available from "Create" or the left-hand Tools menu. This article focuses on two of the core video-generation paths: "Short AI Video," which generates a single AI clip directly from a prompt using your choice of AI model, and "Long AI Video," which builds a full, multi-scene video from a style template, complete with AI voiceover.
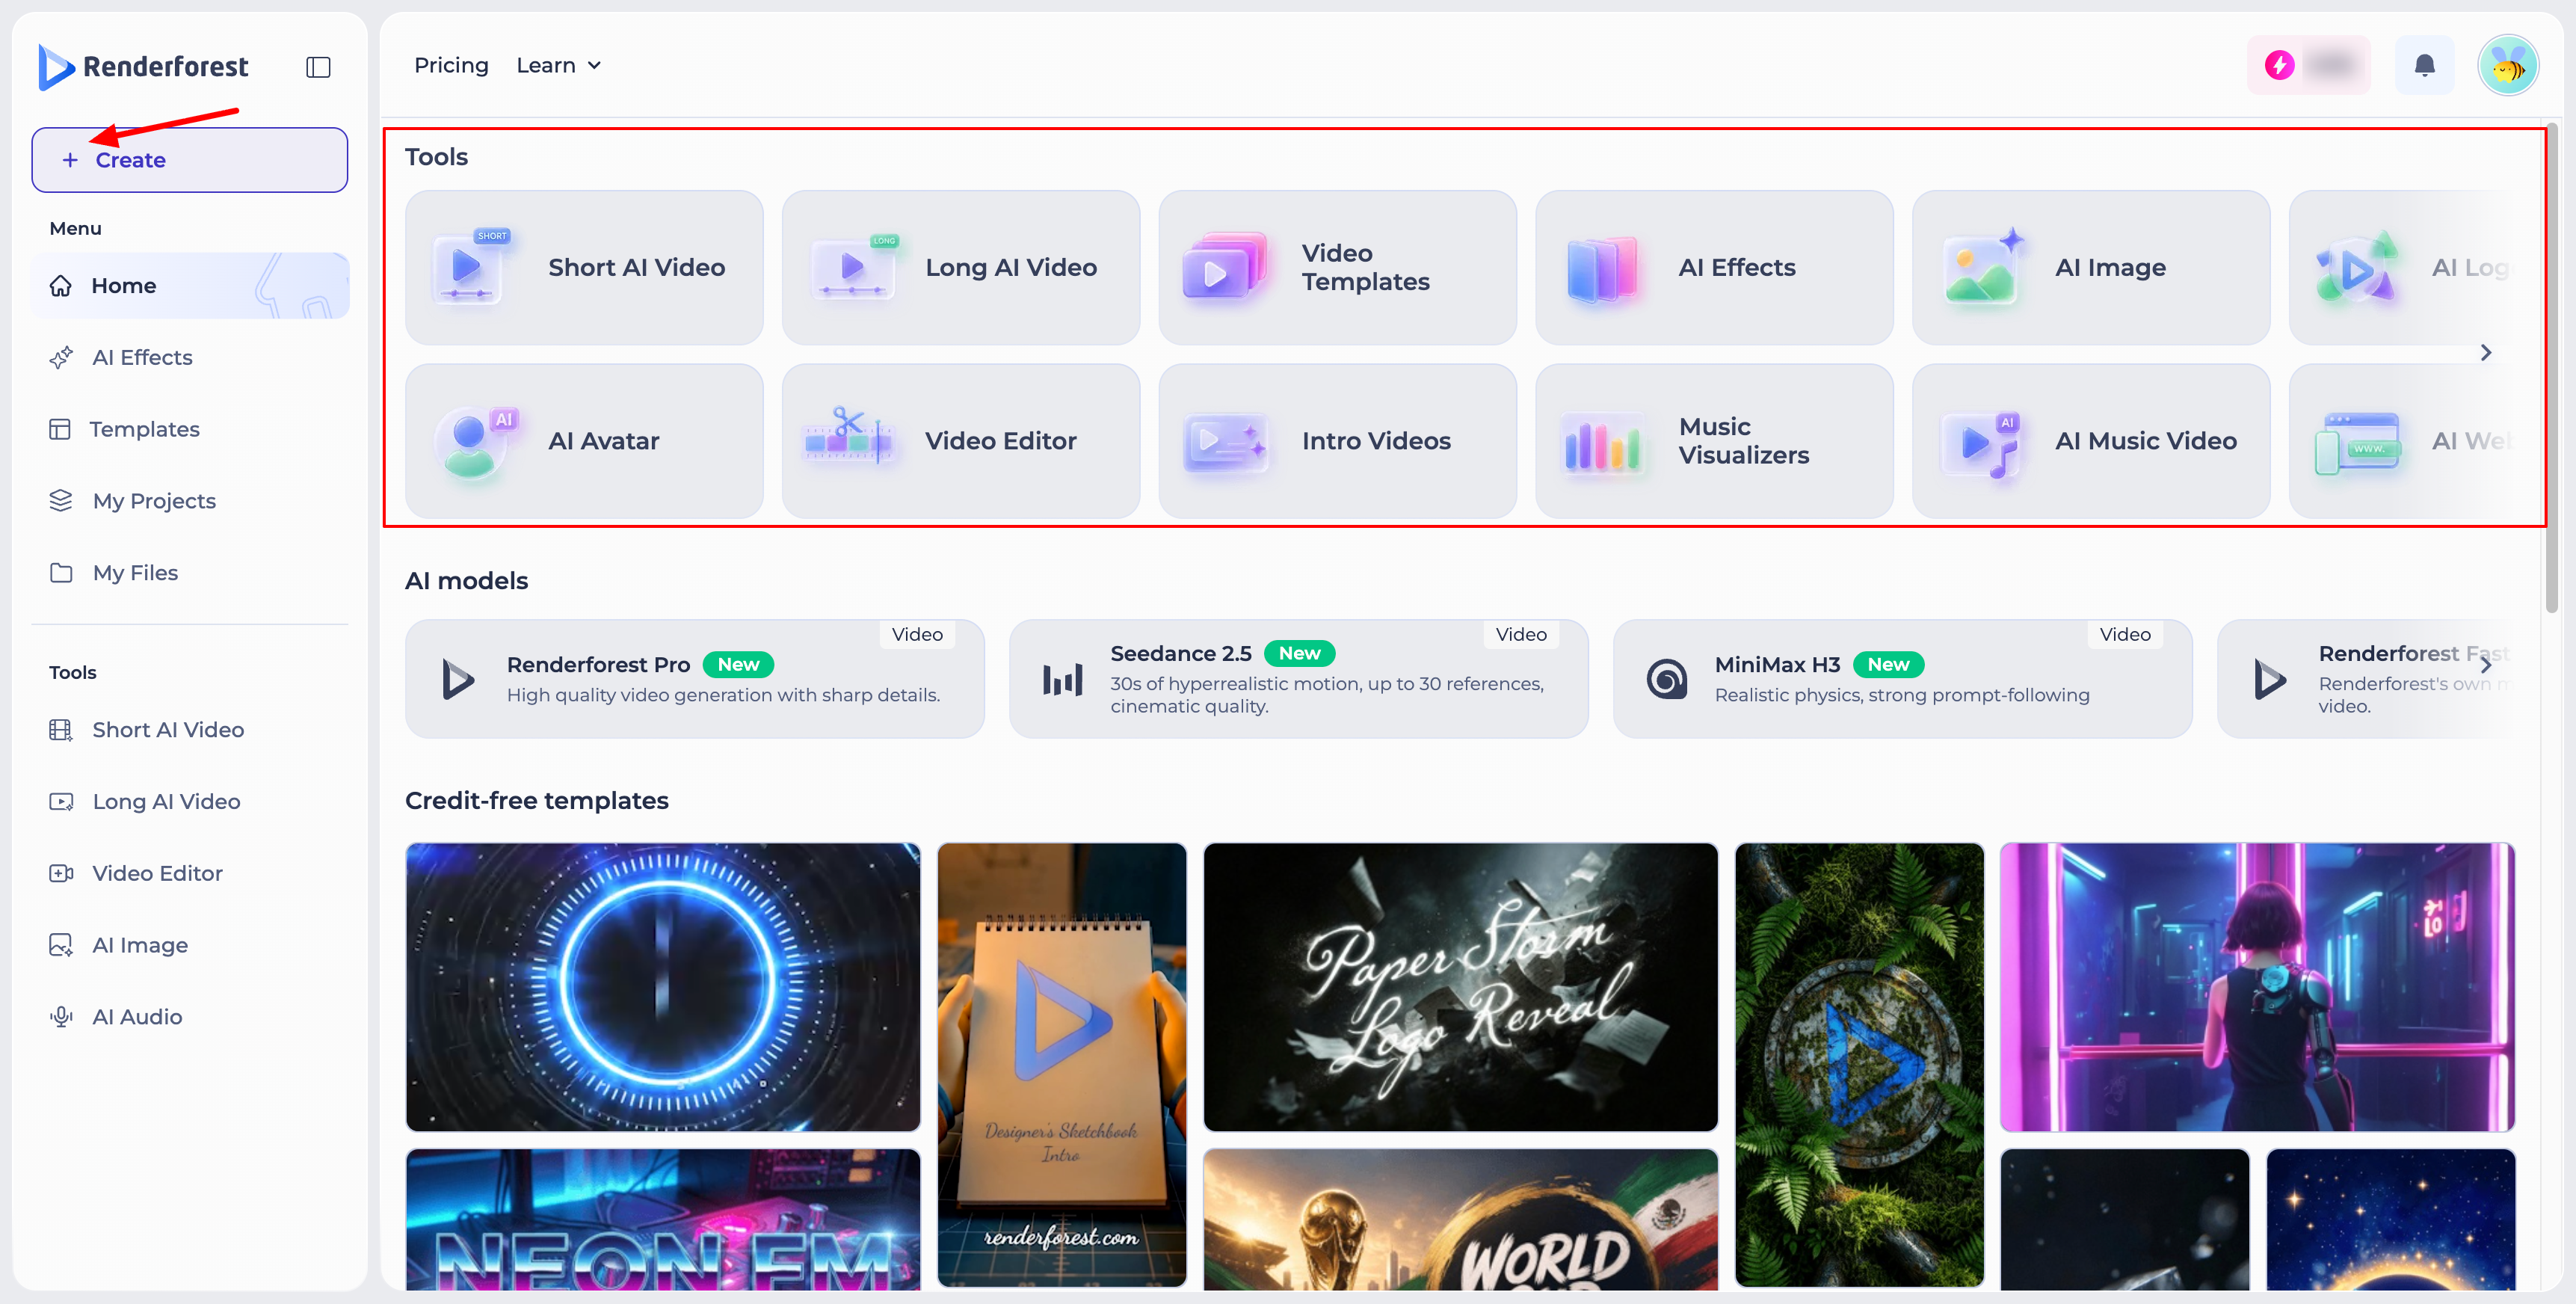
Short AI Video
Short AI Video is built for generating individual clips using a specific AI model.
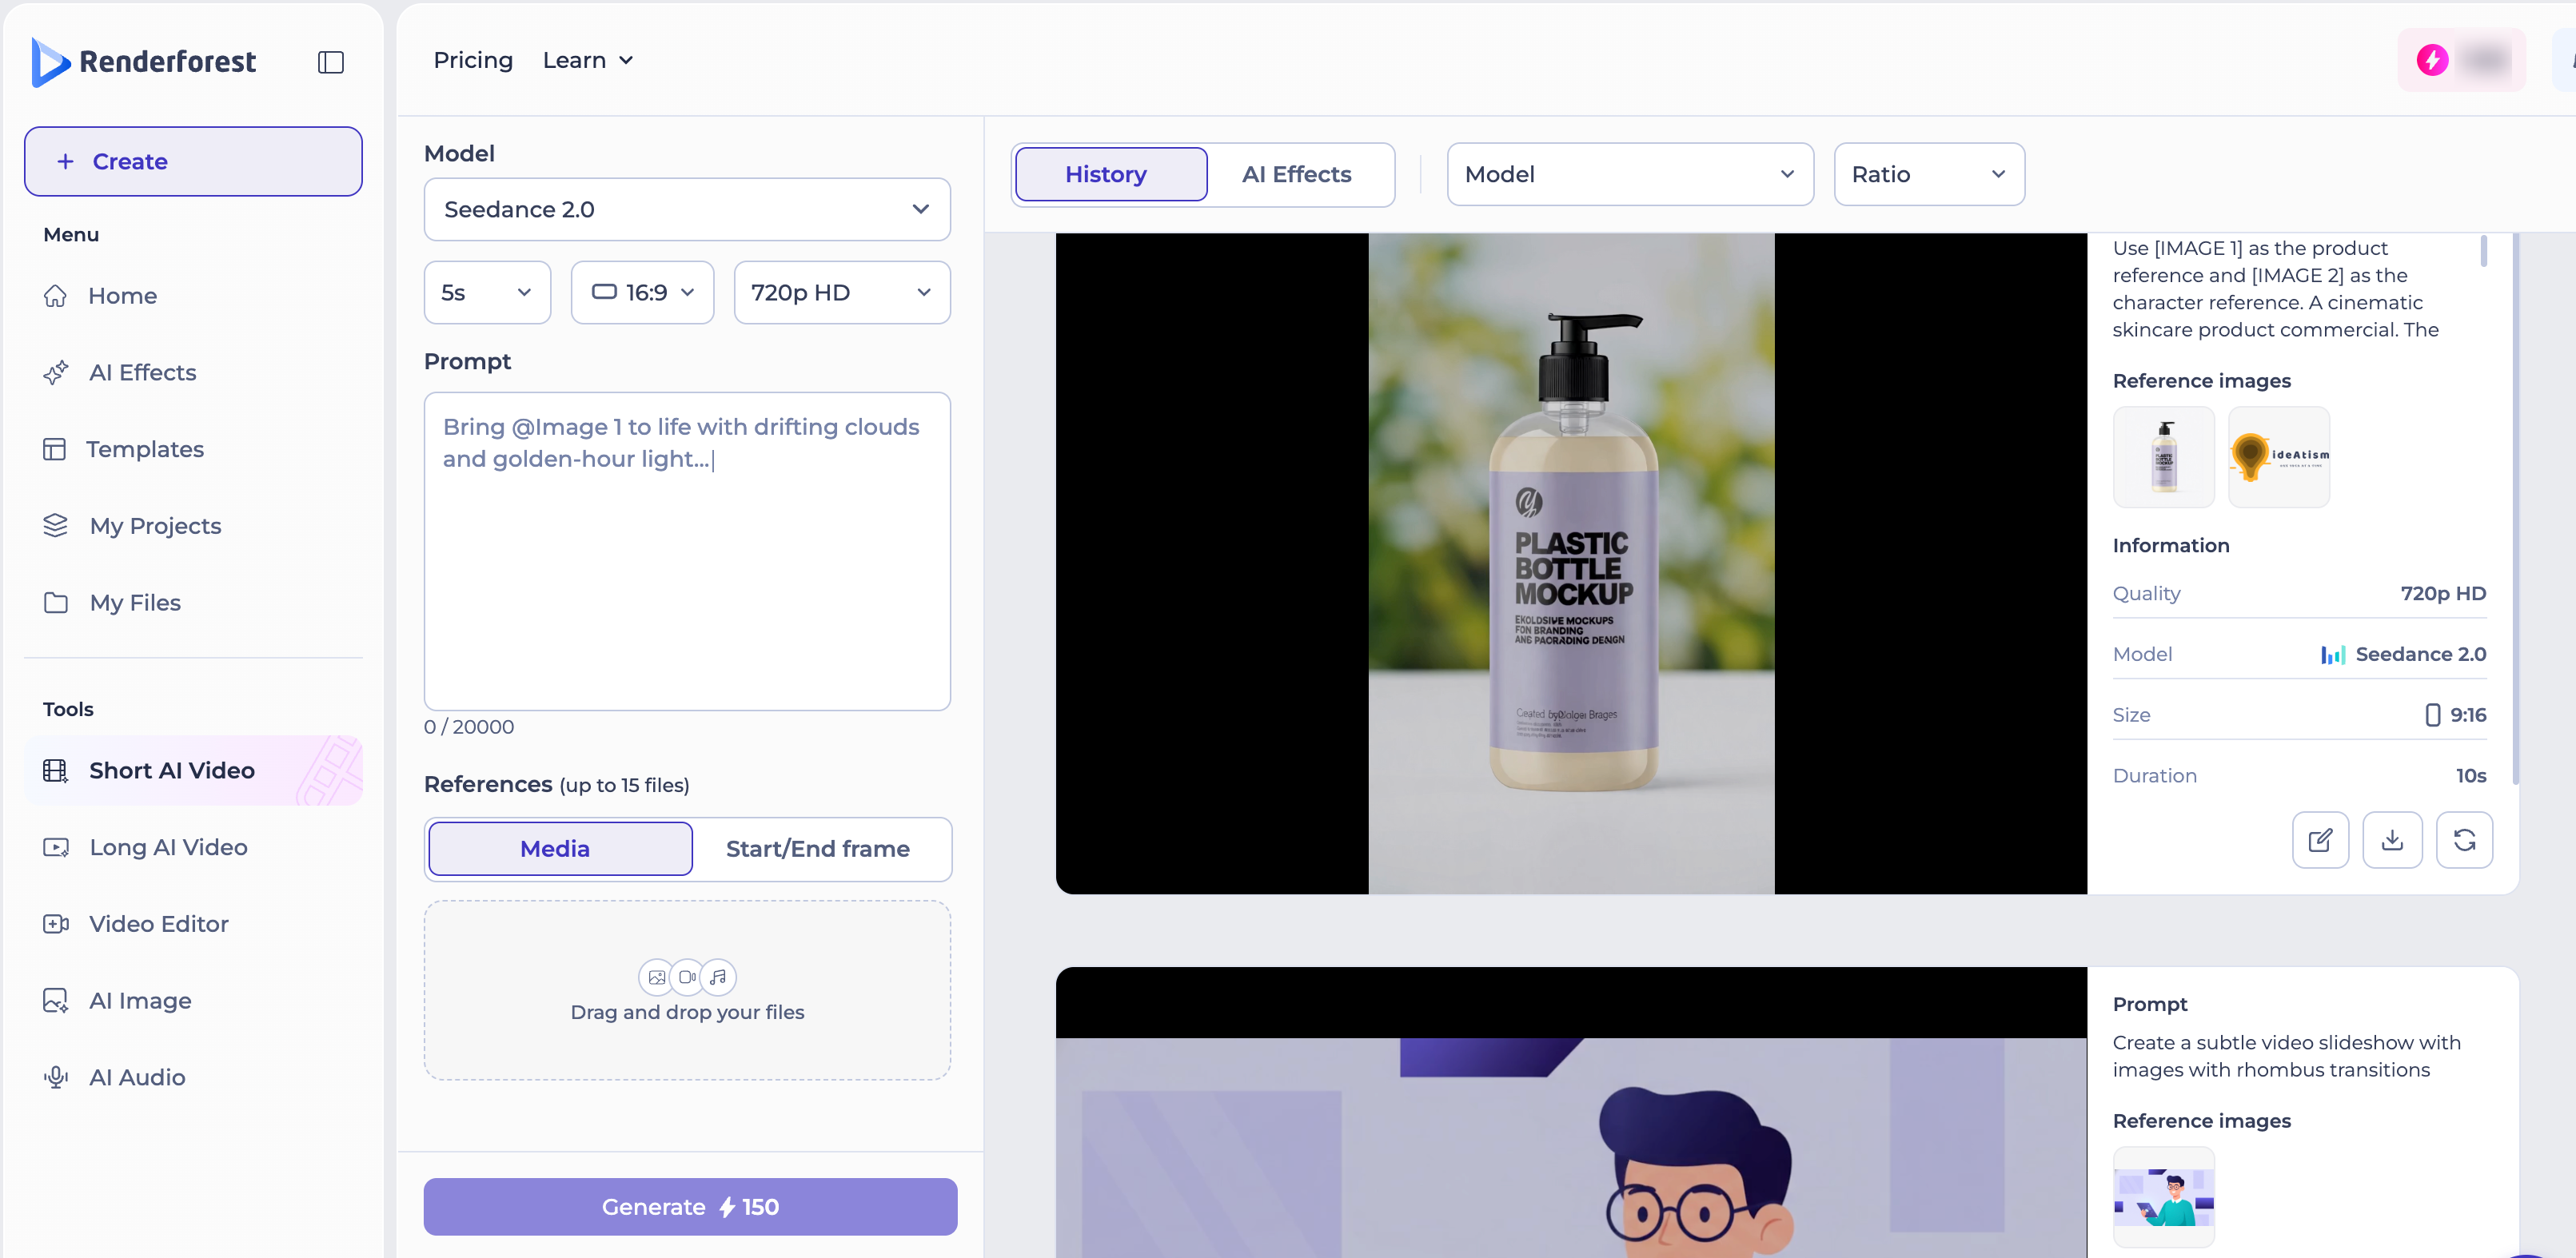
- Choose your Model: select the AI model you want to generate with (e.g., Seedance 2.0), along with your desired duration, aspect ratio, and quality.
- Write your Prompt: describe the video you want. The character limit depends on the model you've selected. You can reference an uploaded image directly in your prompt using "@Image" mentions — for example, "Bring @Image 1 to life with drifting clouds and golden-hour light."
- Add References: switch between "Media" to attach reference images, video, or music, or "Start/End Frame" to set the first and last frame and give the AI a clear visual path from one to the other. The number of reference files you can add, and whether Start/End Frame is available at all, depends on the model you've selected.
- Click "Generate" — the credit cost is shown on the button before you confirm.
Your generated clips appear under the "History" tab, where you can filter by Model or Ratio. Each result shows its prompt, reference images, and generation details (quality, model, size, duration), along with options to edit, download, or regenerate.
Long AI Video
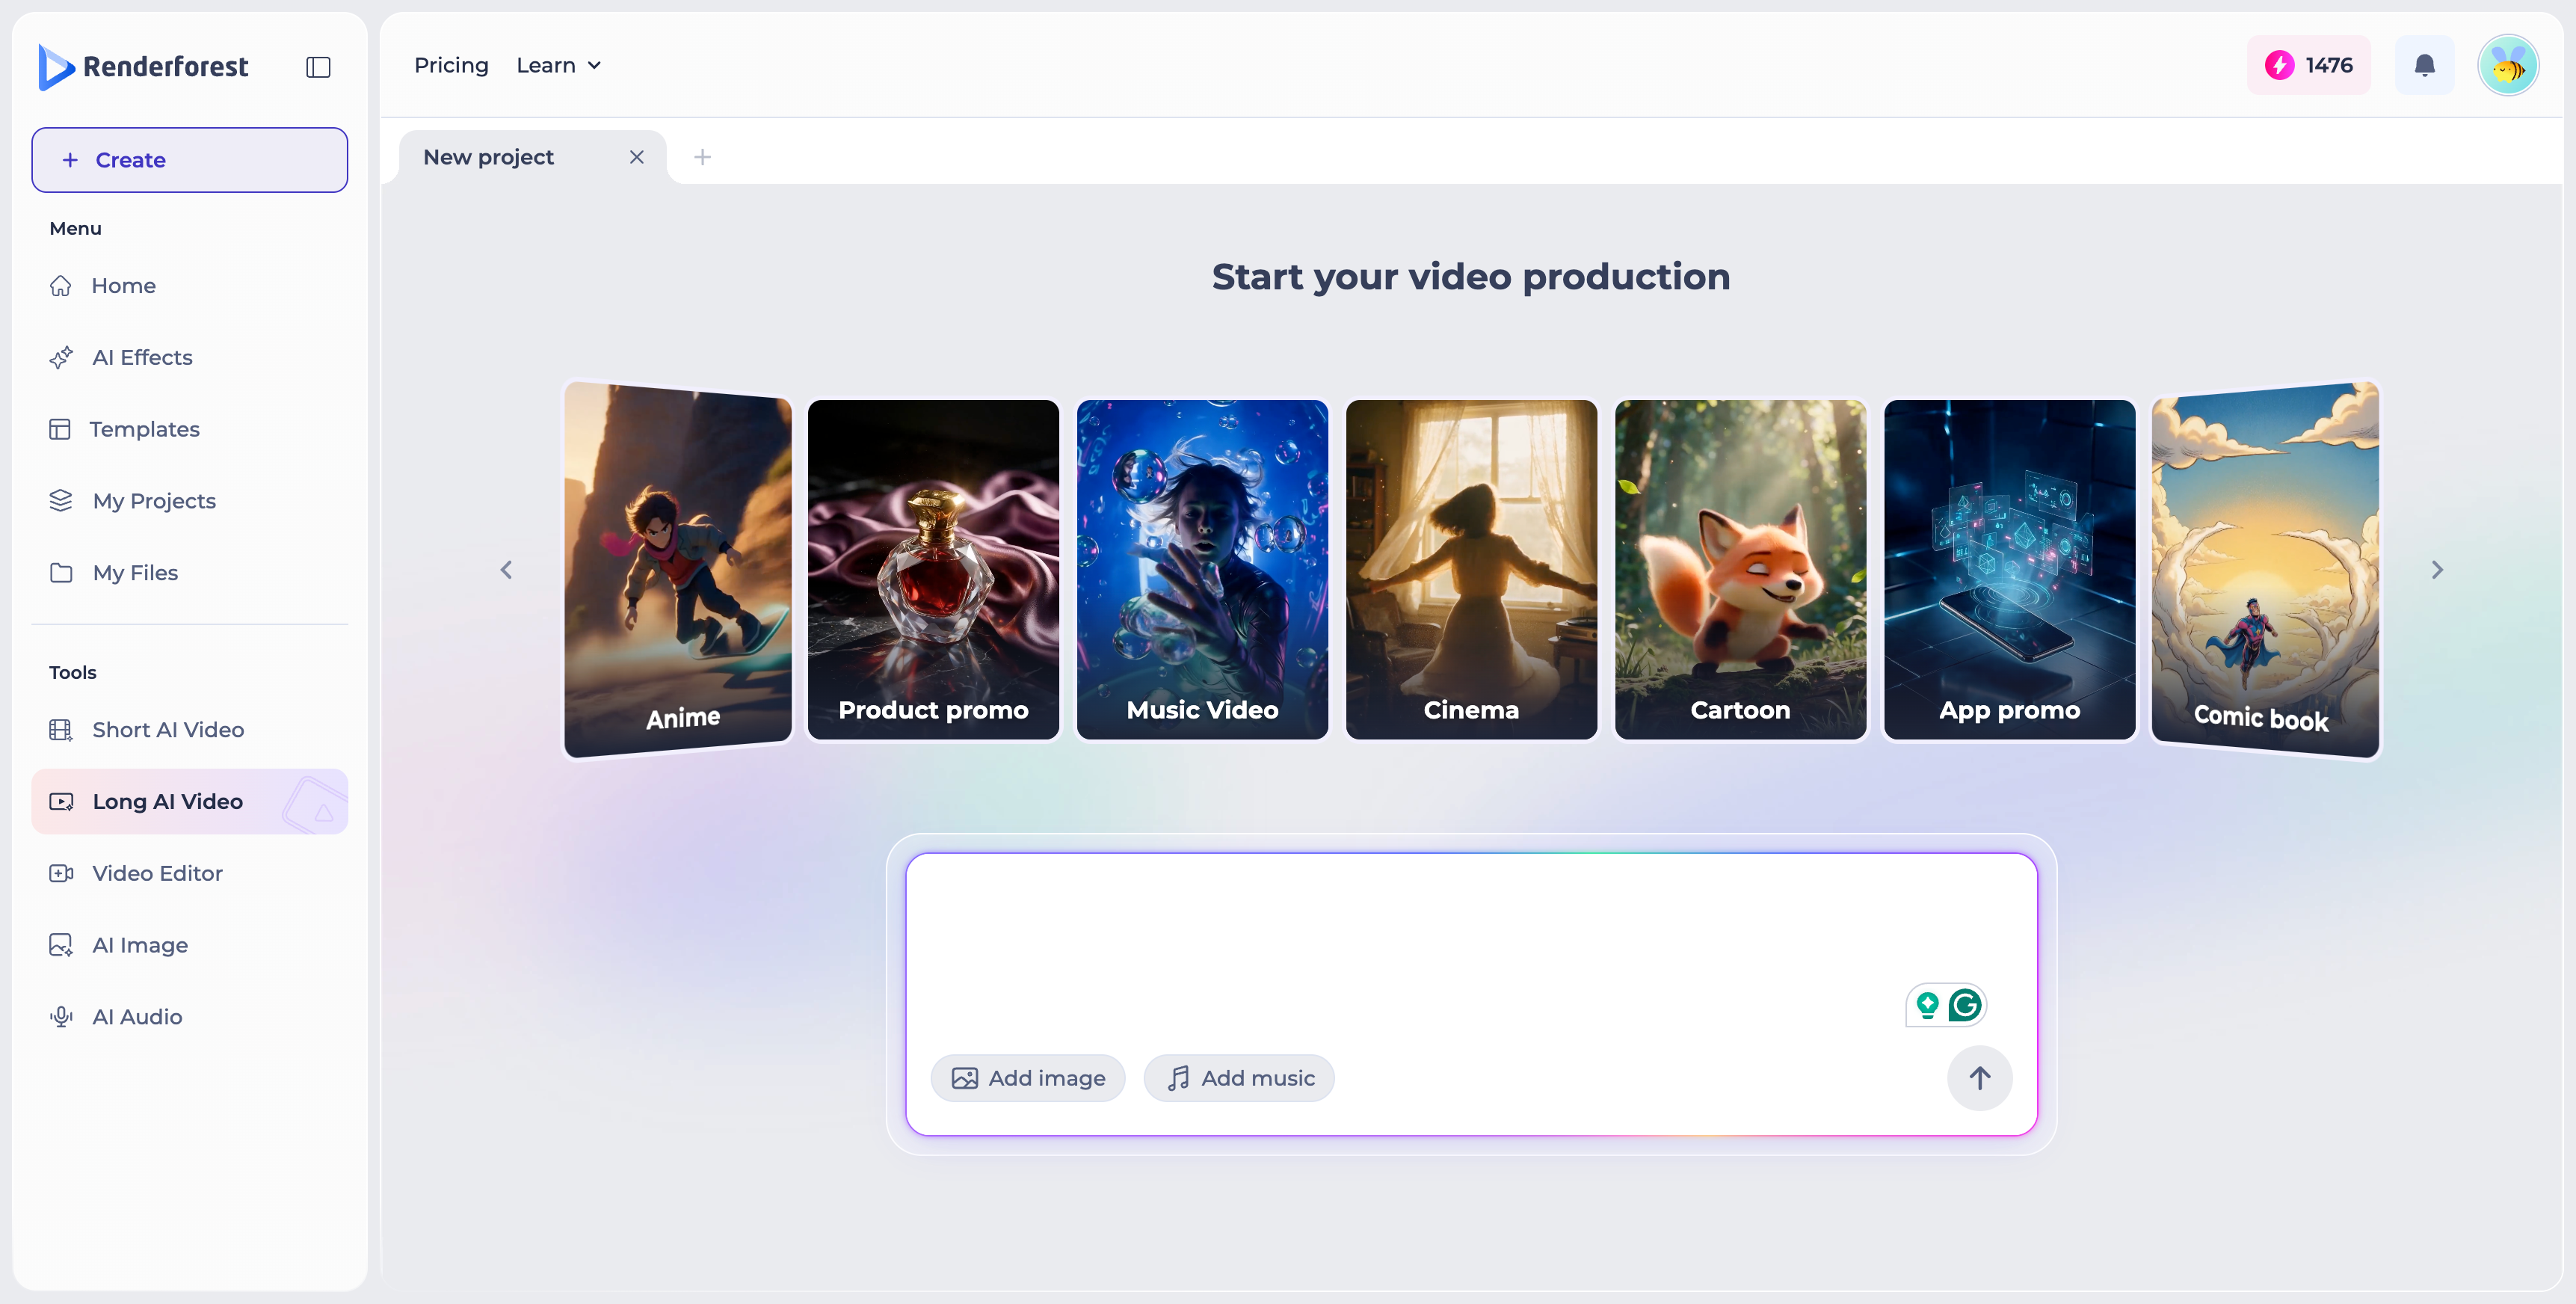
Long AI Video is built for creating a complete, styled video with multiple scenes and a voiceover.
- Choose your Video Type & Style: pick a category — Whiteboard Animation, Anime, Product Promo, Cinema, Cartoon, App Promo, Comic Book, and more — then select a specific visual sub-style within it (for example, "Classic (Whiteboard)").
- Set your generation options: choose your AI model (e.g., Renderforest Pro) and quality (e.g., 720p HD), then pick an aspect ratio (16:9 or 9:16) and set your video's duration using the slider.
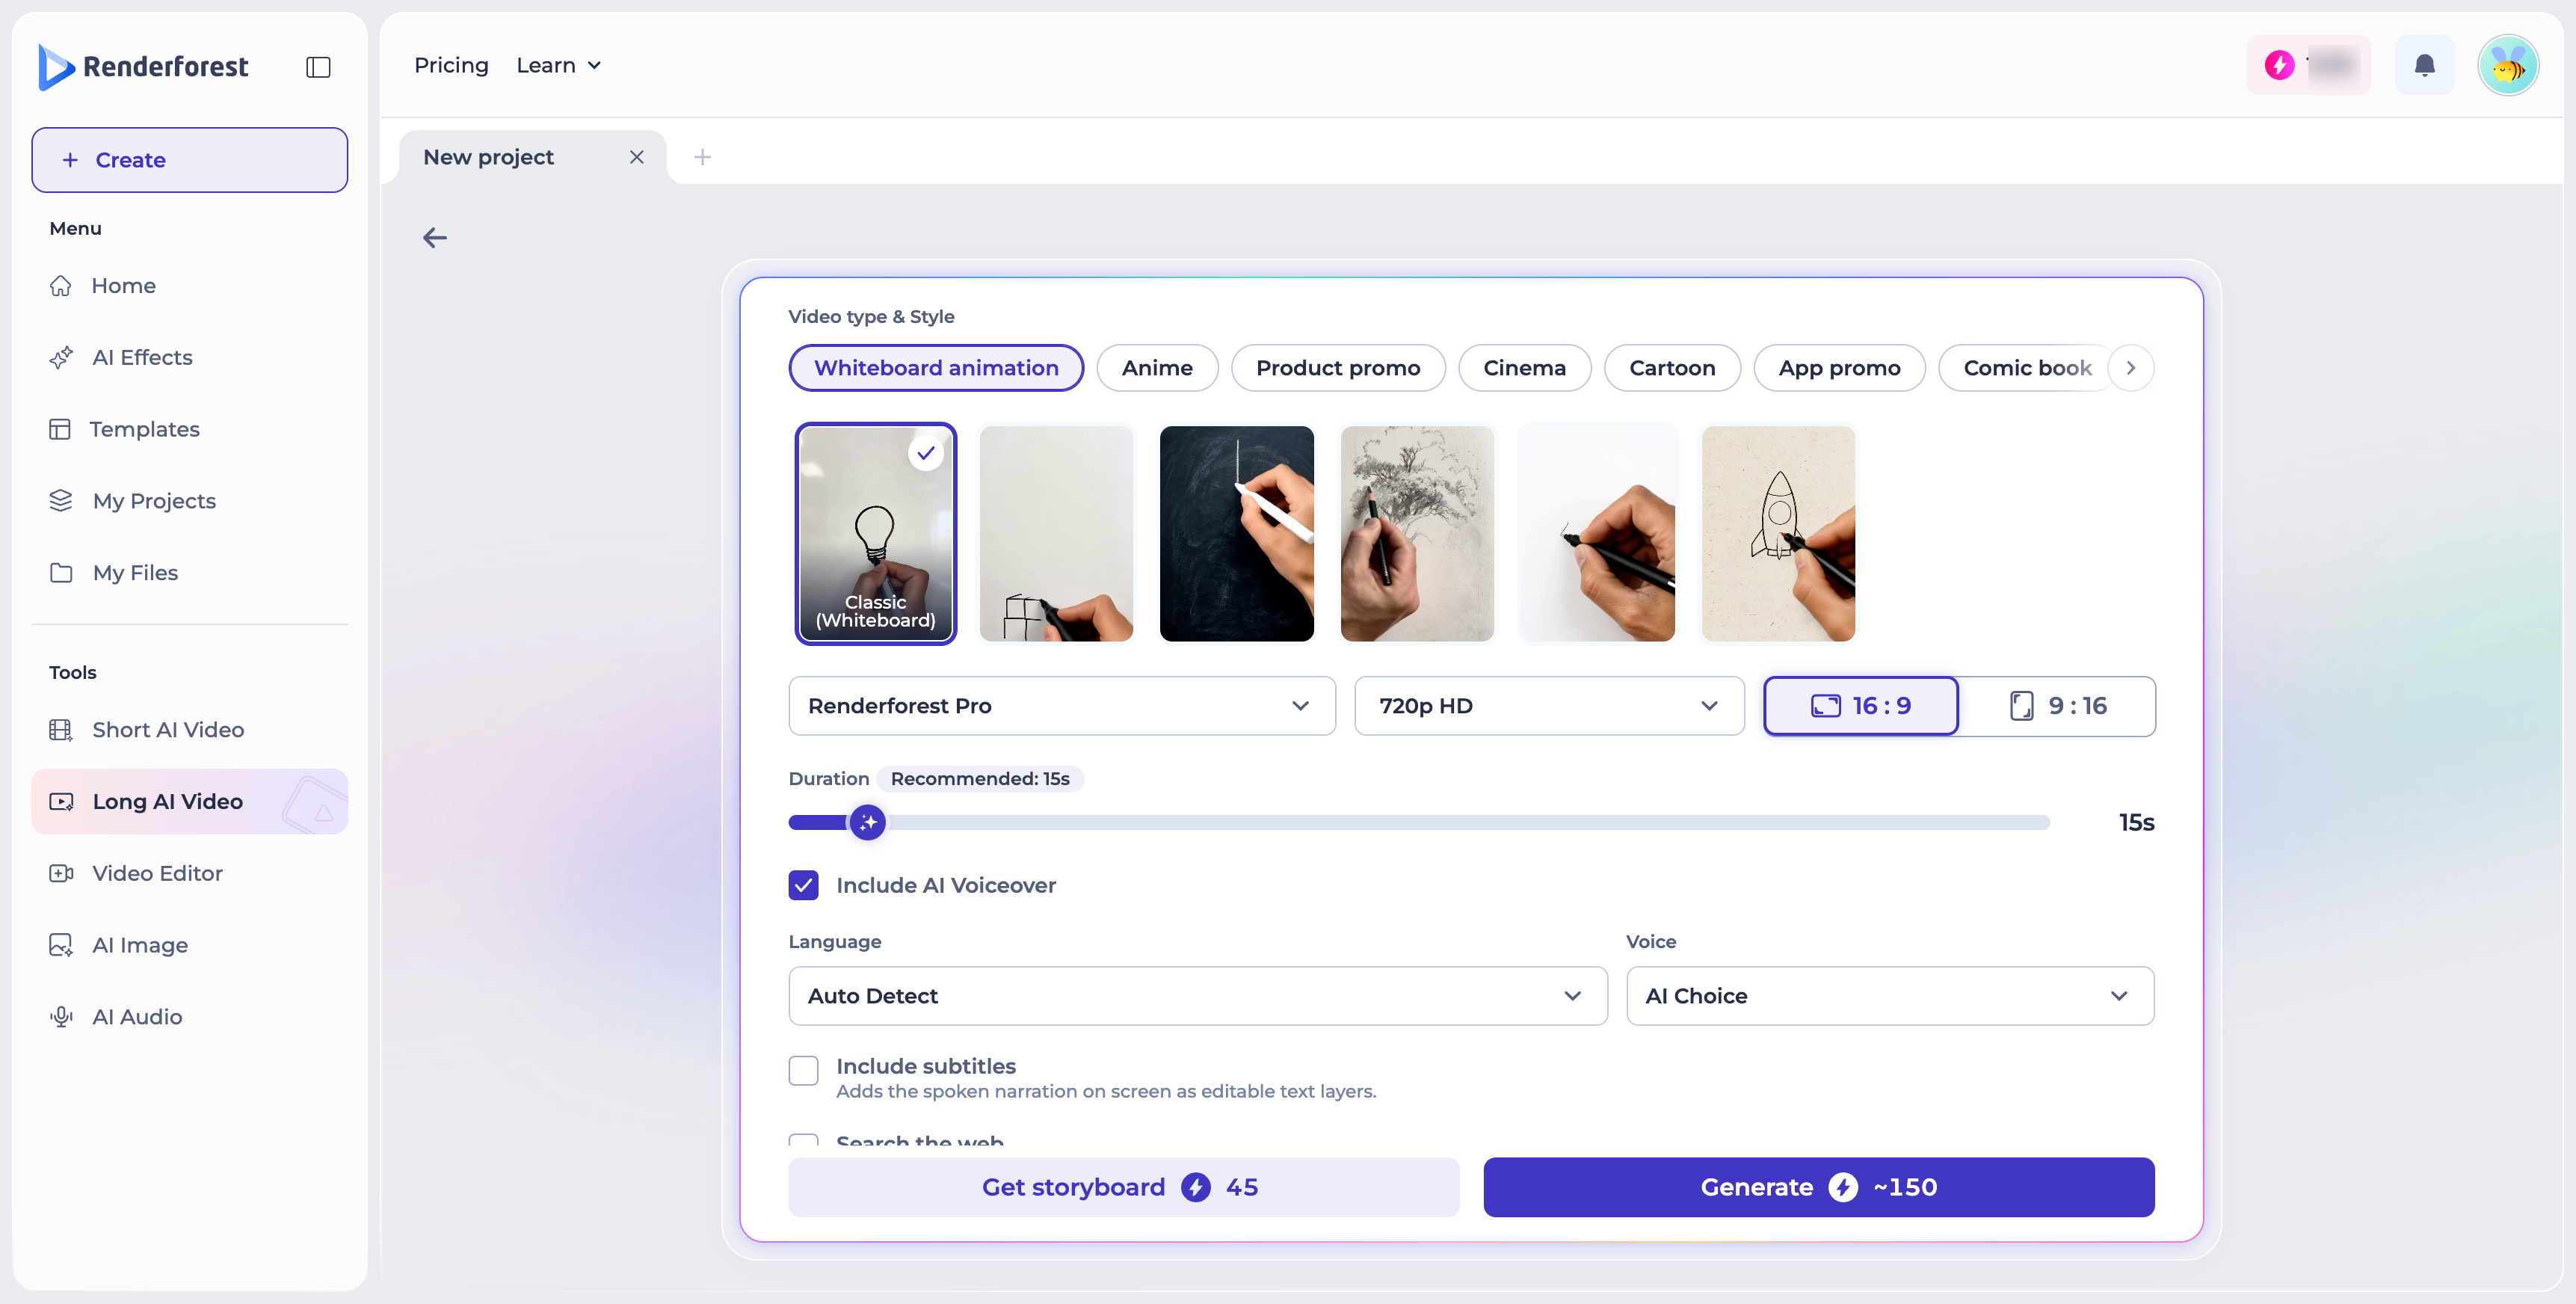
- Configure the voiceover: with "Include AI Voiceover" checked, choose a language (or leave it on "Auto Detect") and a voice (or leave it on "AI Choice").
- Optional extras: check "Include subtitles" to add the spoken narration on screen as editable text layers, or "Search the web" to let the AI pull in relevant information while generating.
- Click "Get Storyboard" to preview your scene breakdown before committing more credits, or click "Generate" to create the full video directly — each button shows its credit cost.
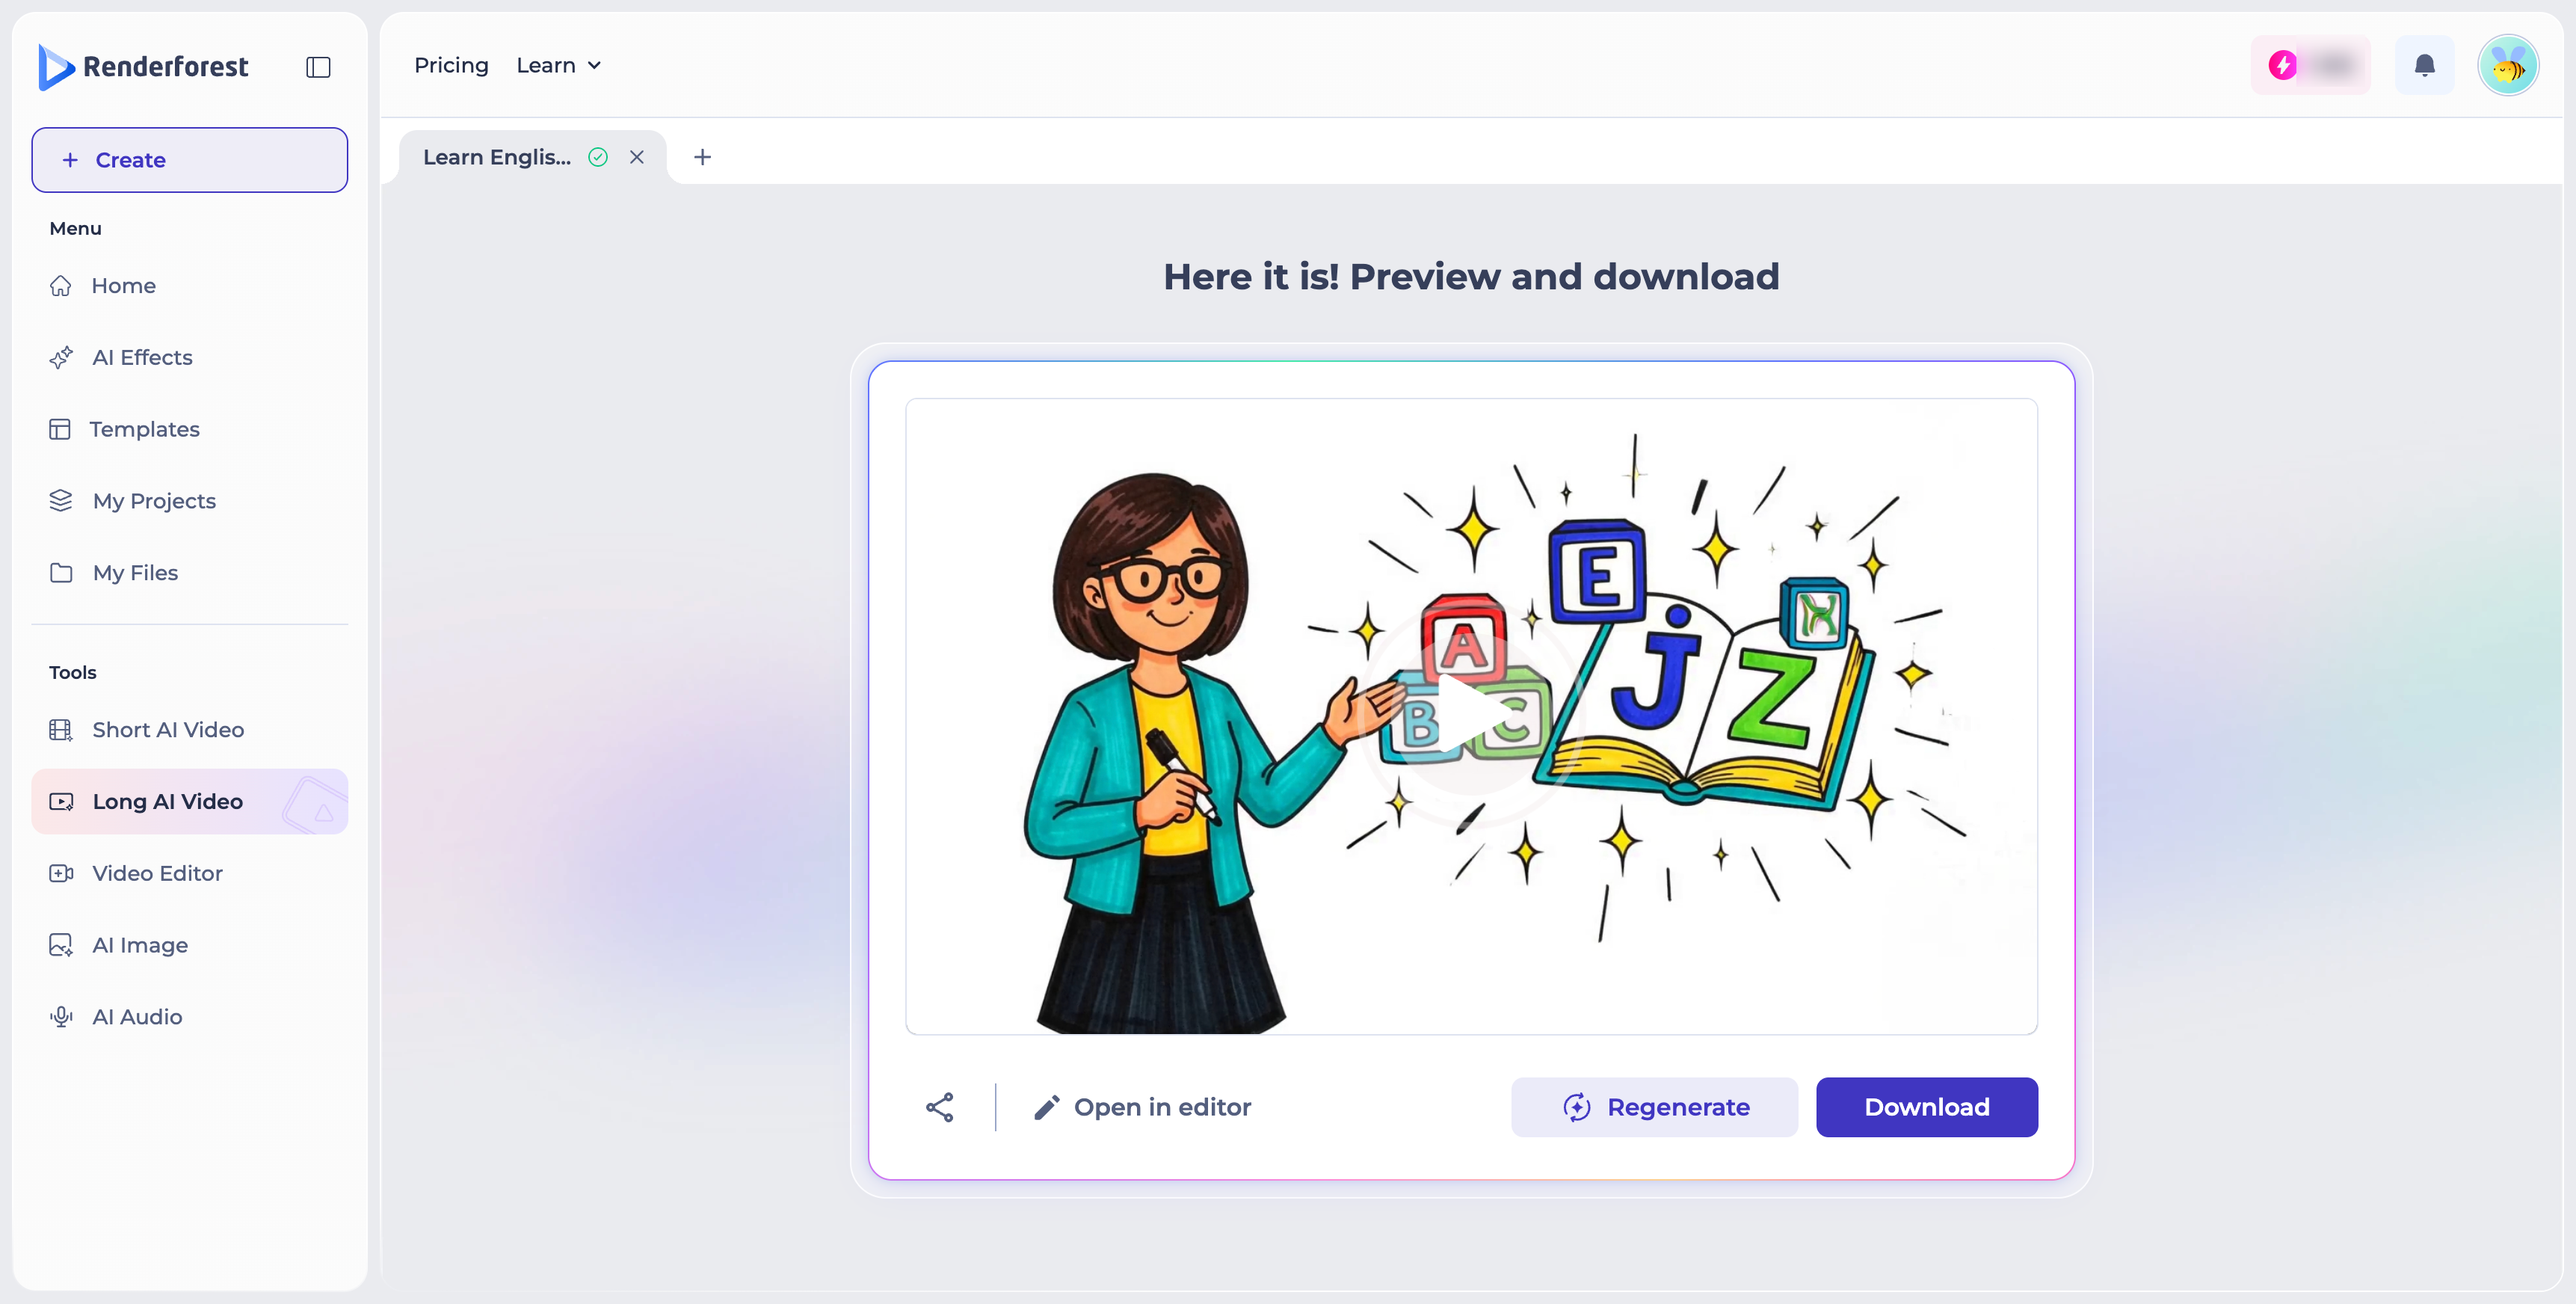
Once your video is ready, you'll land on a preview and download screen, where you can share it, open it in the full editor, regenerate it, or download it.
Editing and Exporting
Selecting "Open in Editor" takes you into the full AI video editor, where you can refine your project scene by scene. The left-hand toolbar gives you access to AI Video, AI Image, AI Avatar, Audio, Text to Speech, Text, Uploads, and your AI History.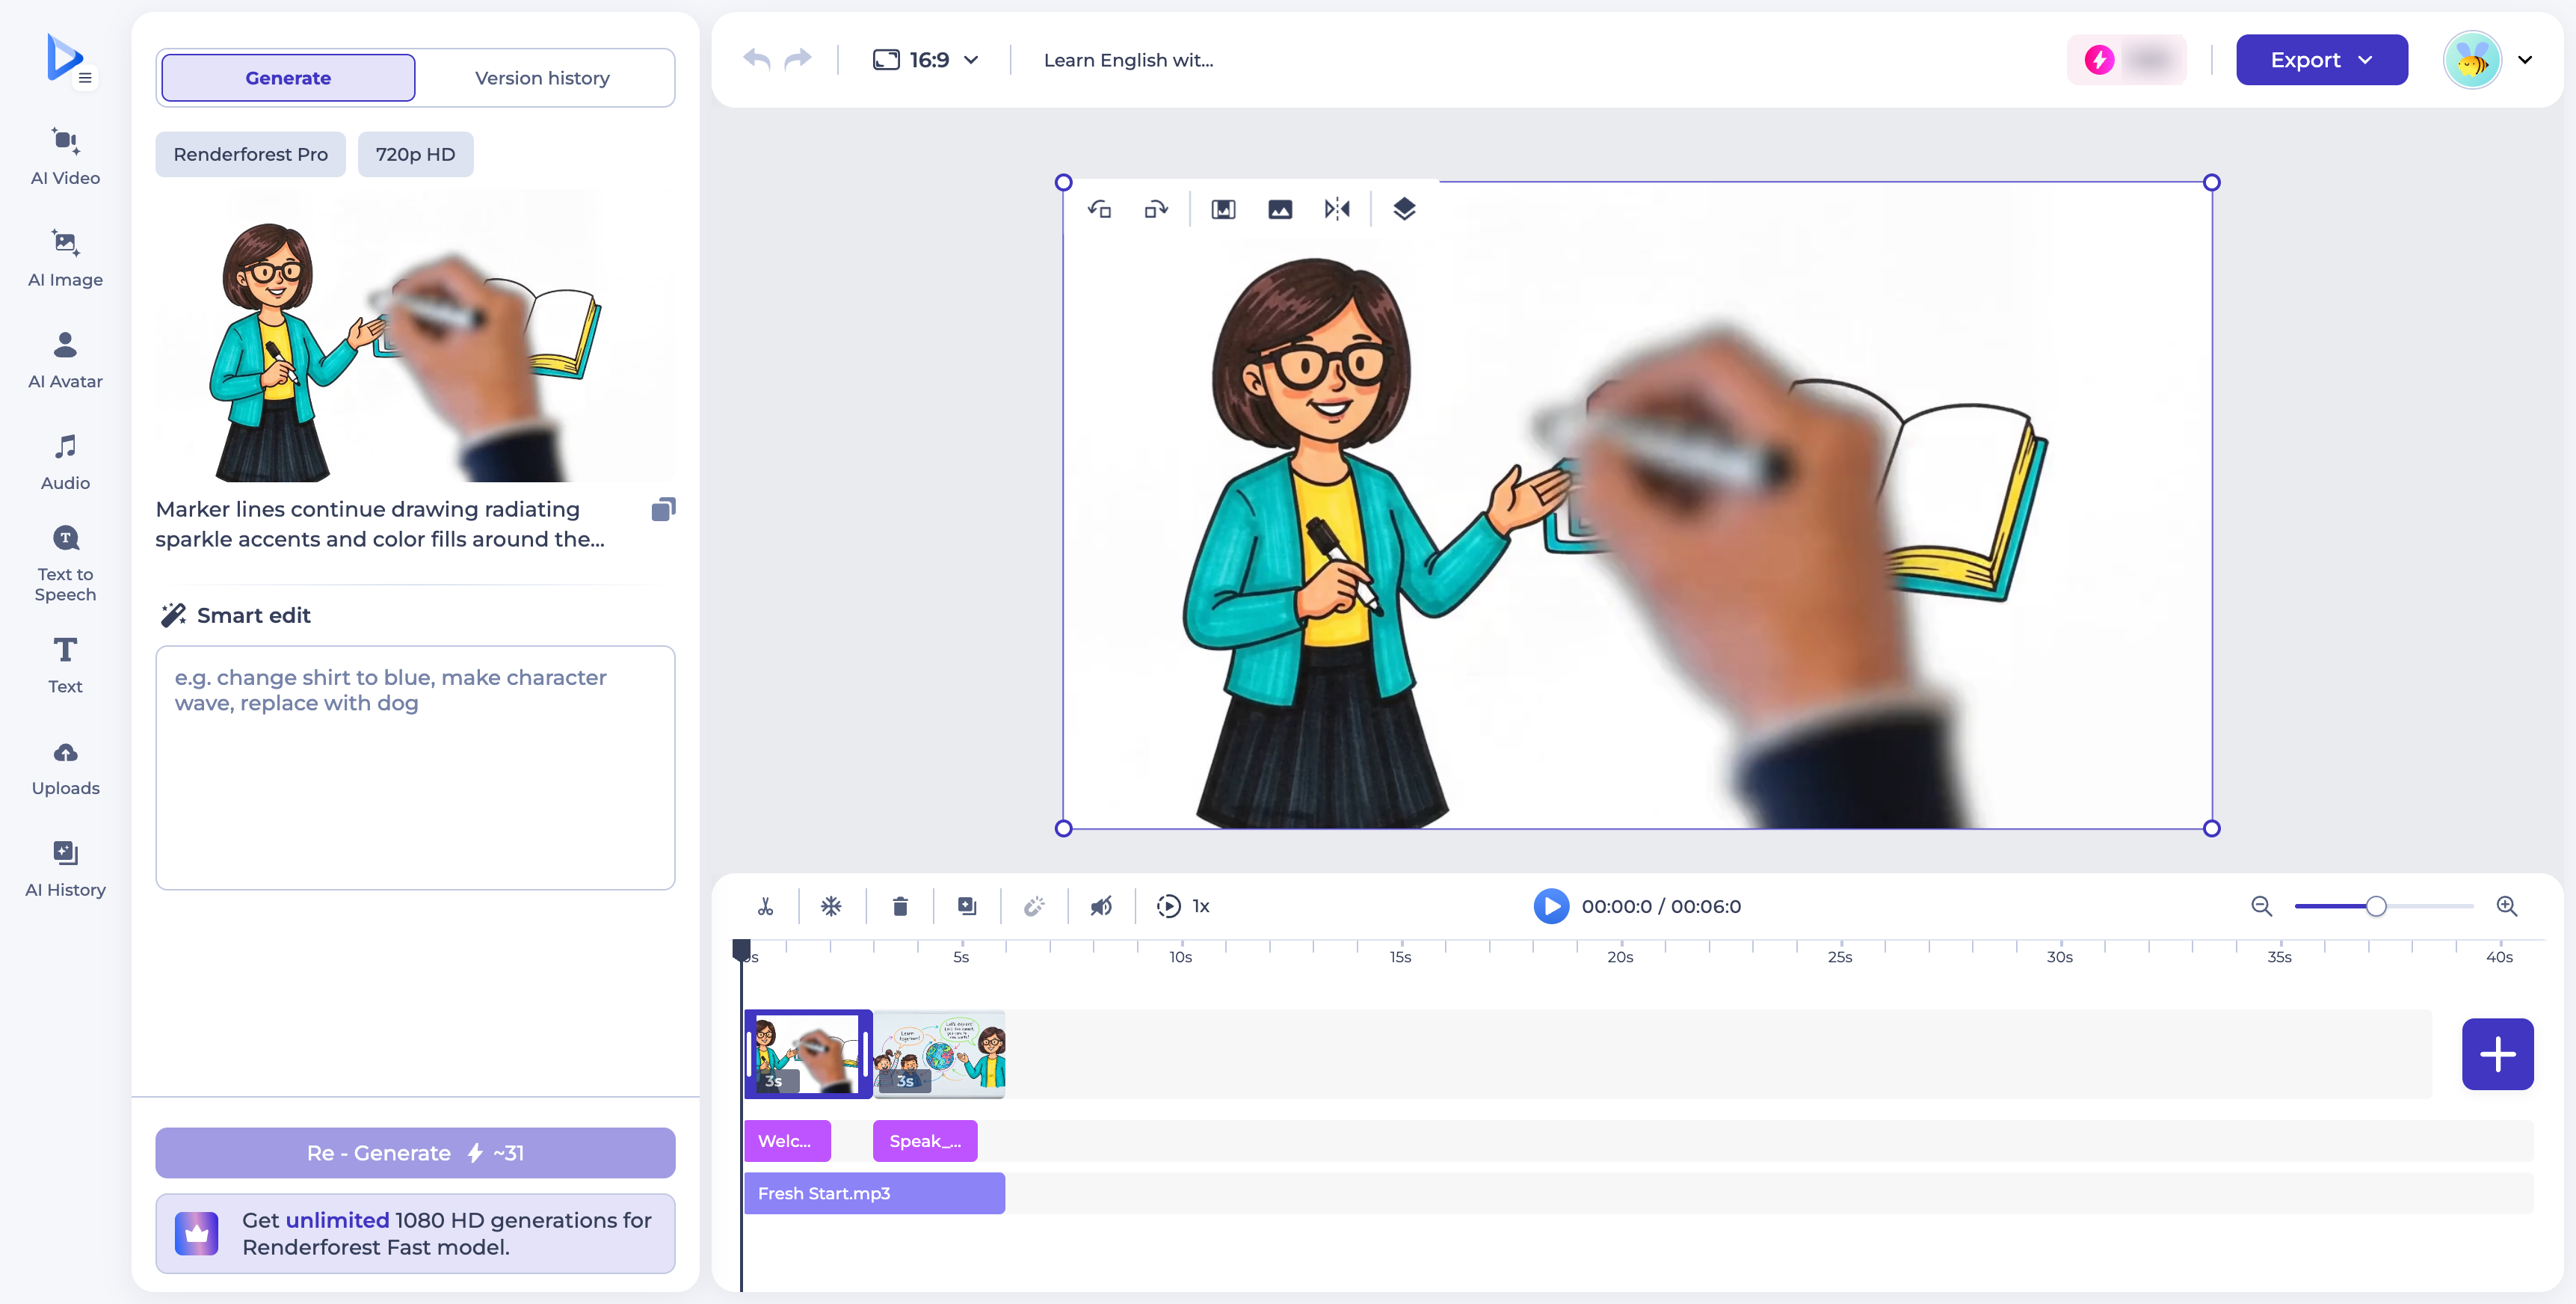
For any scene, use "Smart Edit" to describe a change in plain language (for example, "change shirt to blue" or "replace with dog") and click "Re-Generate" to apply it — the credit cost is shown on the button. The timeline below lets you trim, duplicate, delete, and reorder scenes, and manage your audio layers, just as in the standard Video Maker editor.
Once you're happy with the result, use "Export" to render and download your final video.
Was this article helpful?
That’s Great!
Thank you for your feedback
Sorry! We couldn't be helpful
Thank you for your feedback
Feedback sent
We appreciate your effort and will try to fix the article