Table of Contents
- Overview
- Step 1: Start a New AI Video
- Step 2: Select the Renderforest Fast Model
- Step 3: Set Your Video Duration
- Step 4: Choose Your Aspect Ratio
- Step 5: Choose Your Quality/Resolution
- Step 6: Turn Off Power Mode
- Step 7: Add Your Reference Image (Optional)
- Step 8: Generate
Overview
Renderforest lets you generate AI videos completely free of charge by using the Renderforest Fast model instead of premium models like Renderforest Pro, Kling, Seedance, etc. Follow the steps below to generate videos without spending any credits.
? Note: This free/unlimited generation option is available only for Pro and Business plan subscribers.
Step 1: Start a New AI Video
From the Home page, go to Create → Video Editor (or select Video Editor from the sidebar). This will open the editor where you can proceed with the next steps.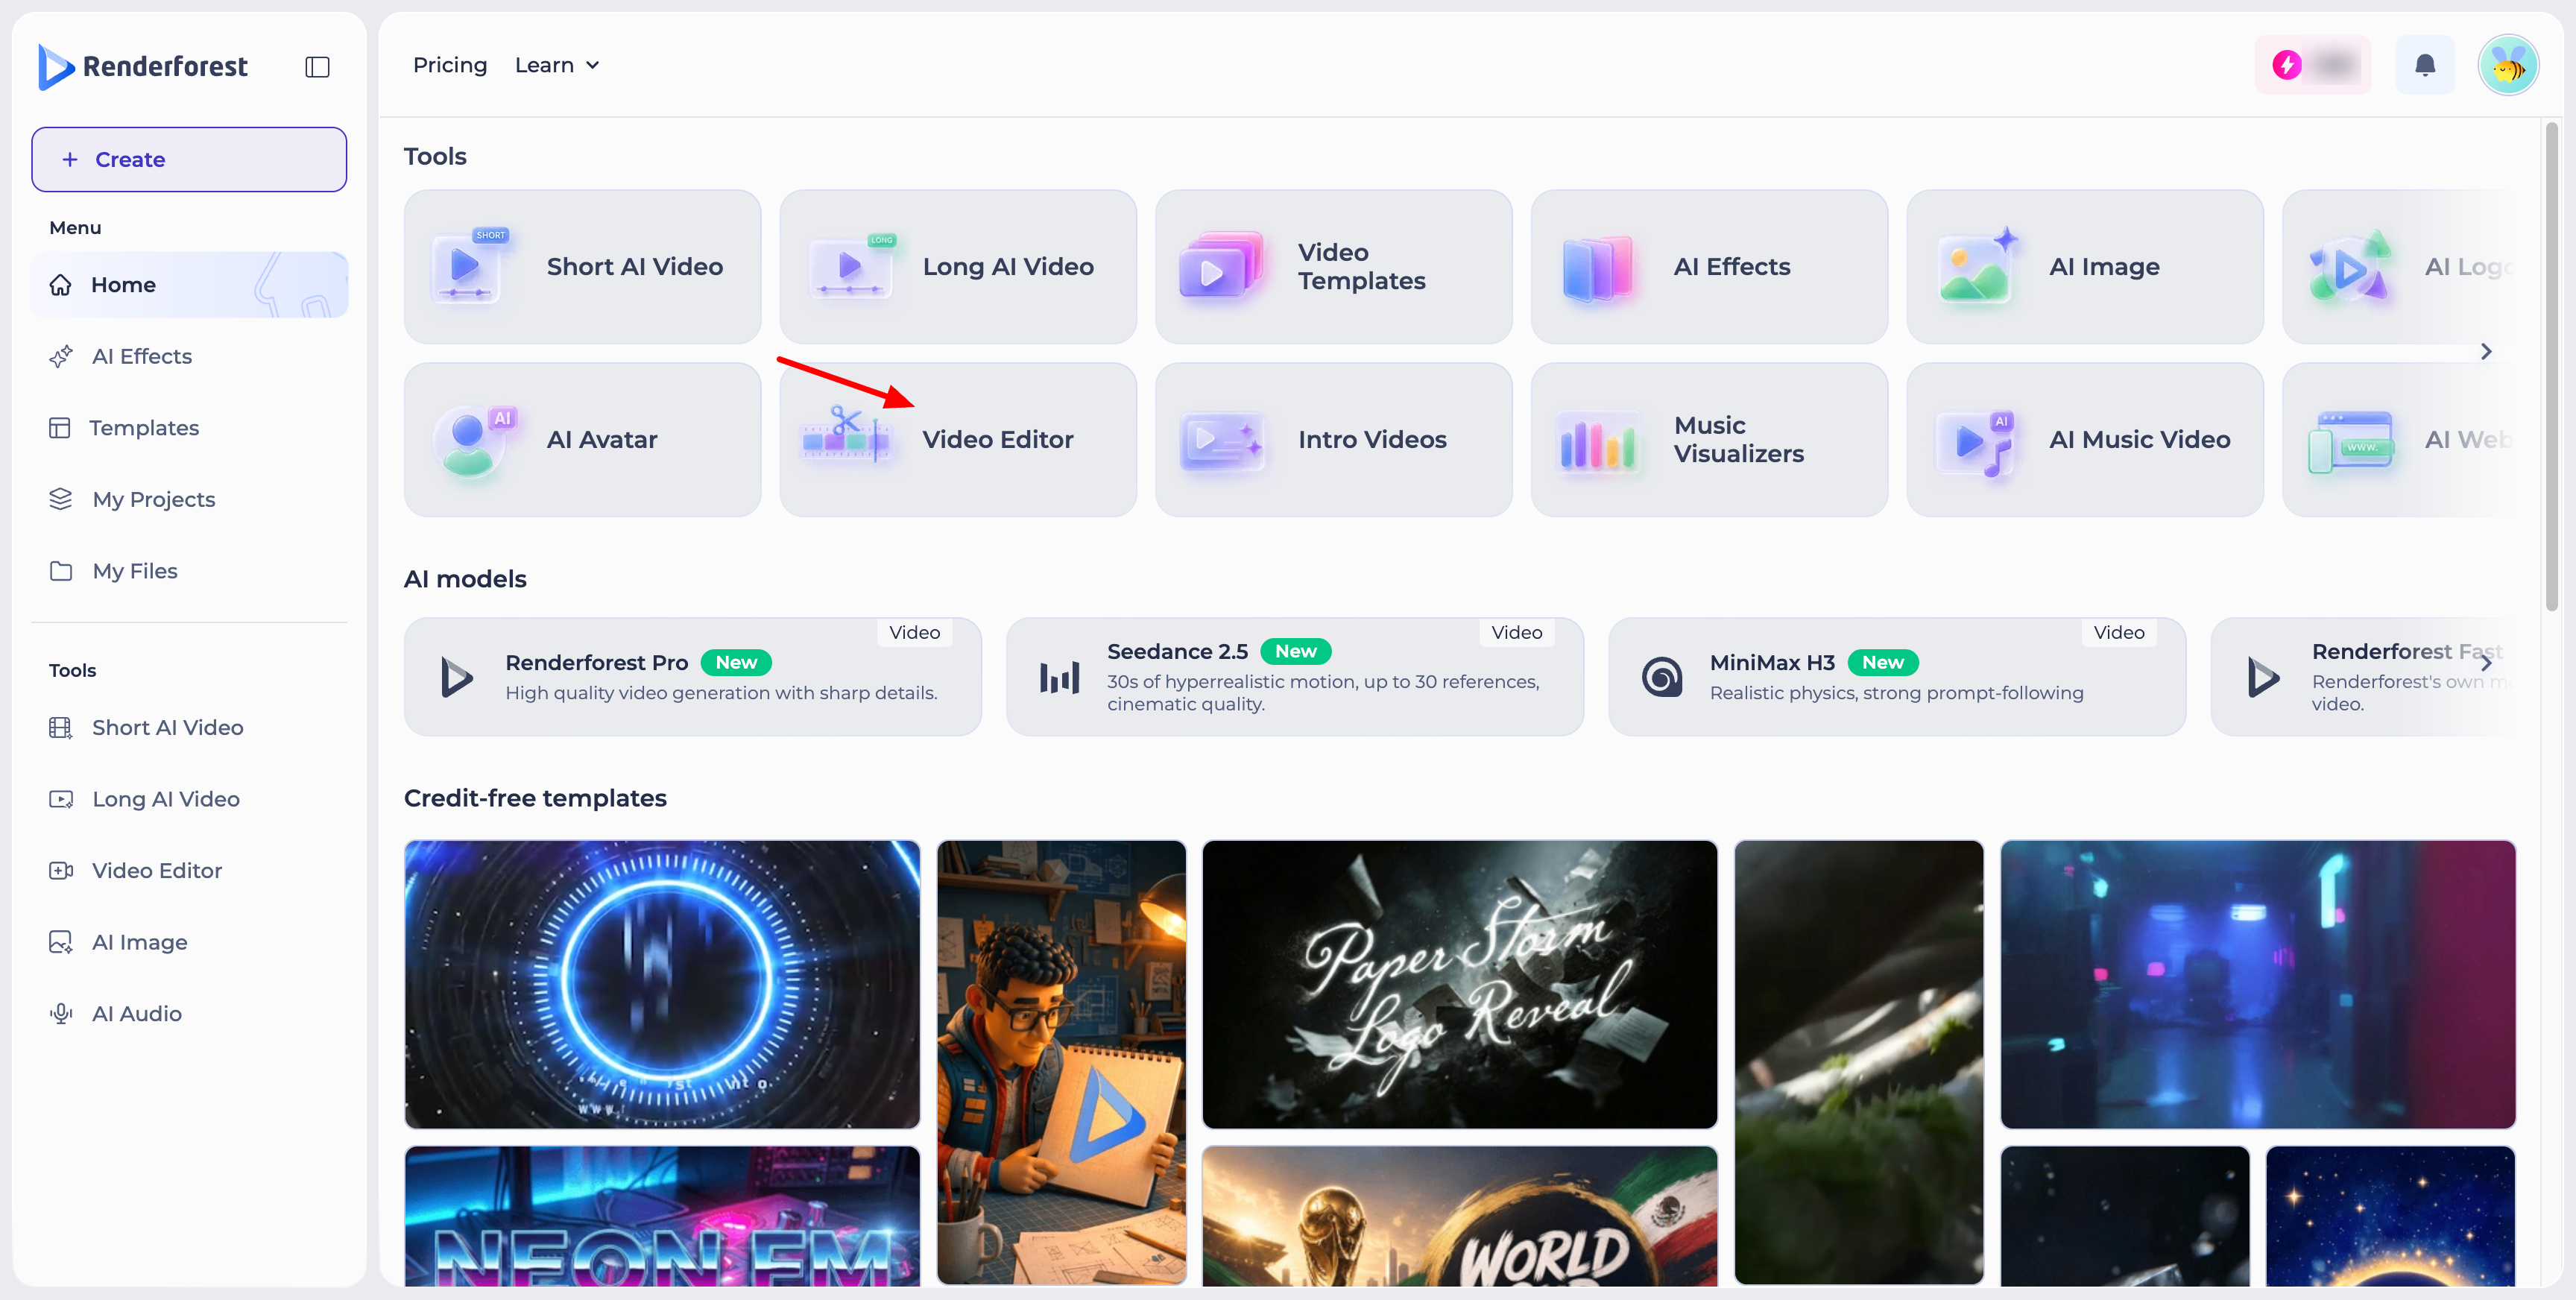
Step 2: Select the Renderforest Fast Model
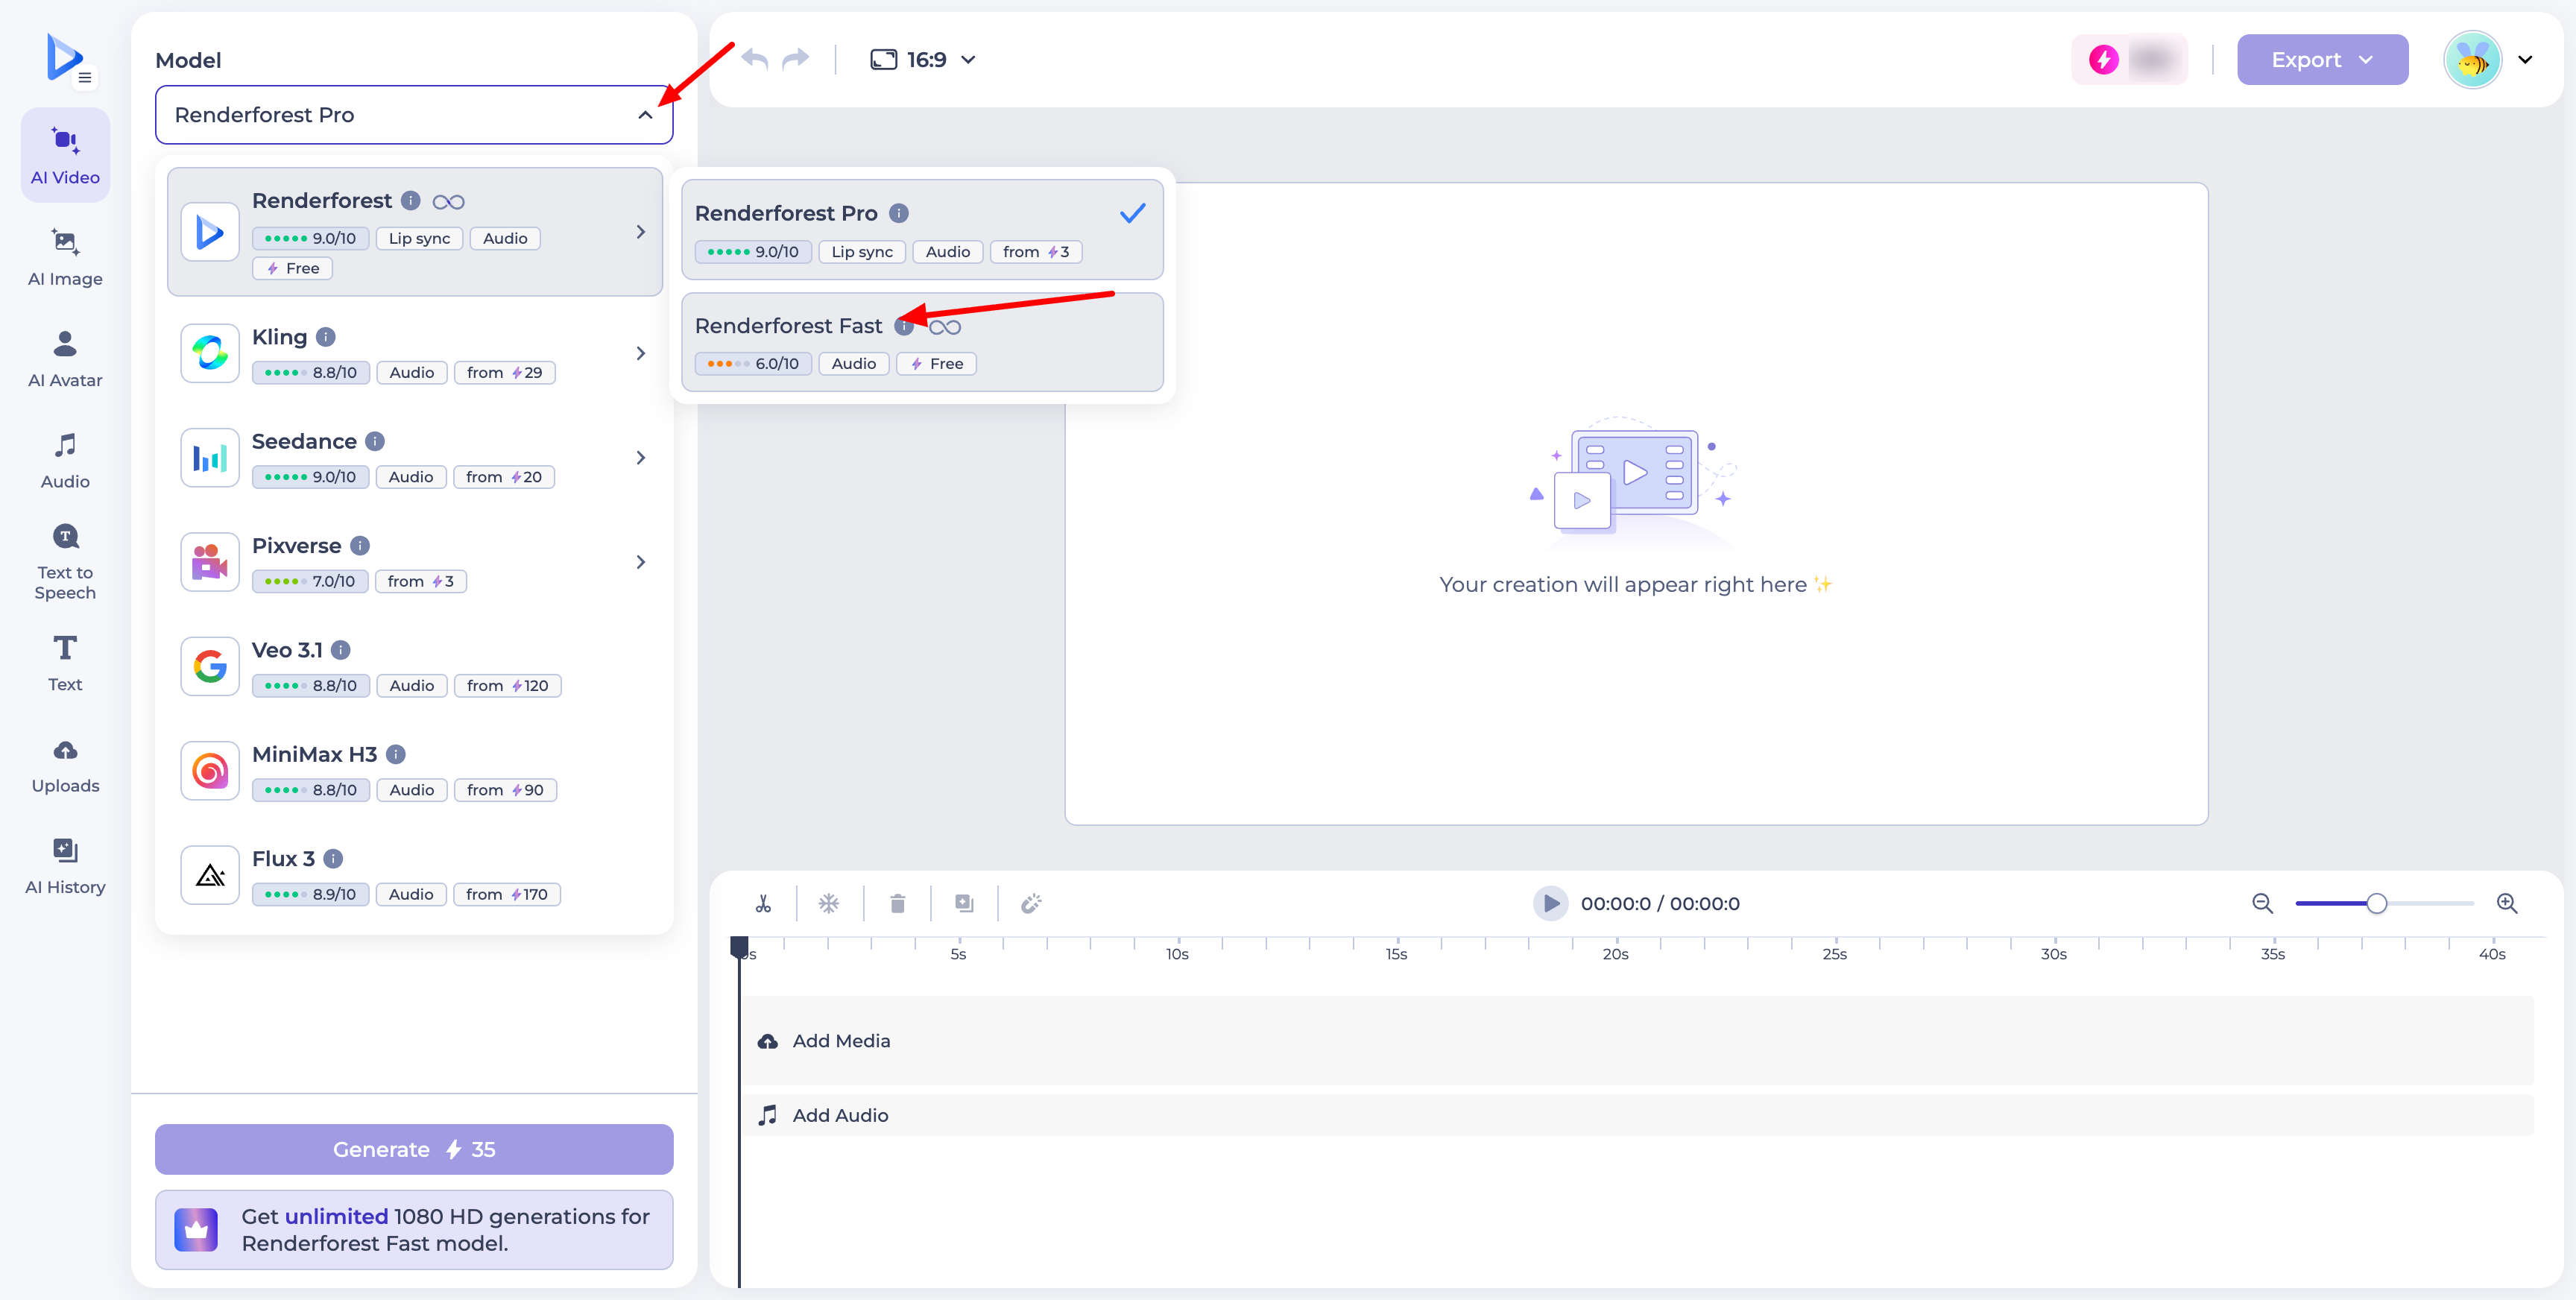
In the Model dropdown, choose Renderforest Fast. You'll notice it's marked with an infinity (∞) icon and labeled "Free" — this means unlimited generations at no credit cost, unlike other models (Renderforest Pro, Kling, Seedance, etc.) which consume credits per generation.
 Step 3: Set Your Video Duration
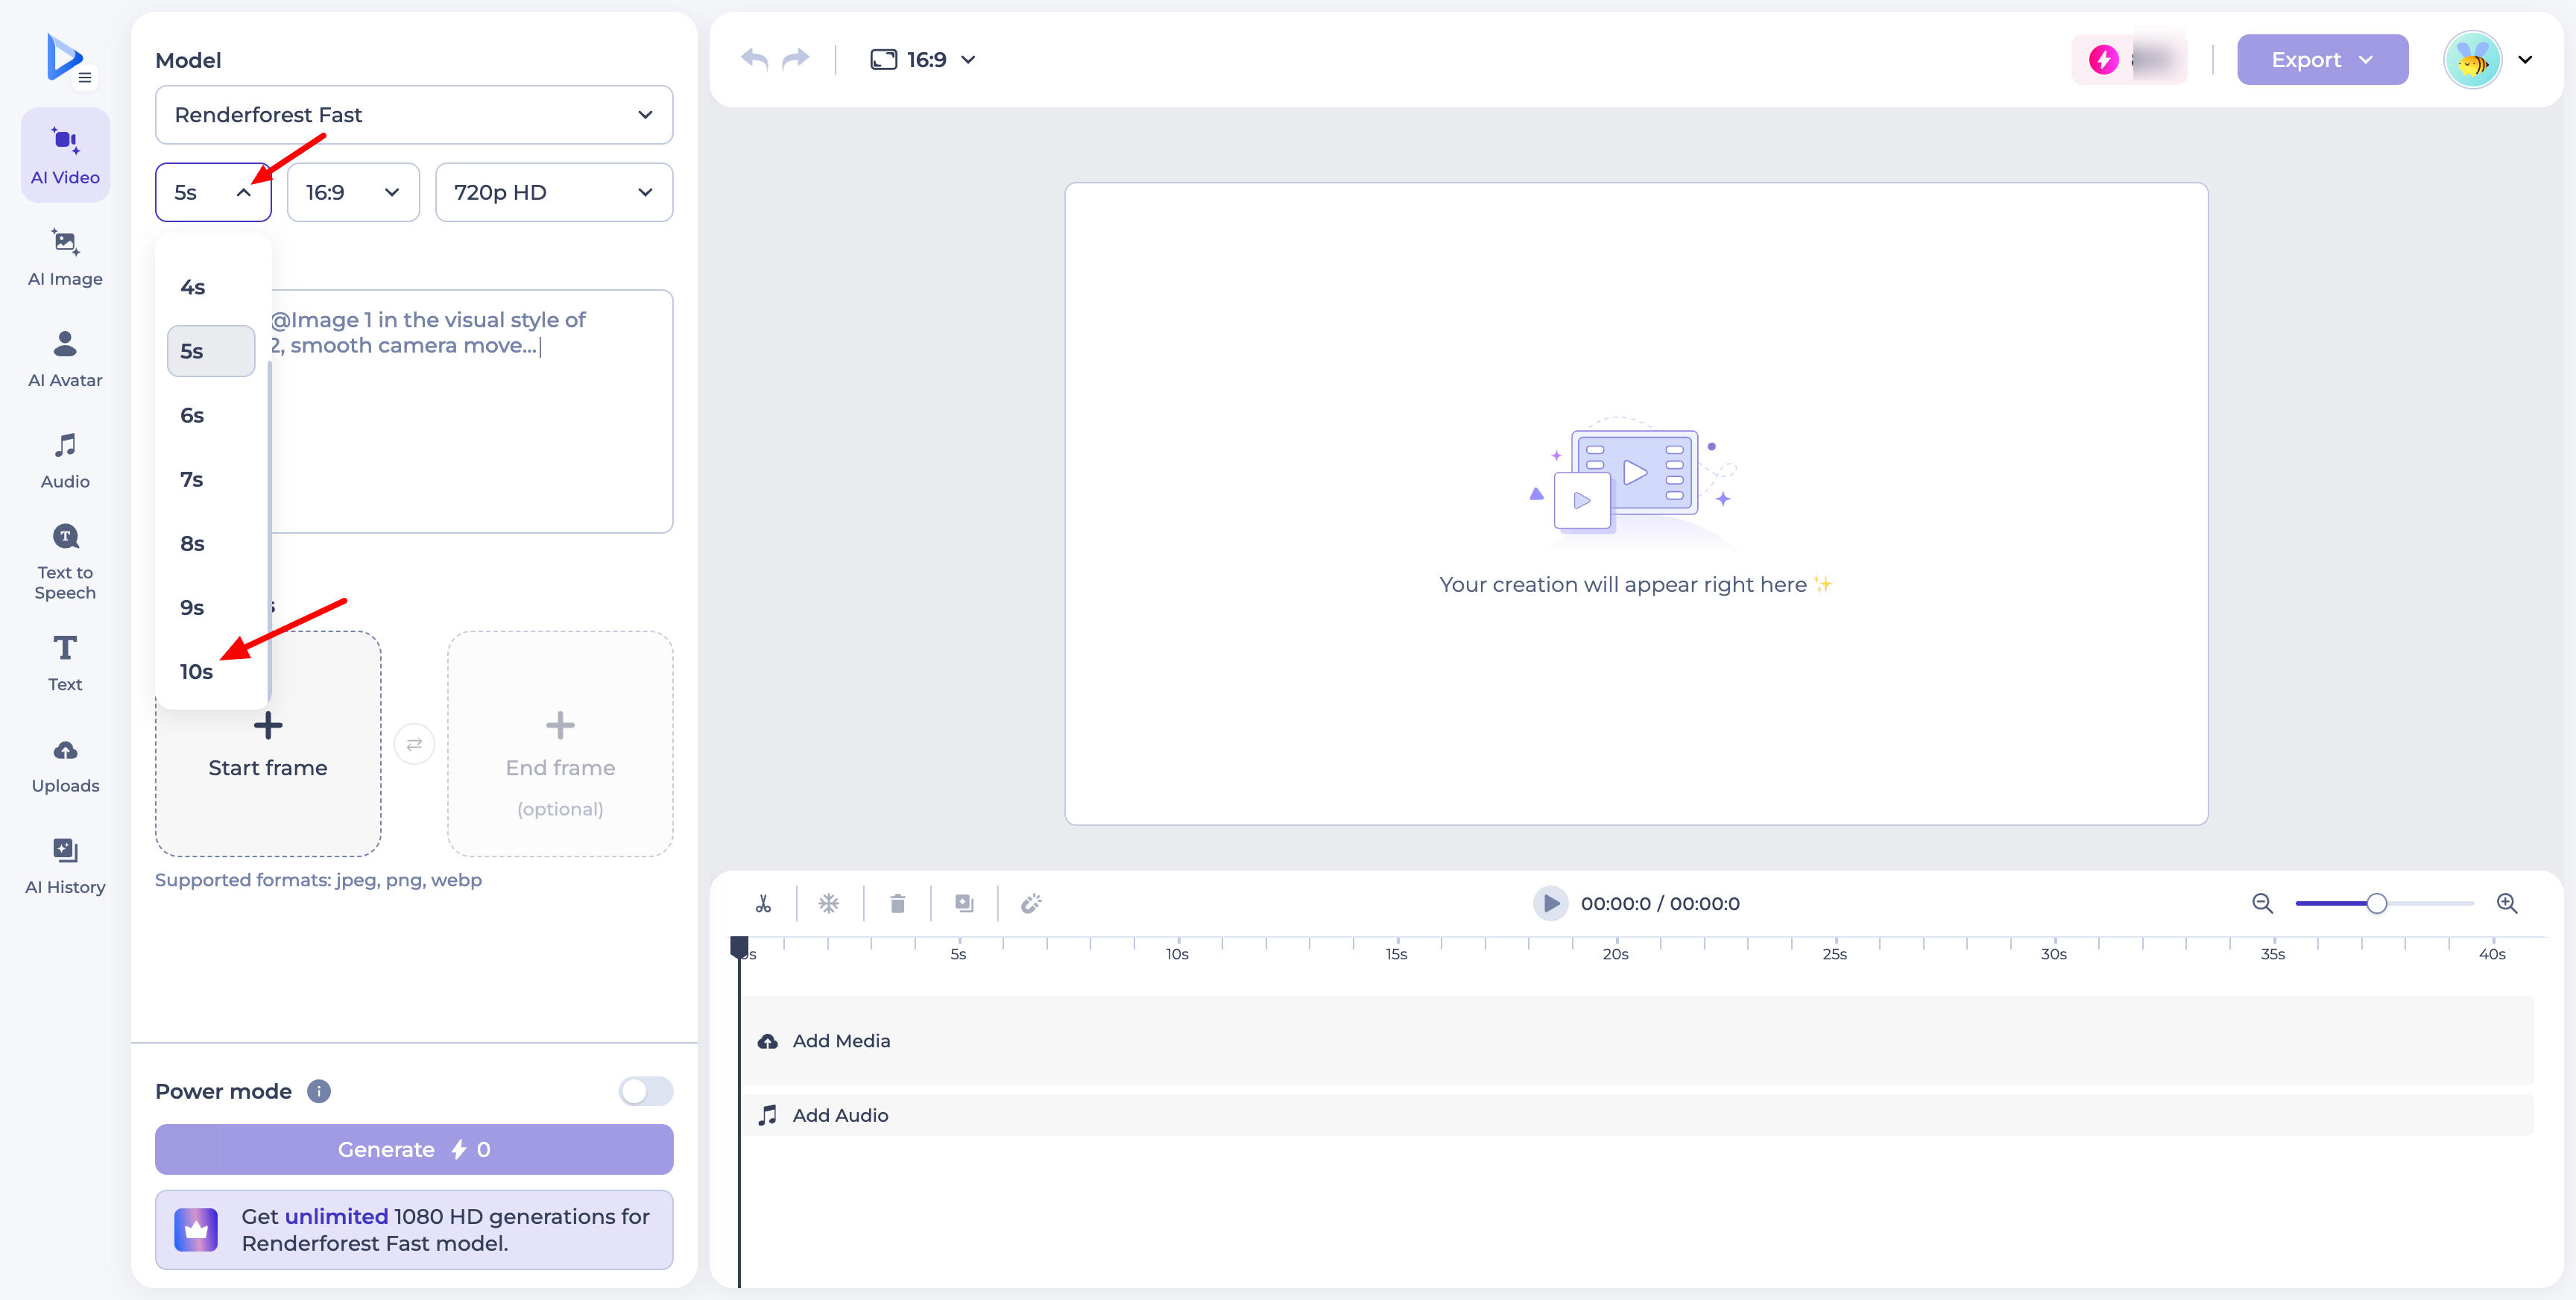
Choose any duration from 4s up to 10s — all durations are included in the free tier when using Renderforest Fast.
 Step 4: Choose Your Aspect Ratio
All aspect ratio/resolution options are free by default. However, if you've uploaded a reference image, keep the aspect ratio set to "Original (Ref image size)."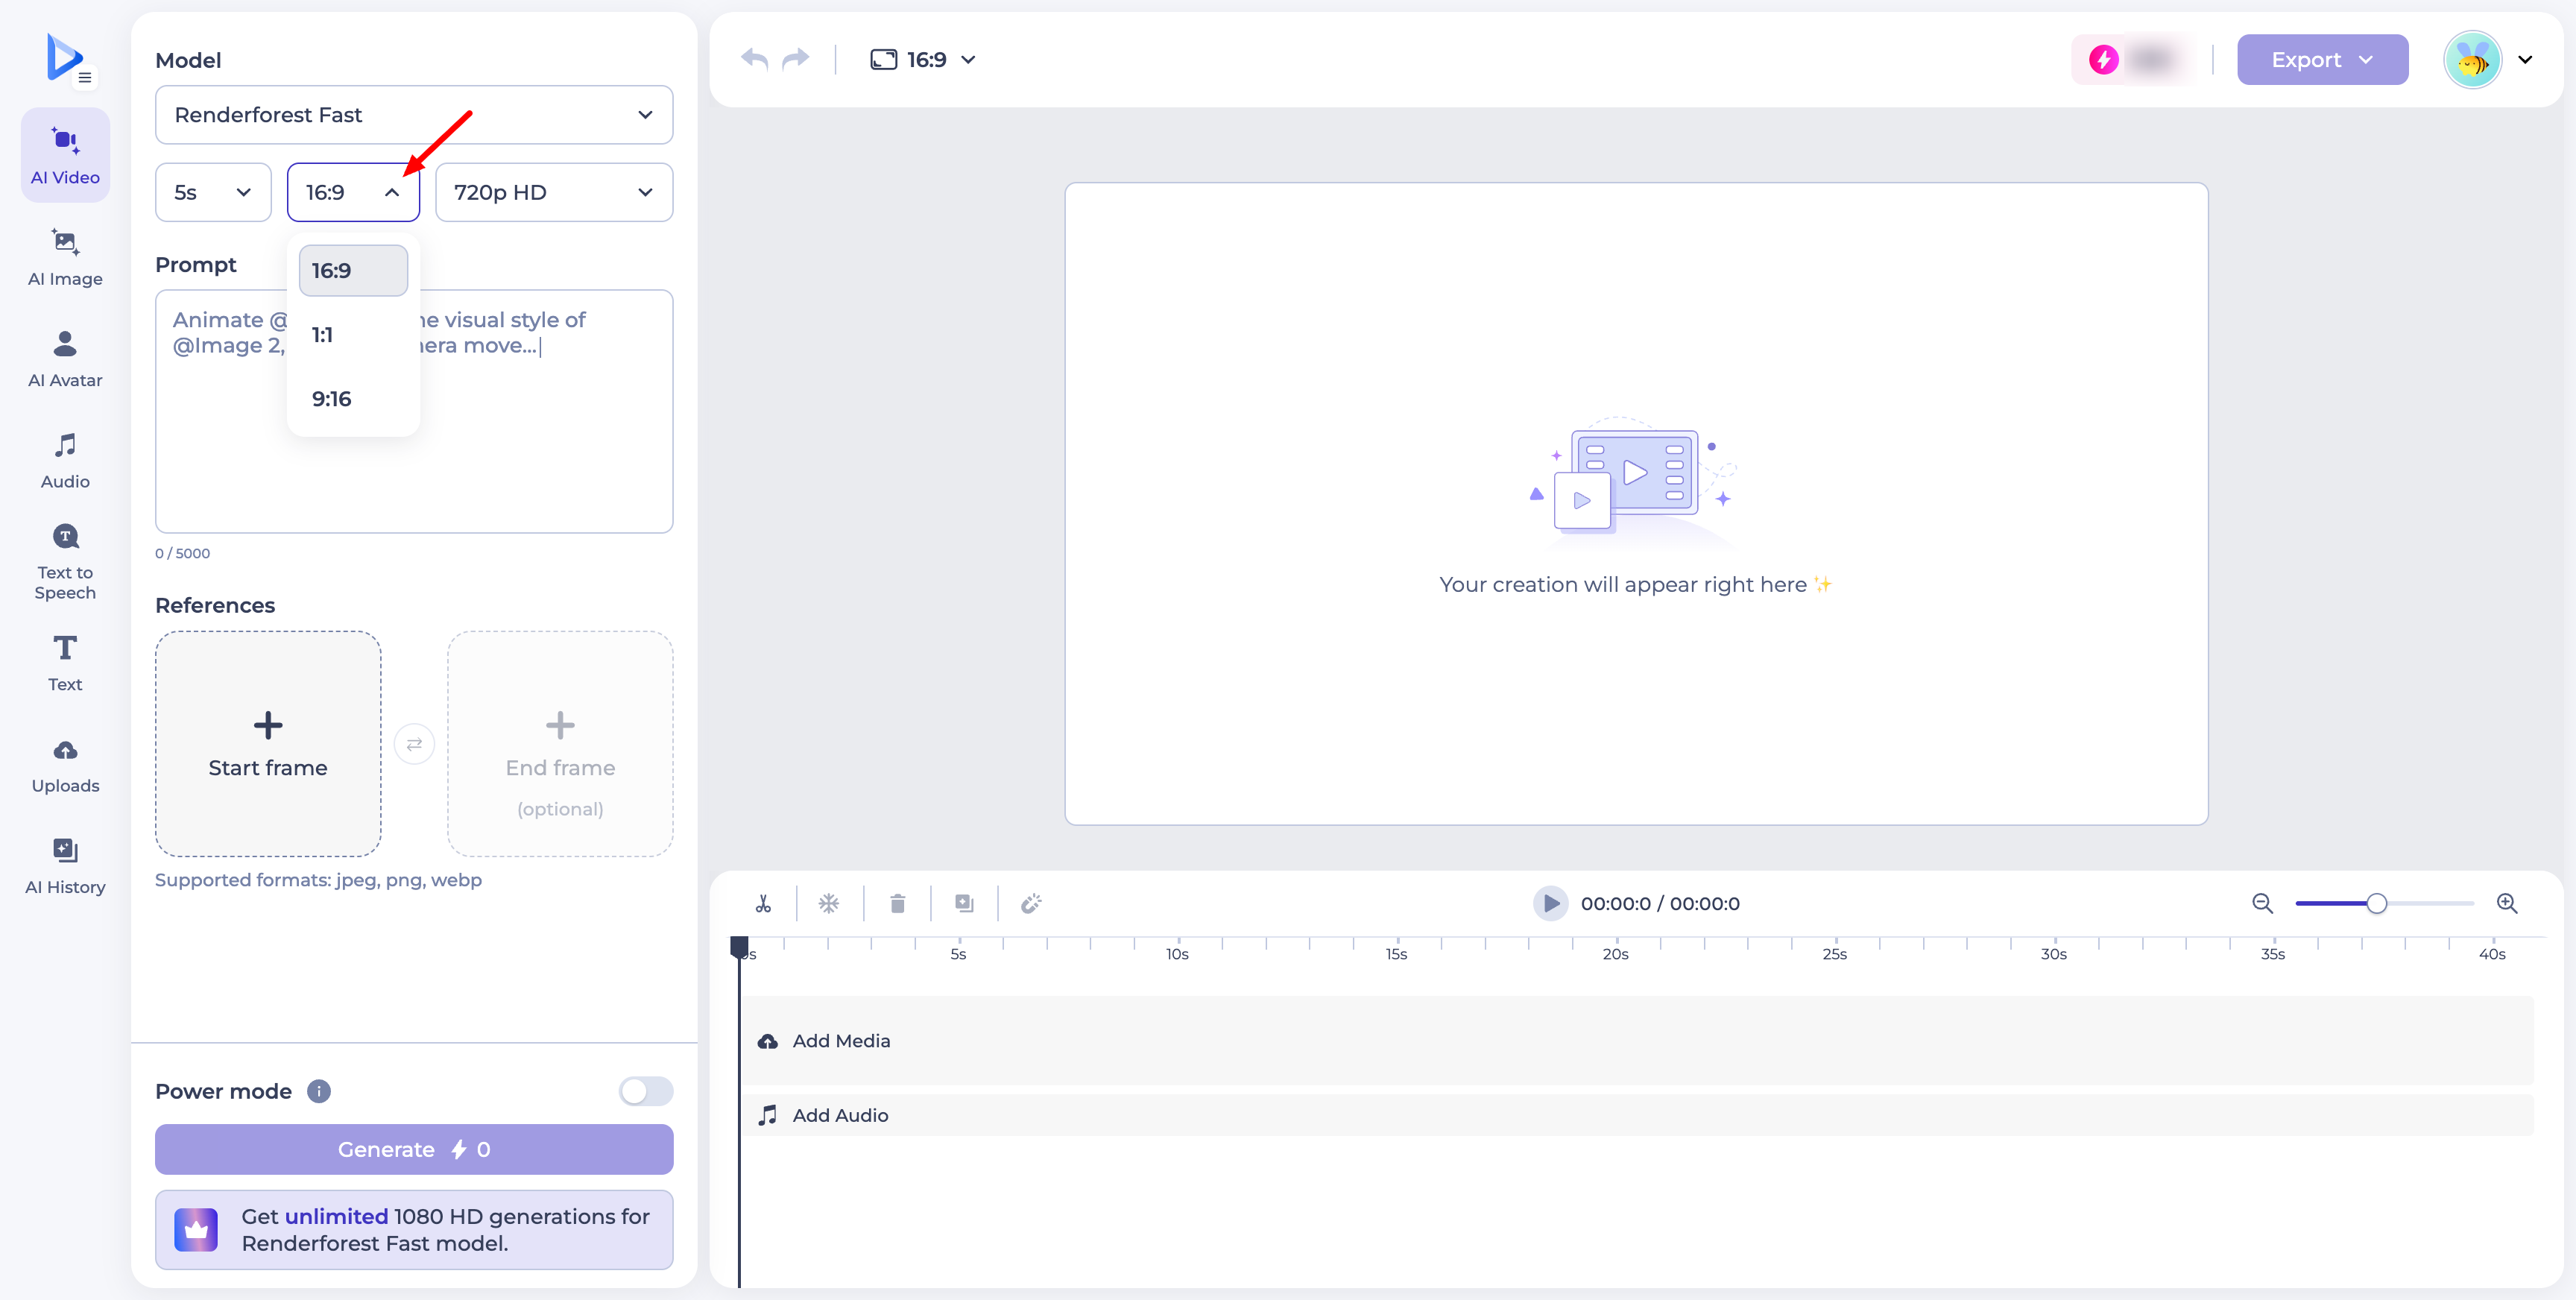
⚠️ Important: If you switch the aspect ratio to something other than your reference image's original size (e.g., 16:9, 1:1, or 9:16), the system will need to resize/reframe the image to fit — and this will consume credits (shown as +10 credits per option). To stay free, always keep it on Original (Ref image size).
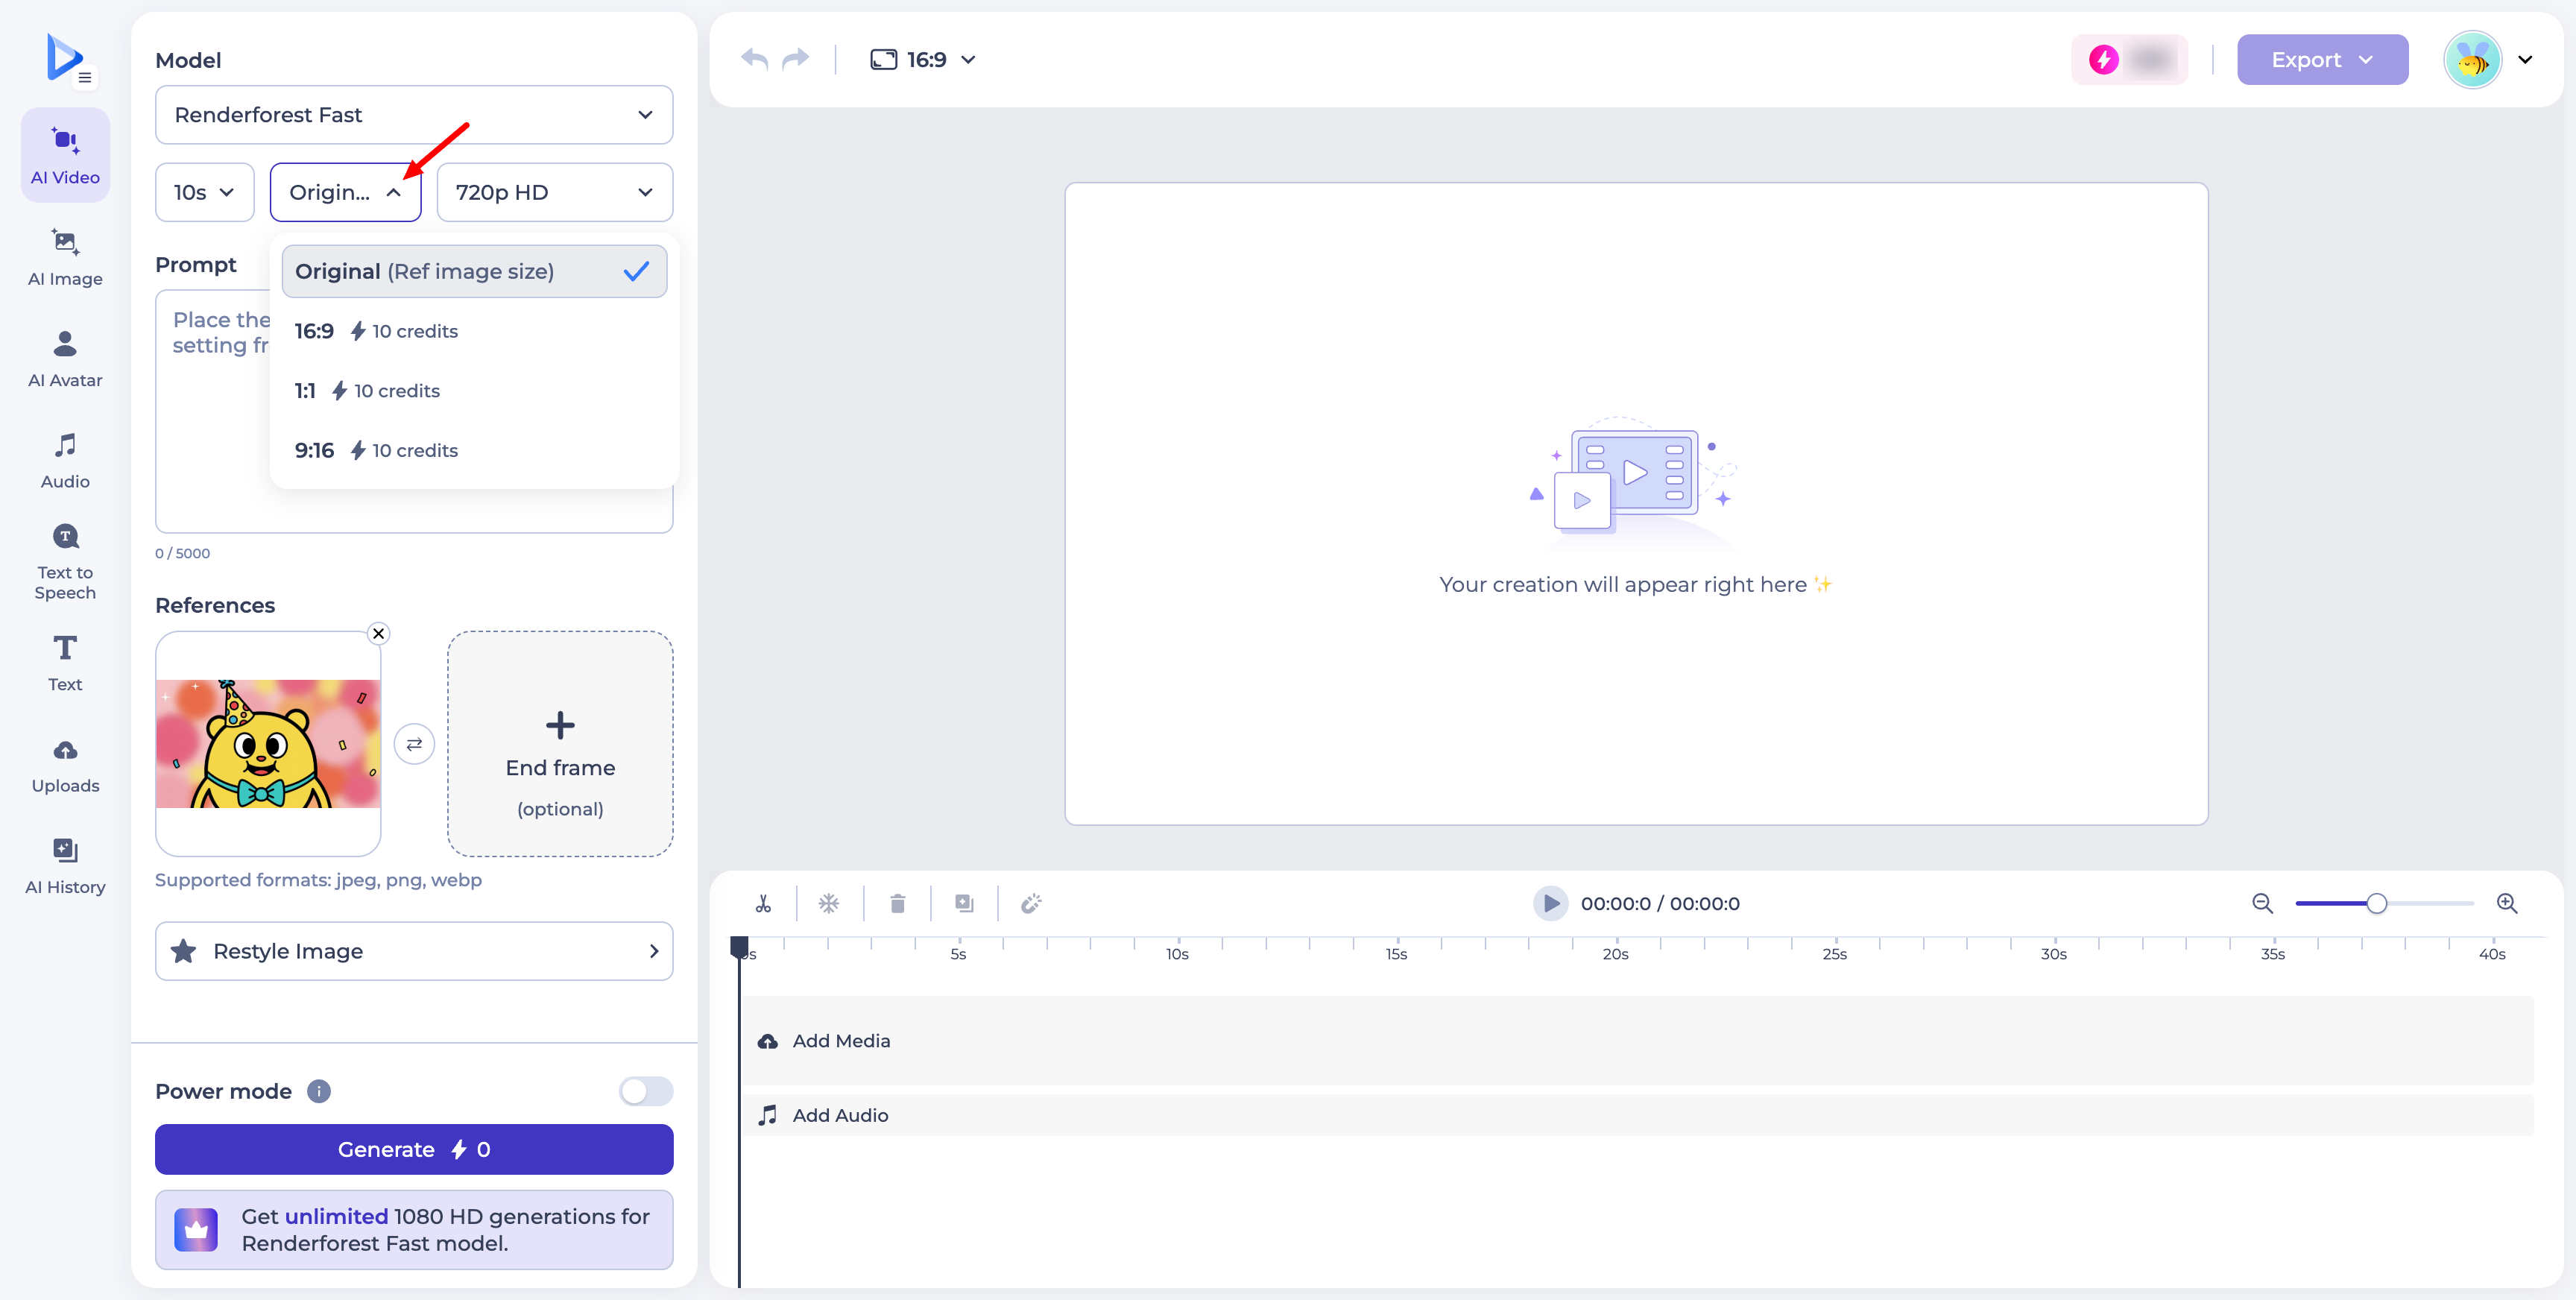
Step 5: Choose Your Quality/Resolution
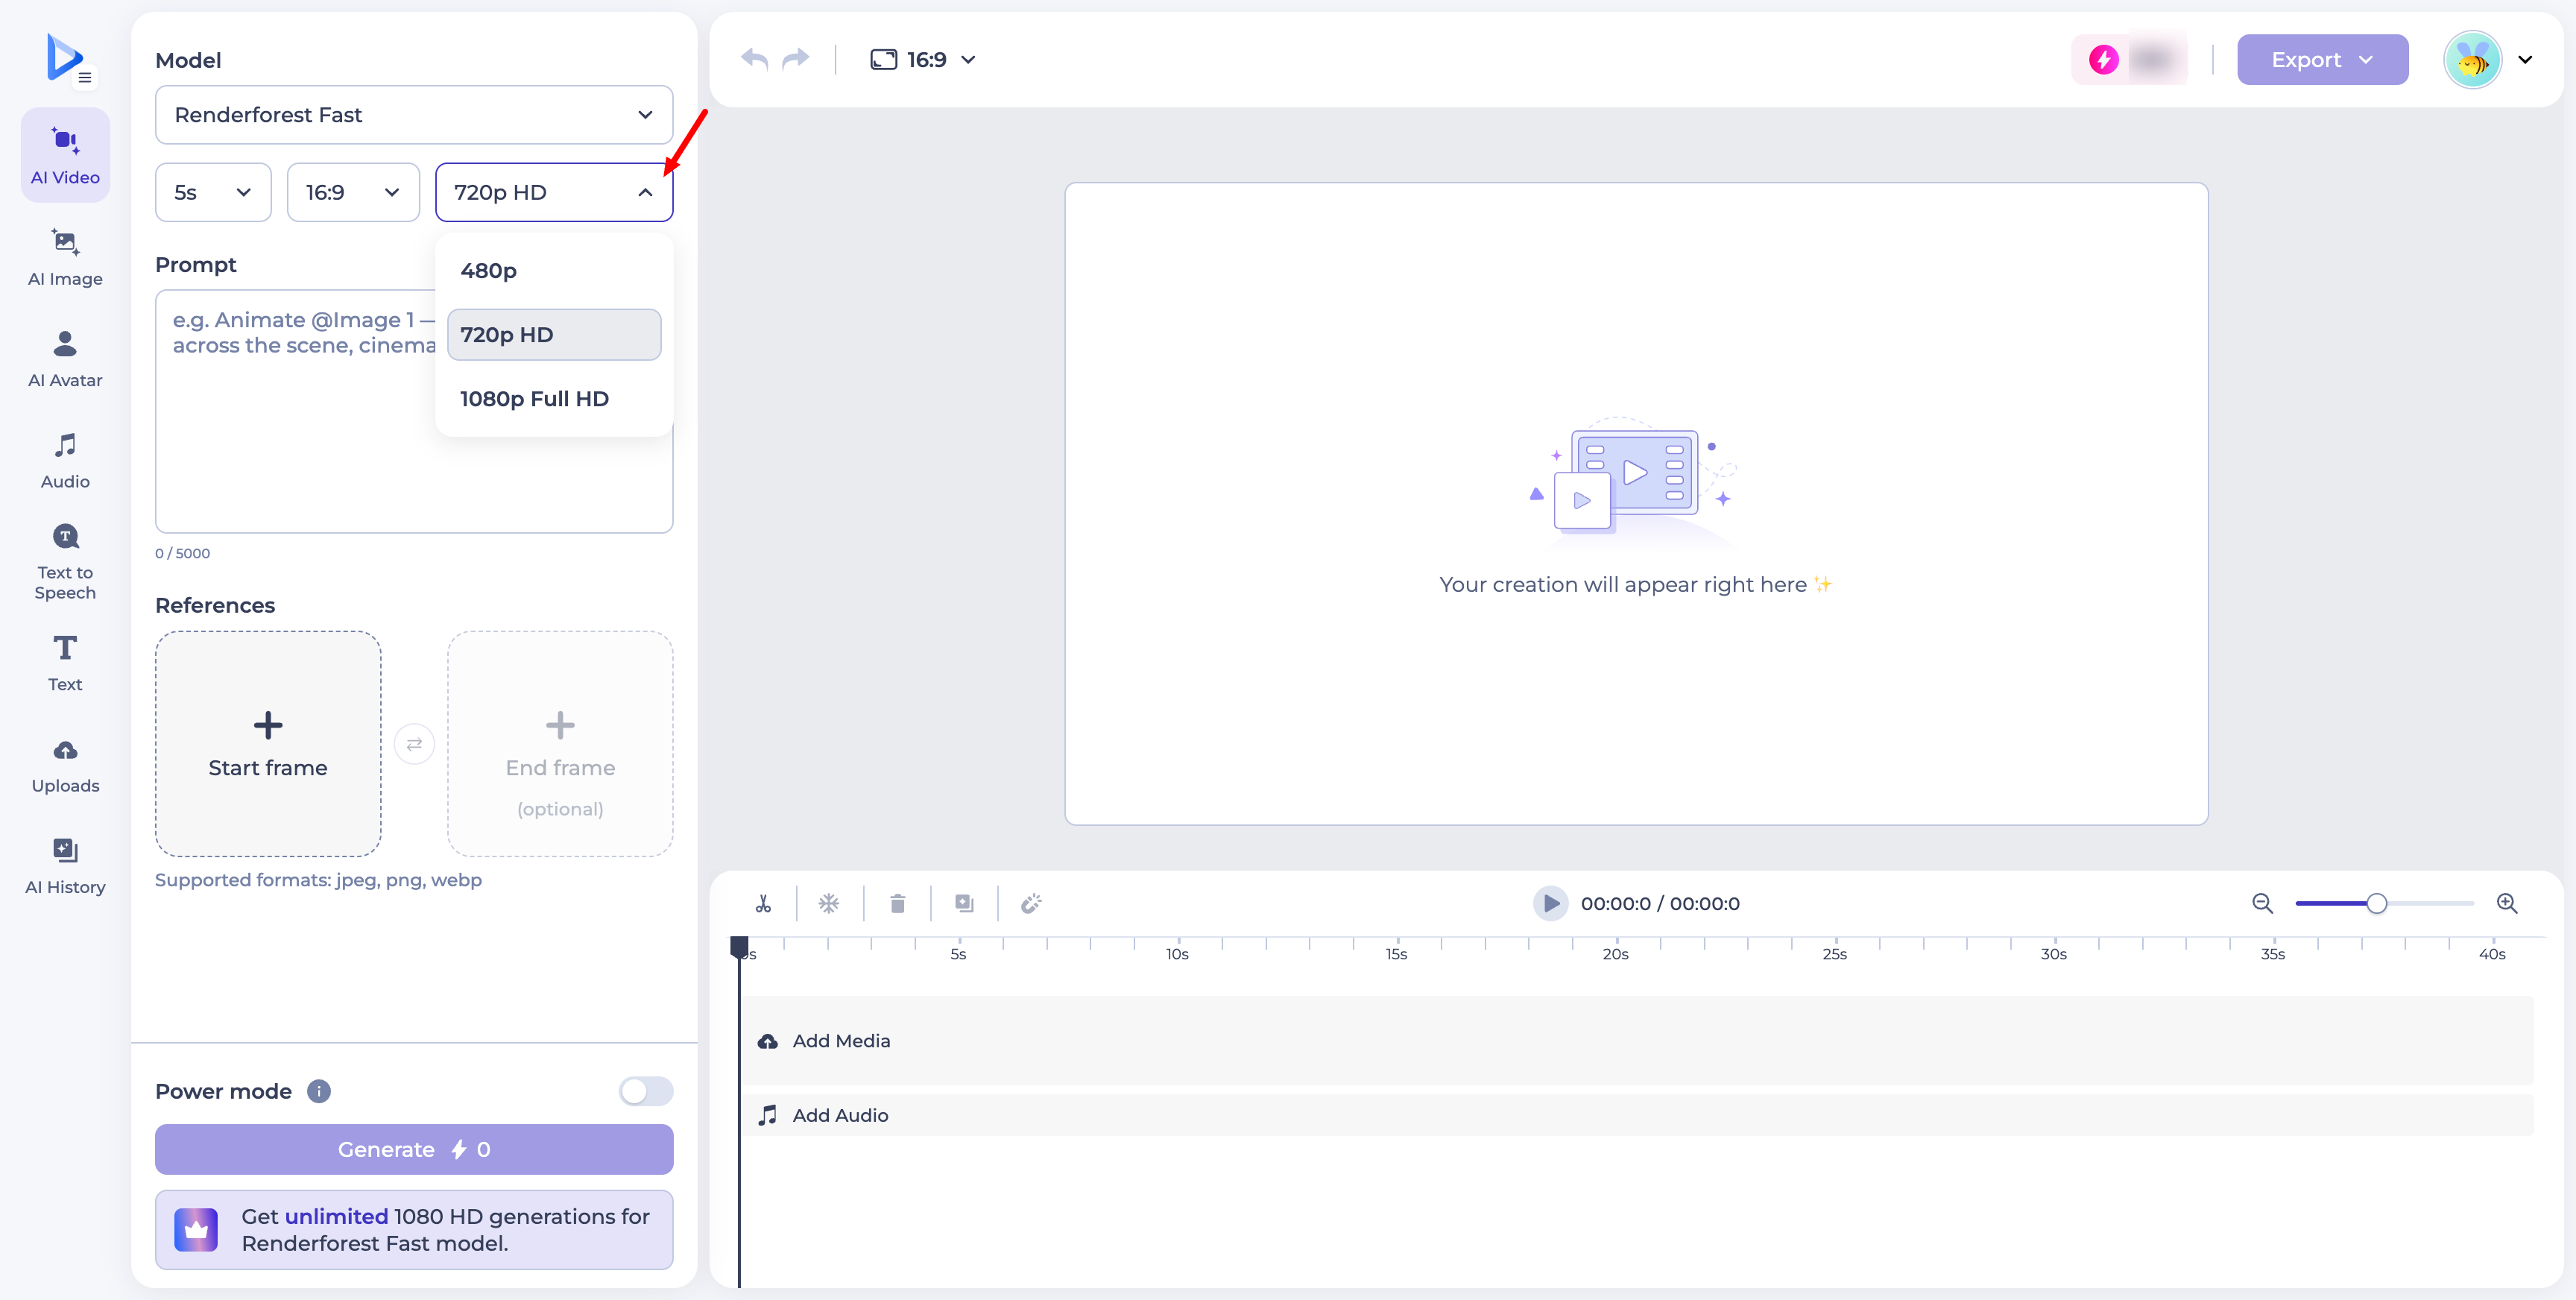
All resolution options — 480p, 720p HD, and 1080p Full HD — are free when using the Renderforest Fast model, regardless of which one you select.
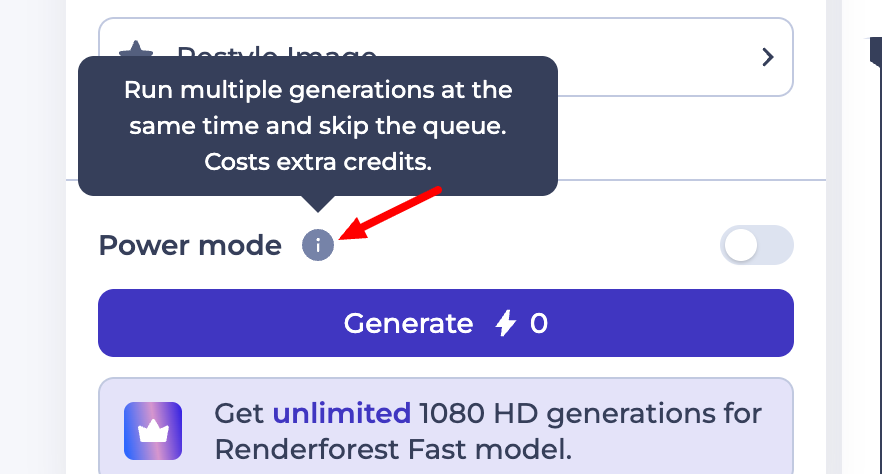
Power Mode allows the system to run multiple generations at the same time and skip the generation queue — this gets you faster results, but it costs extra credits.
To stay credit-free, make sure the Power Mode toggle is switched off (the toggle appears gray/left-aligned when off, and purple/right-aligned when on).
 Step 7: Add Your Reference Image (Optional)
If you're animating a reference image, upload it under Start Frame or End Frame — neither of these consumes credits.
Optional: Restyle Image
Renderforest also offers a Restyle Image feature, which lets you transform your reference image into a completely different visual style before it's animated — such as Claymation, Anime, Cinema, Whiteboard animation, Product promo, and more. This is a great way to give your video a distinct creative look without needing separate design work.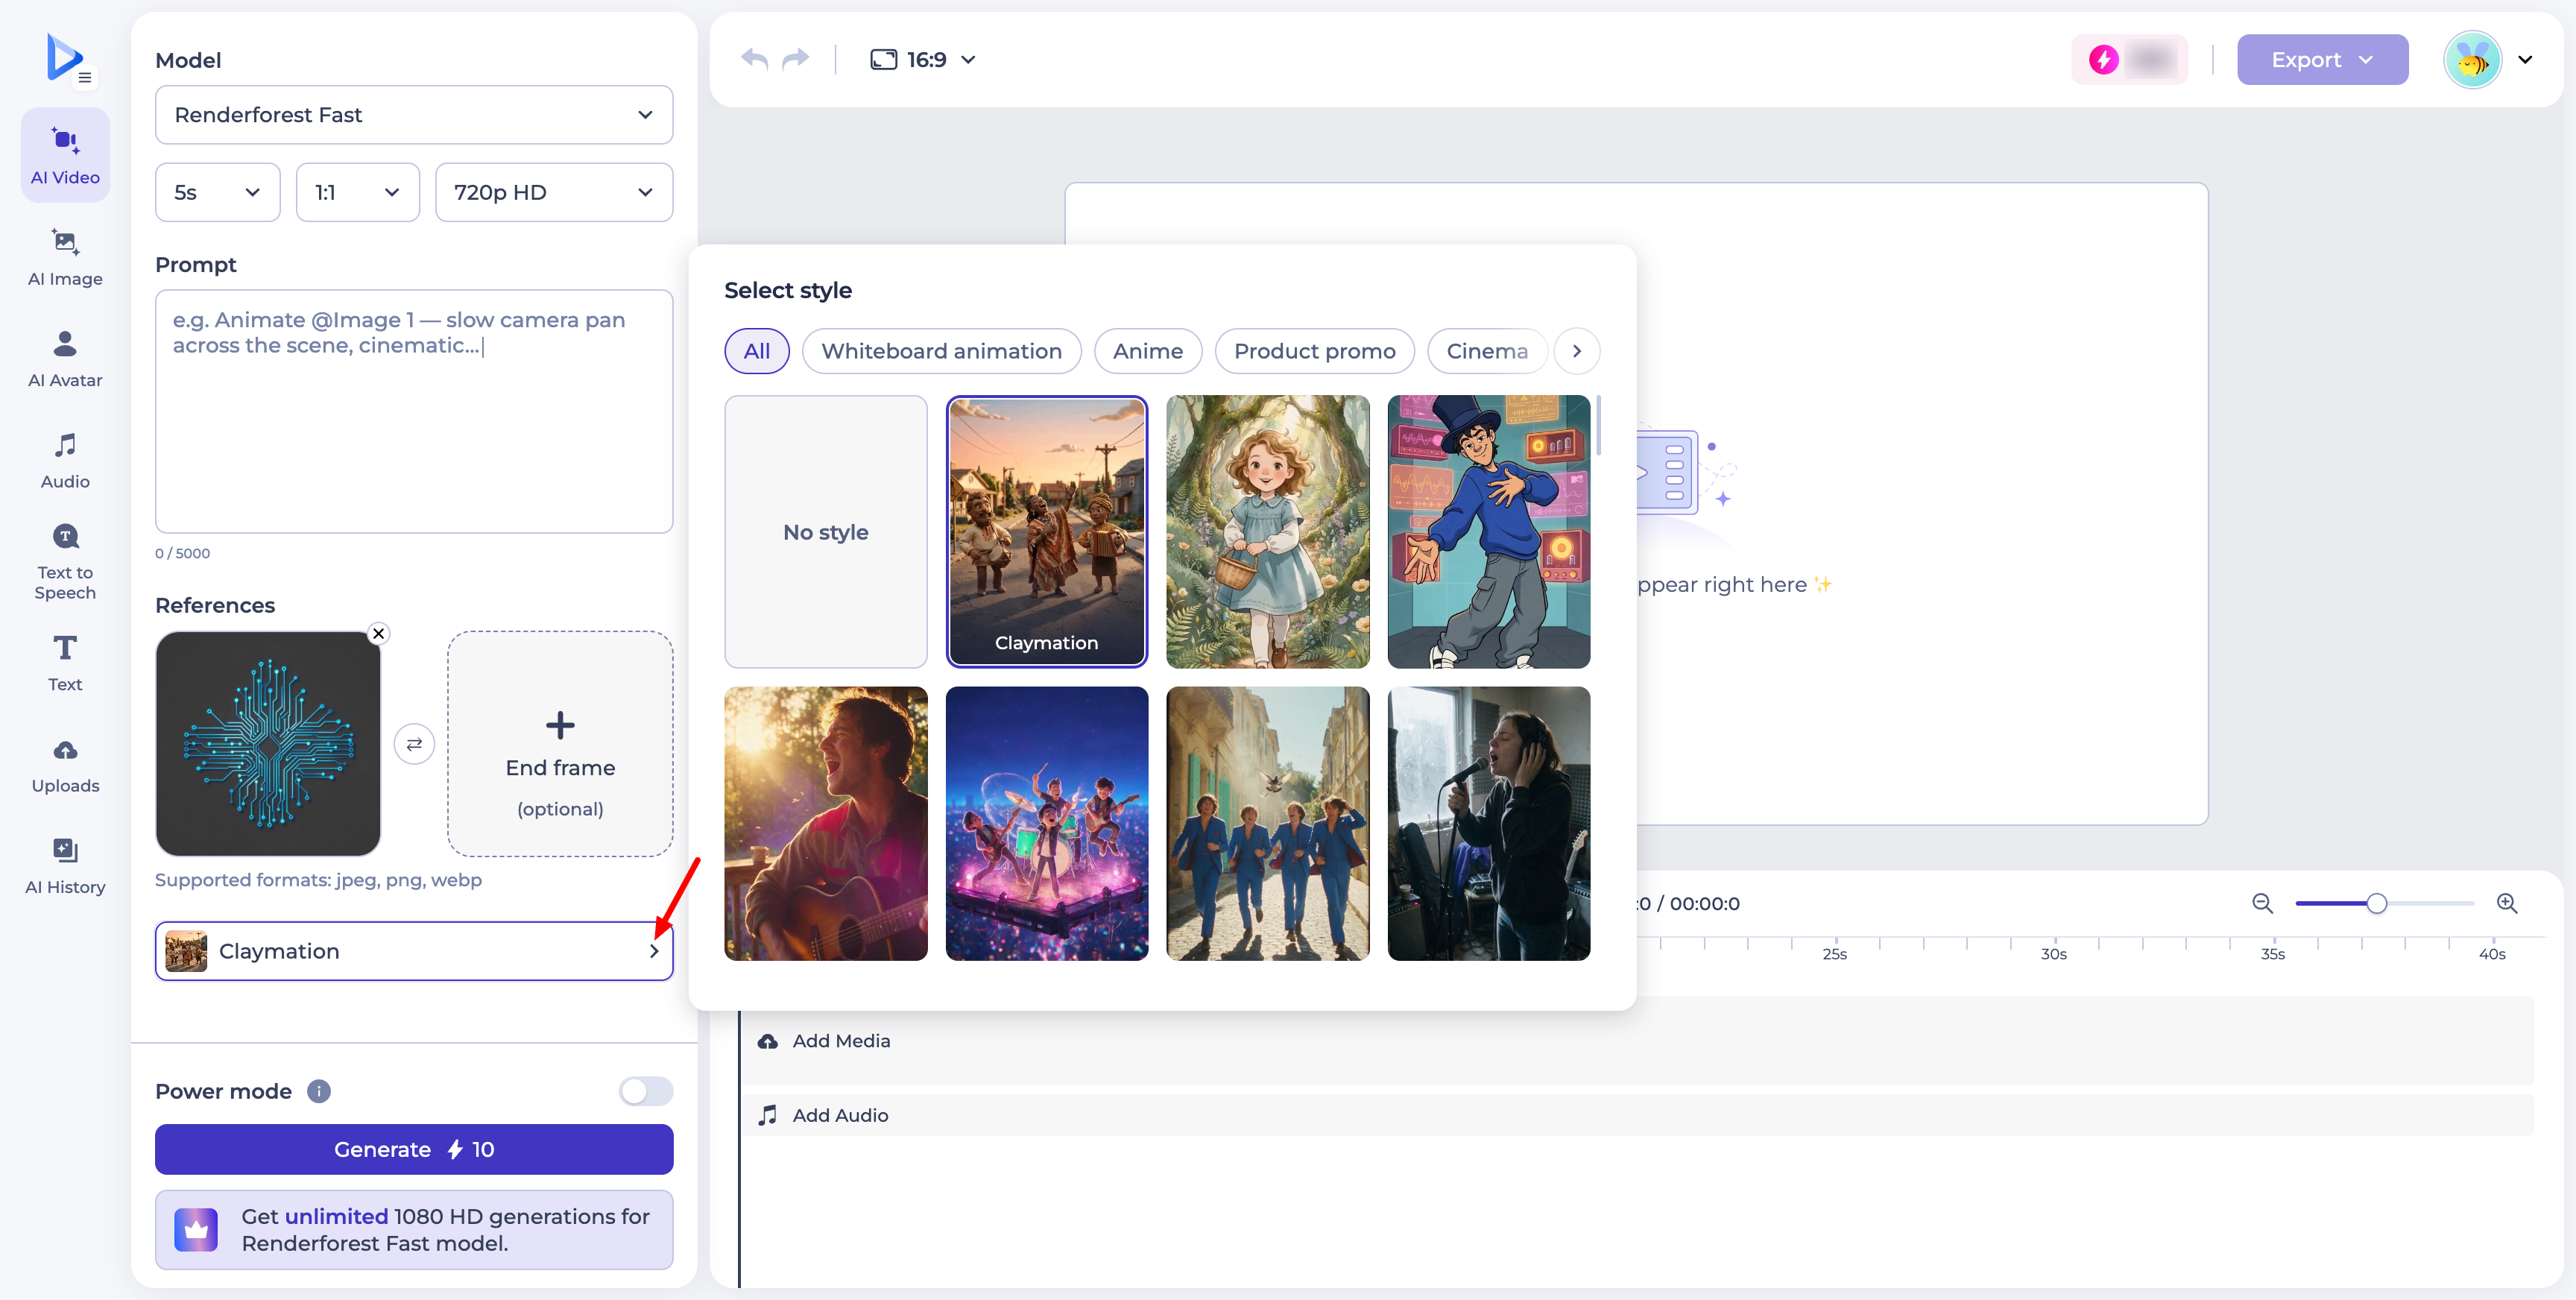
Keep in mind that applying a style through this feature does consume credits, since the system generates a new, restyled version of your image (you'll see the Generate button update from 0 credits to a value like 10 credits once a style is selected).
If your goal is to generate videos with zero credits, simply leave the Restyle Image option set to "No style" and use your original reference image as-is — the animation itself will still be completely free.
Step 8: Generate
Once everything is set (Fast model, ≤10s duration, Original aspect ratio, Power Mode off, no style applied), click Generate — the cost will show 0 credits.
That's it! You now know how to create unlimited AI videos with Renderforest Fast without spending a single credit. ?
If you have any questions or run into any issues, feel free to reach out to our support team — we're happy to help.
Was this article helpful?
That’s Great!
Thank you for your feedback
Sorry! We couldn't be helpful
Thank you for your feedback
Feedback sent
We appreciate your effort and will try to fix the article