TABLE OF CONTENTS
- Accessing the AI Image Tool
- Generating an Image
- Browsing "My Images" and "Inspiration"
- Managing a Generated Image
Renderforest's AI Image tool lets you generate custom images from a text prompt, using your choice of AI model. This guide walks you through generating, browsing, and managing your AI-created images.
Accessing the AI Image Tool
From your homepage, click "AI Image" in the Tools section, or select it from the left-hand Tools menu at any time.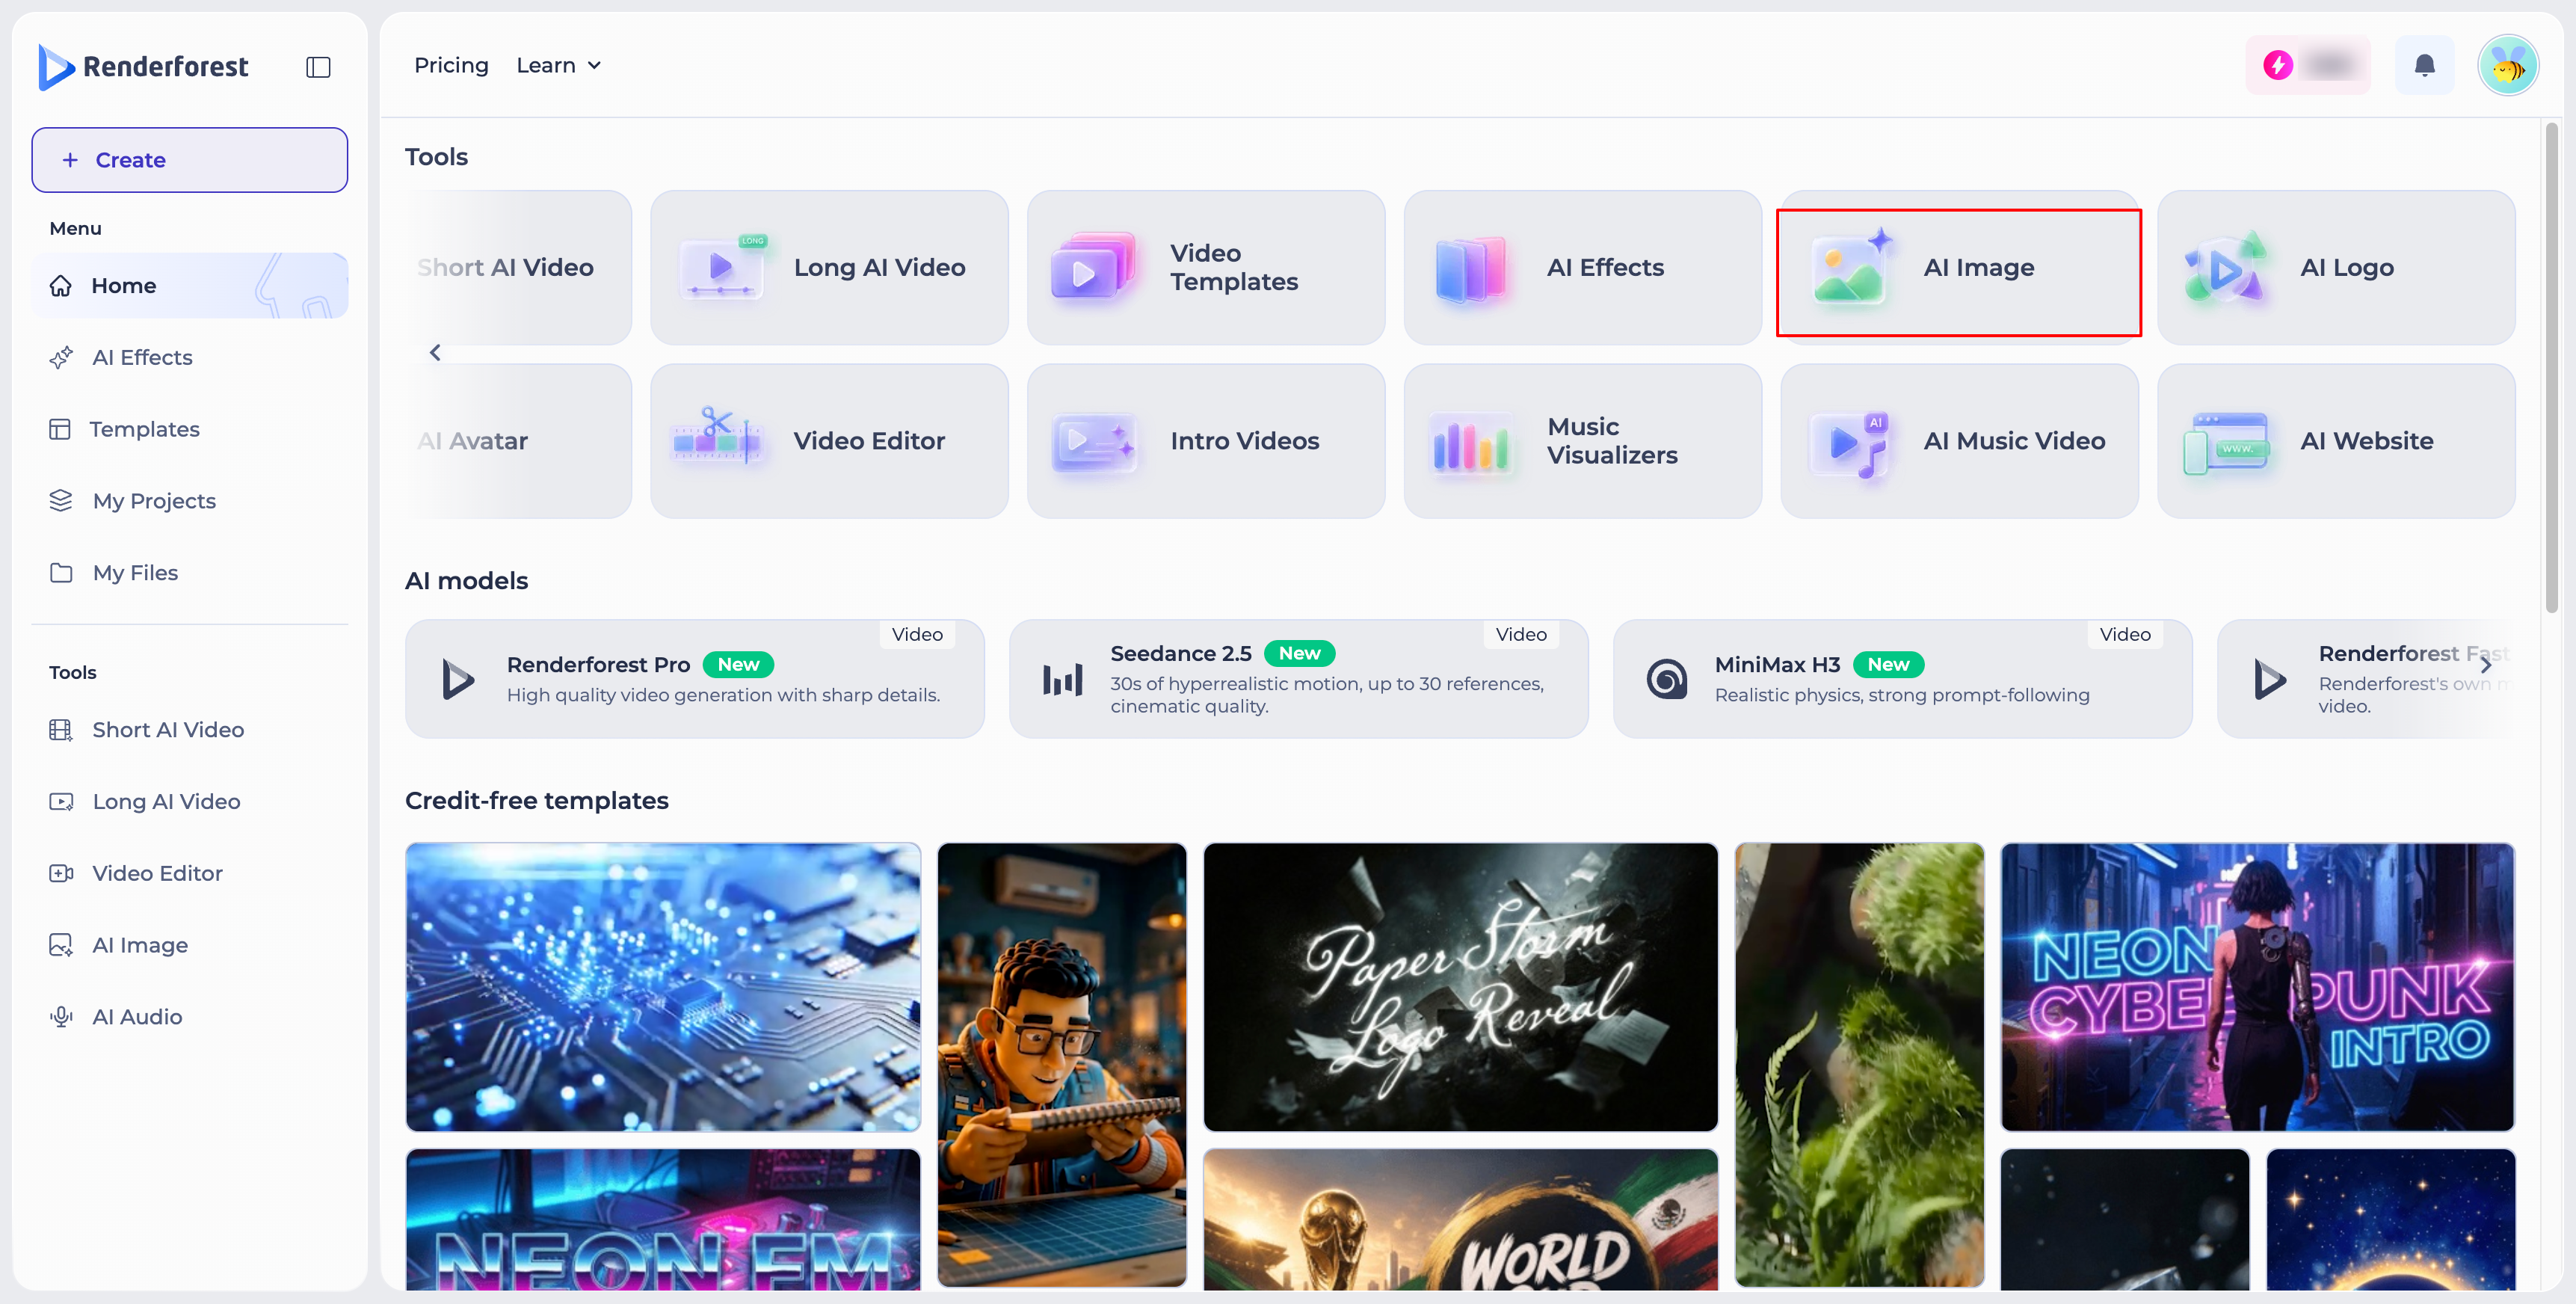
Generating an Image
- Choose your Image Model: select from a range of models, including Renderforest, Grok, GPT, Nano Banana, Seedream, and Flux 2 Pro. Each model supports a different number of reference images (shown alongside its name in the dropdown), so the option you choose affects how many references you can add.
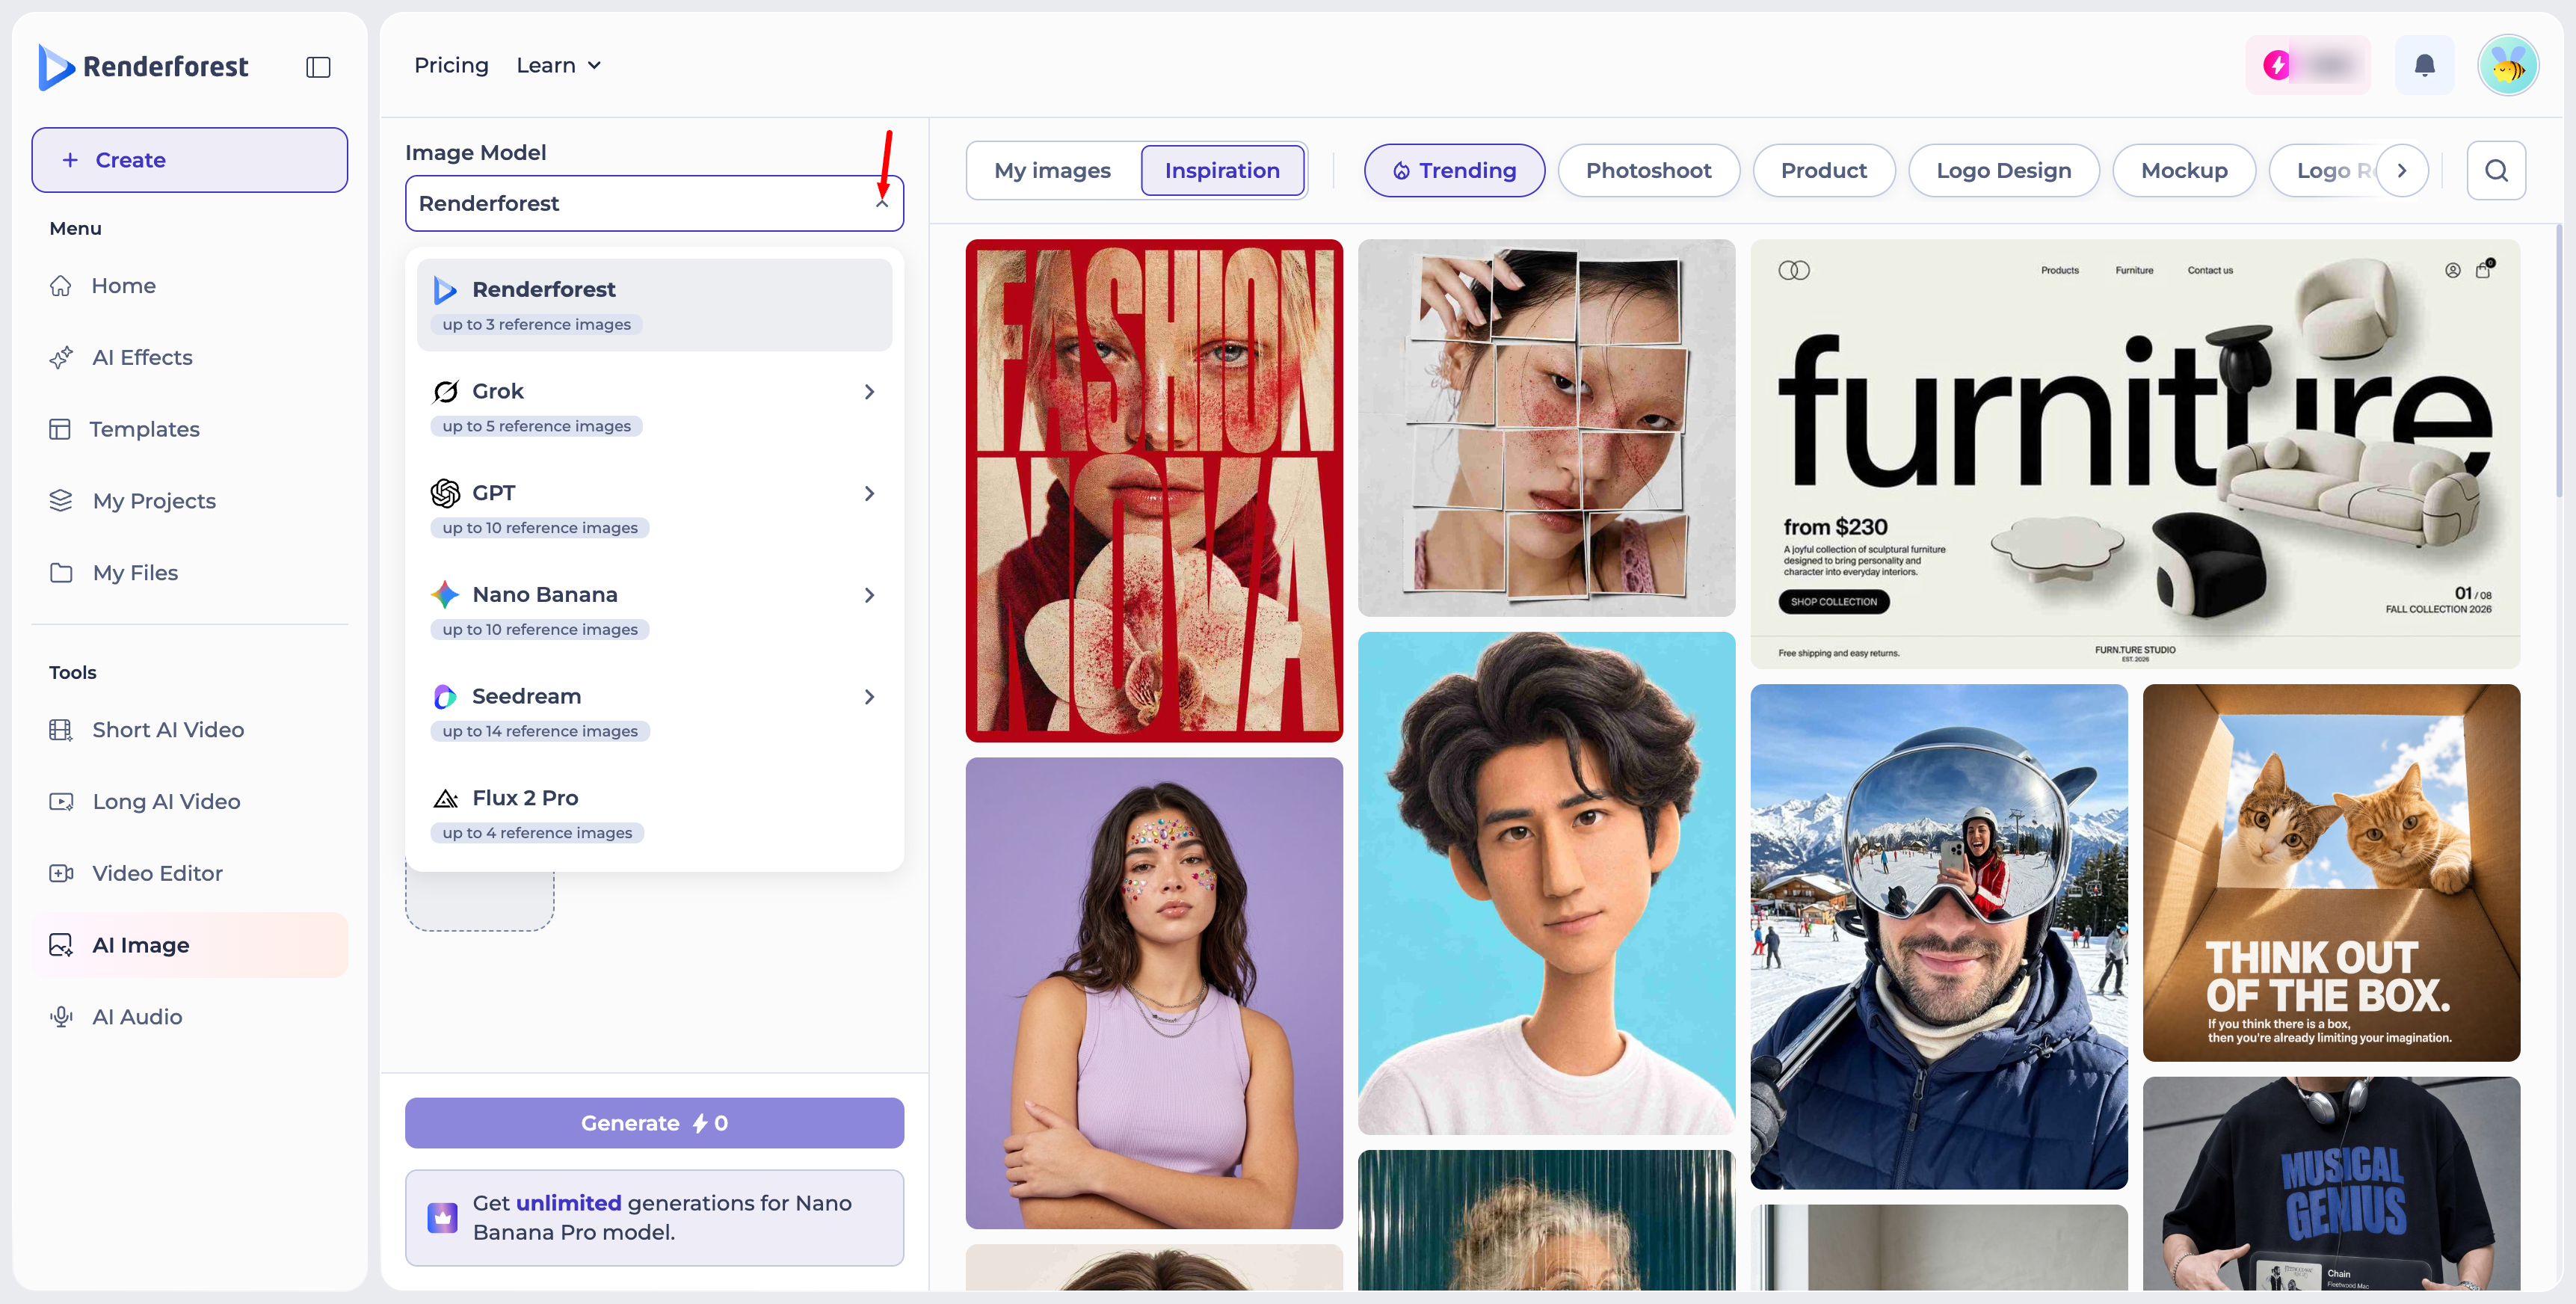
- Describe your image: enter a prompt describing what you'd like to generate. You can reference an uploaded image directly in your prompt using "@Image" mentions — for example, "Place the product from @Image 1 into the kitchen from @Image 2."
- Set your Size and Style: choose a size (or leave it on "Auto"), and optionally pick a style from the "Select" menu.
- Upload reference images: add reference images to guide the generation — the maximum number depends on the model you've selected.
- Click "Generate" — the credit cost is shown on the button before you confirm.
Browsing "My Images" and "Inspiration"
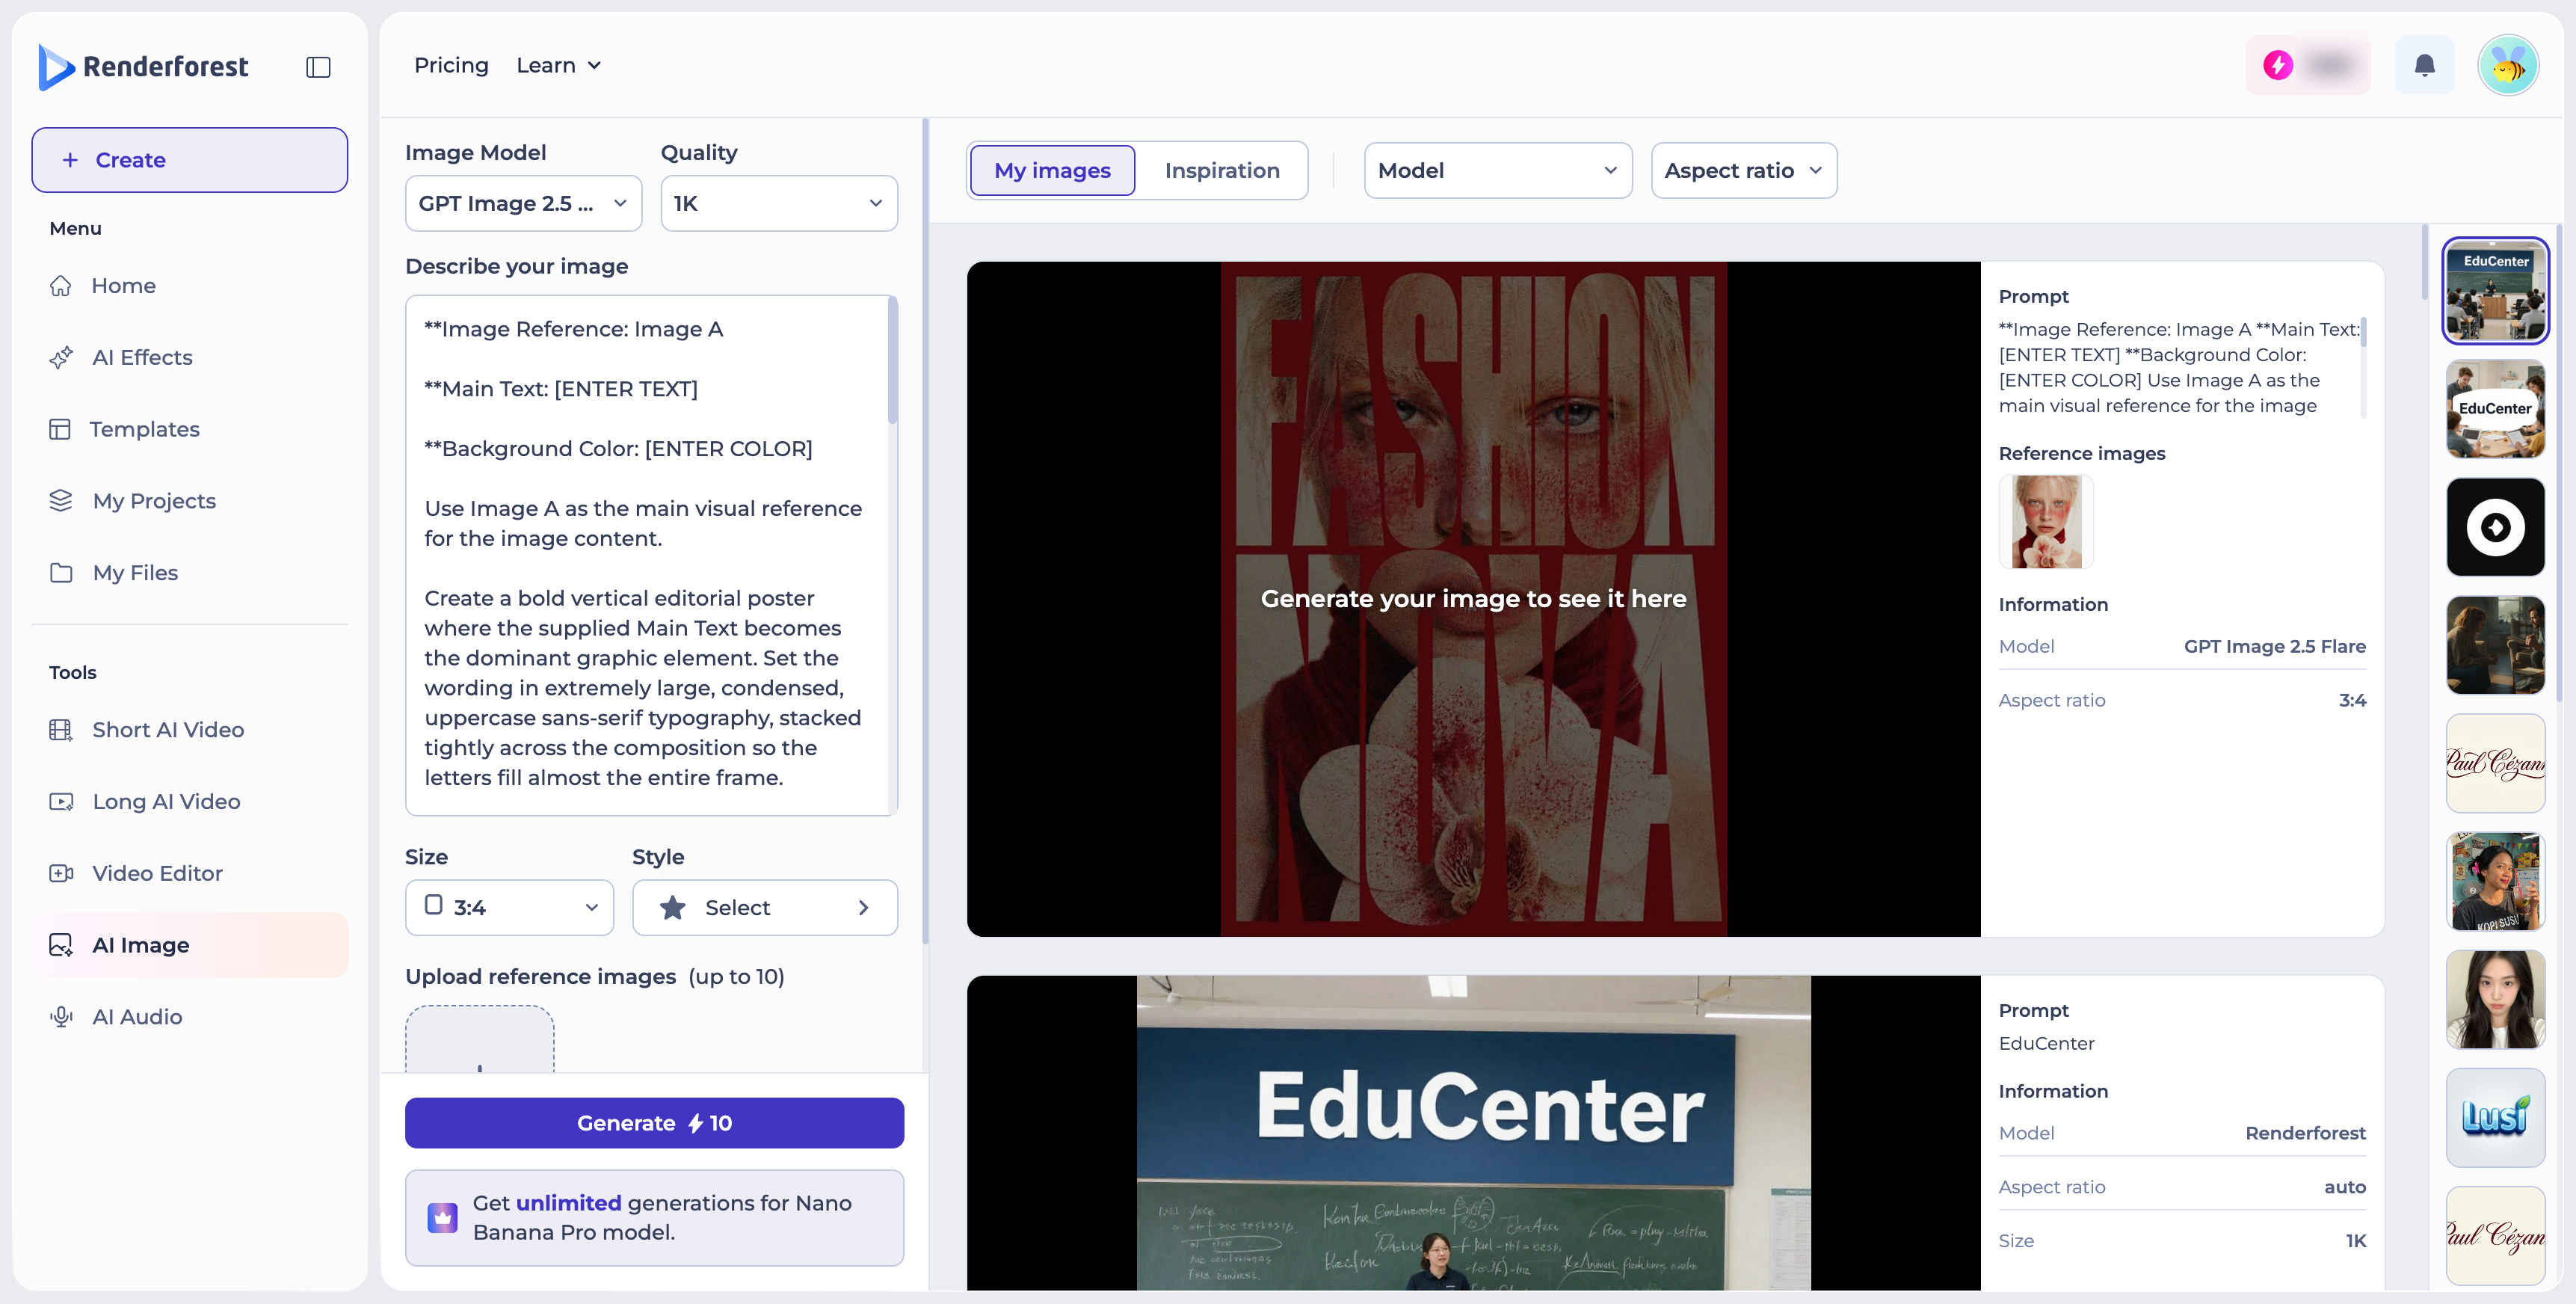
At the top of the AI Image tool, switch between "My Images," where your own generations are saved, and "Inspiration," a gallery of example images to spark ideas.
Within "Inspiration," browse by category — Trending, Photoshoot, Product, Logo Design, Mockup, and more — or use the search icon to find something specific.
Within "My Images," filter your own generations by Model or Aspect Ratio. Each image shows its full prompt, any reference images used, and generation details (model, aspect ratio, size).
Managing a Generated Image
Selecting one of your generated images brings up a set of actions: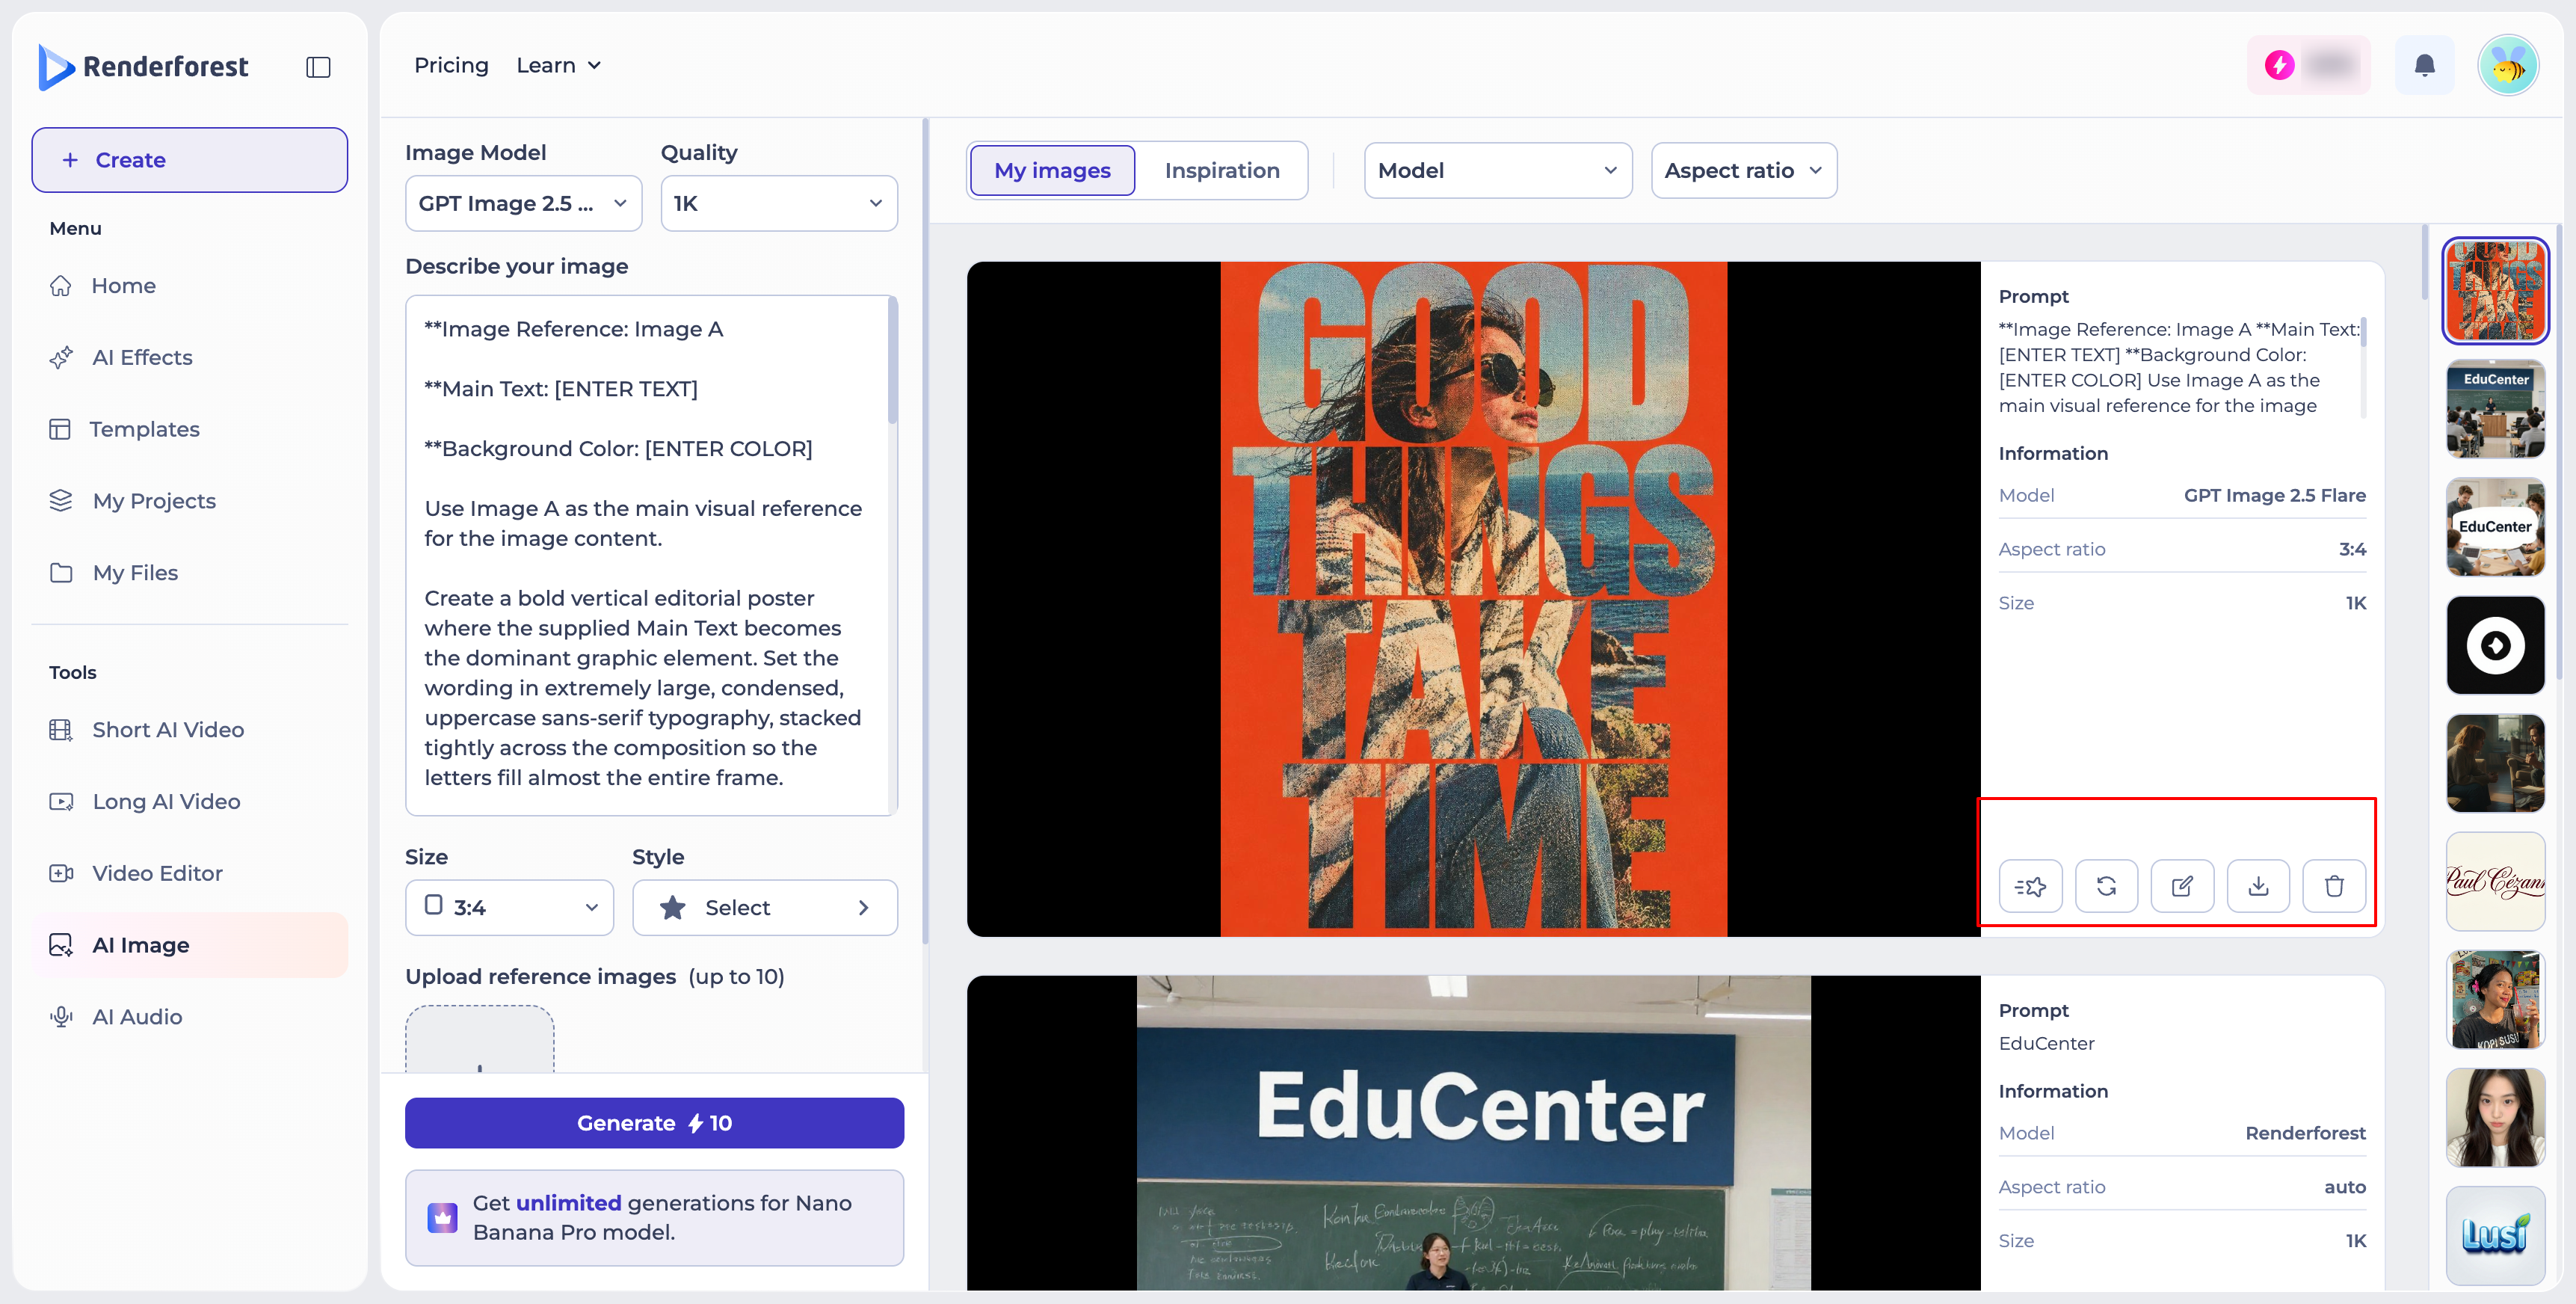
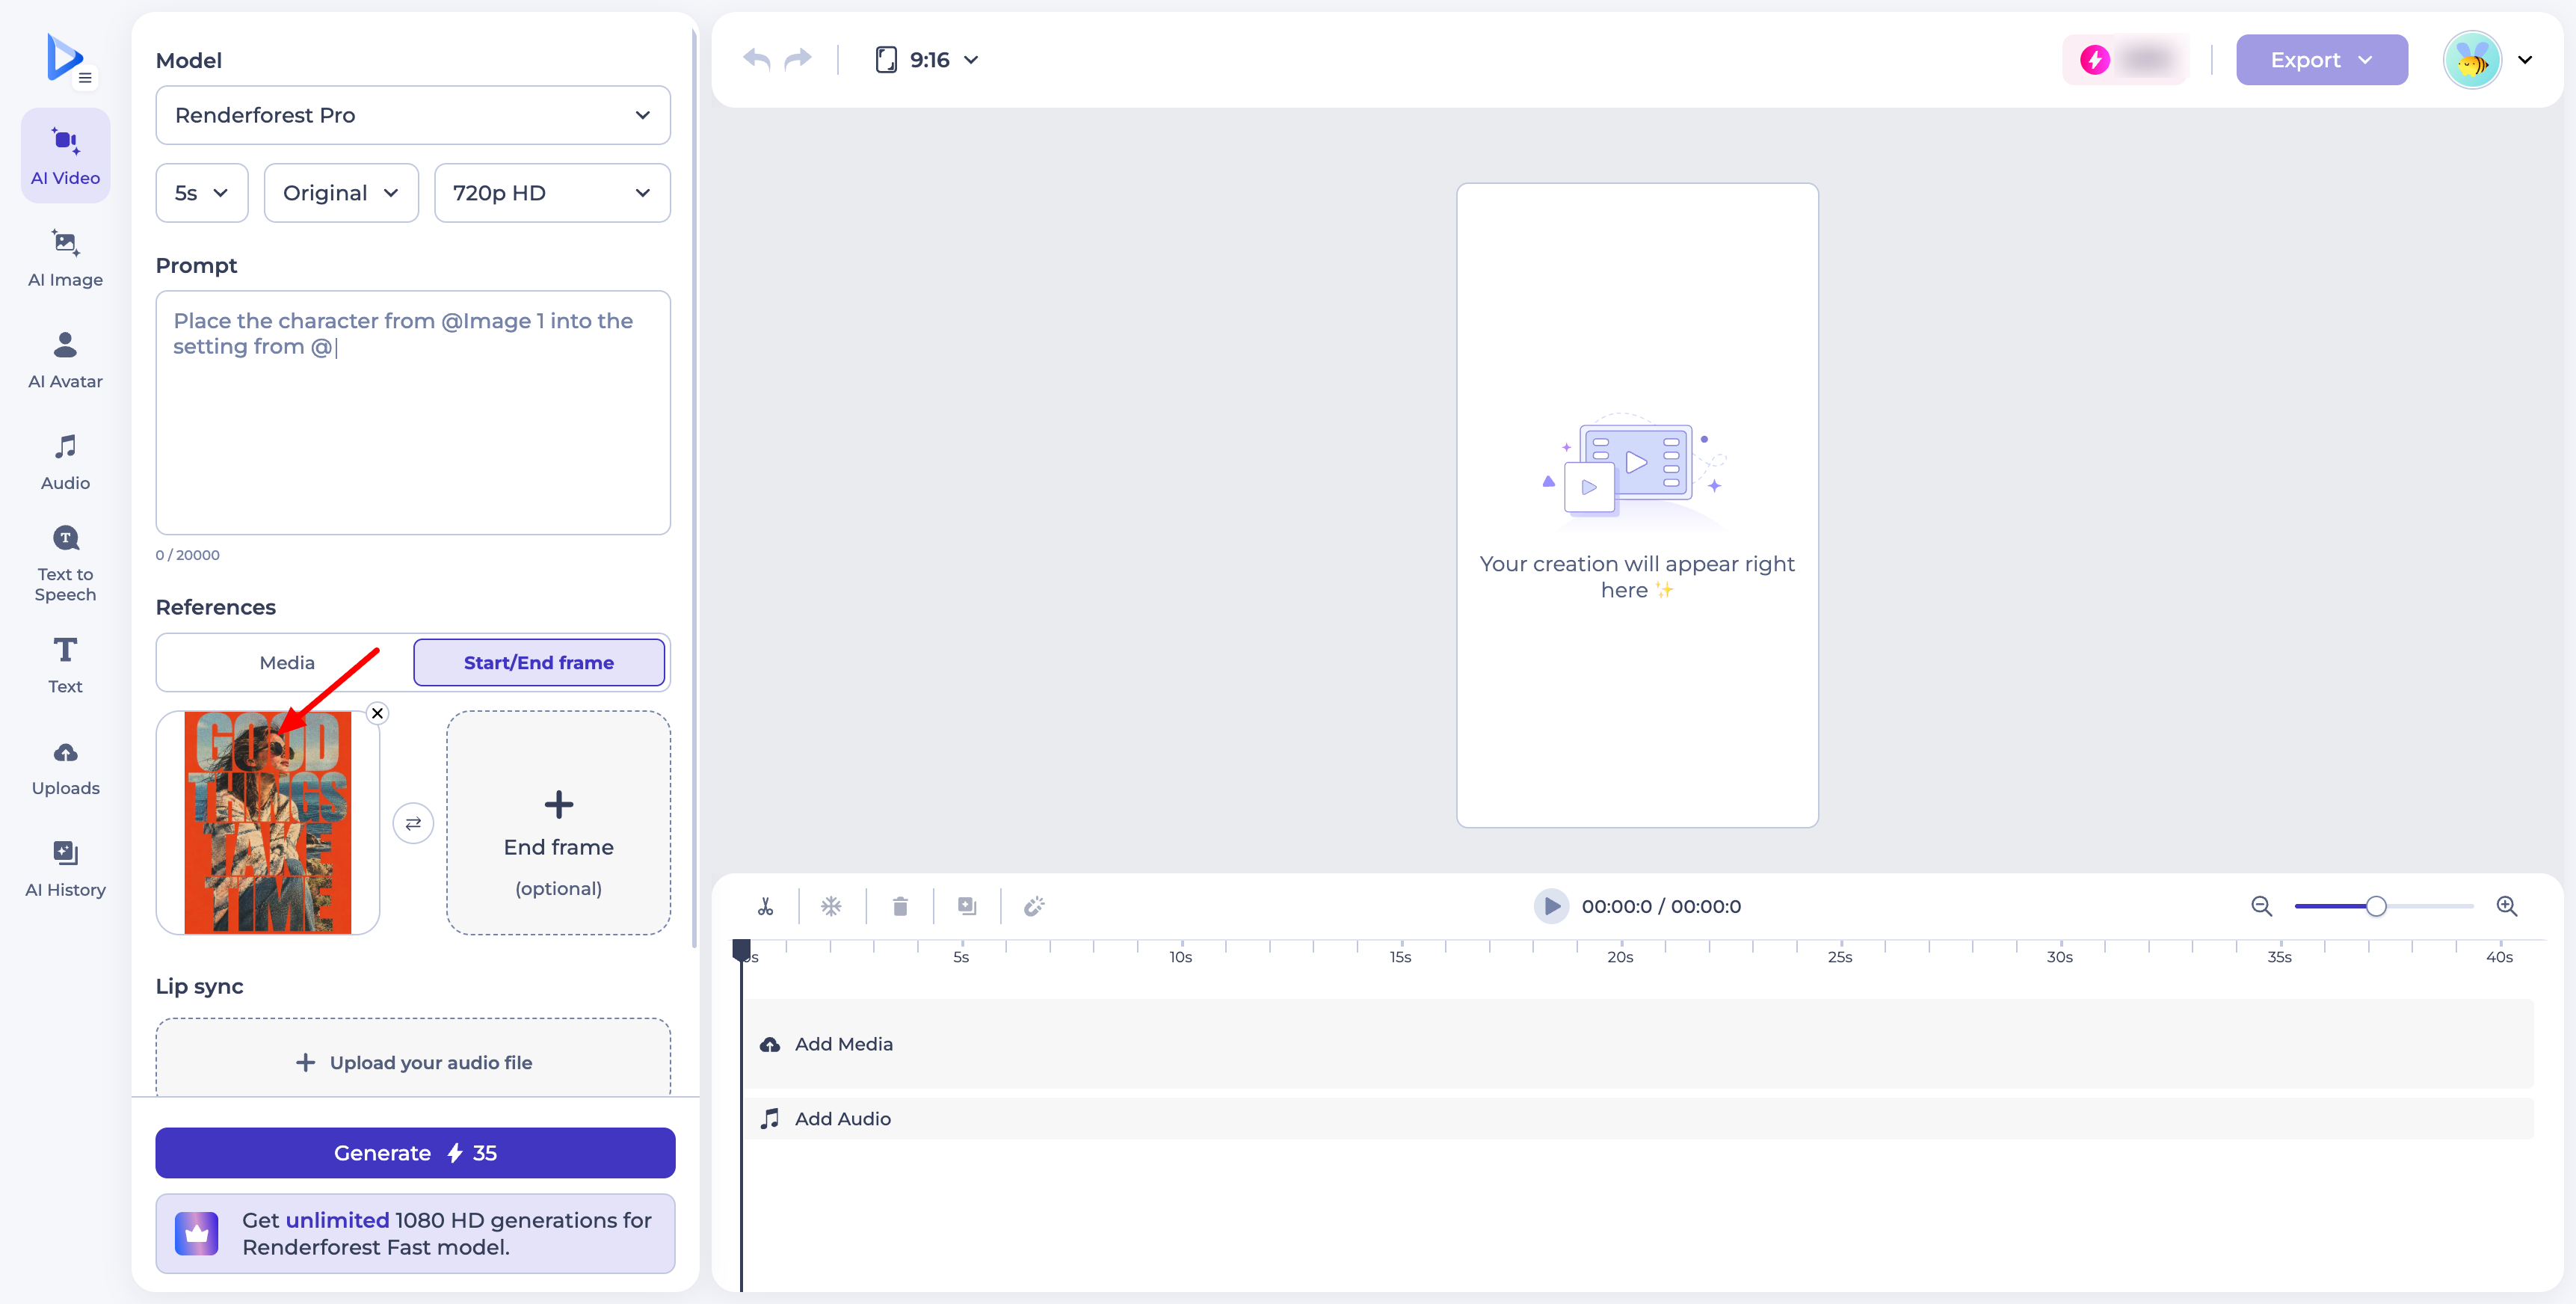
- Animate: turn your image into a video. This opens the AI Video tool with your image pre-loaded as the start frame (under "References" → "Start/End Frame"), and a prompt field pre-filled referencing your image — just describe the motion or scene you want, optionally add an end frame, and generate. You can also add lip sync by uploading an audio file.
- Re-create: generate a fresh variation using the same prompt and settings.
- Modify: make further edits to the image.
- Download: save the image to your device.
- Delete: remove the image.
With a wide range of AI models to choose from and plenty of ways to refine your results, the AI Image tool makes it easy to bring your visual ideas to life.
Was this article helpful?
That’s Great!
Thank you for your feedback
Sorry! We couldn't be helpful
Thank you for your feedback
Feedback sent
We appreciate your effort and will try to fix the article